The Massive Mash Tun

How ambitious is your Club? The group brew sessions organized by the Red Ledges Homebrewers, a club in Grand Ledge, Michigan, give new meaning to the words “big beer.” Last year, they gathered two dozen brewers and their equipment to make a communal Oktoberfest using multiple mash tuns and one 250-gallon kettle.
This year, ambition struck again. We wanted to brew 150 gallons of Imperial stout with a gravity of 1.110 OG, using one gigantic mash tun with capacity for 660 pounds of grain. Guess who got to build it? Fortunately, I had help.
Any mash tun has one duty, to hold the grains and hot water while enzymes convert the starch to fermentable sugars. If the tun can keep the mash temperature constant, so much the better. After all, did ancient Sumerians have steam-jacketed stone vessels? A lauter tun has a different duty, to separate sweet wort from spent grain. Combining the two functions is a typical homebrewers’ solution, and that is how we chose to design and build our big mash tun.
Designing the mash tun required calculations. I asked Mary Anne Gruber, the “semi-retired” technical director at Briess, how big a mash tun would need to be to hold 660 pounds of grain. “It depends on the malts and the milling equipment,” she answered, “but the average weight of brewers’ grist is 28 pounds per bushel.” Hhhmmm … 660 pounds means 23.57 bushel baskets of grain! And 1.25 cubic foot per bushel equals 29.46 cubic feet — or one heck of a big mash tun. Our tun is larger than a kiddie pool, but smaller than an old VW Campmobile. As mash tuns go, it’s big . . . really big.
Then there’s the issue of mash water and sparge water. At a 2:1 ratio of water to grain (by weight), we’ve got 1,320 pounds of water to add to the grain and a total weight of 1,980 pounds. Material strength is now a significant issue.
If your club is interested in building a monster mash tun — and hell, why wouldn’t you be? — here’s how we did it. (In case you’re wondering: Yep, it worked.)
Parts List
Cutting sizes (approximate)
Bottom (uncut): 4’x8’
Sides: 36” x 8’
Ends: 31-5/8” x 4’ (inset)
Frame (2×4) sides (uncut): 4’ x 8’
Frame interior (2×4): 45”
Stiffeners/battens (2×2): 31-5/8” (four)
End braces: 32-3/4” (remainder of 2×2)
Shopping list
Four sheets of 3/4” x 4’ x 8’ interior-grade plywood $18.00
Four 2”x4”x8’ $3.75
Four 2”x”x2”x8’ each $2.10
50 #6 x 1-5/8” galvanized deck screws $4.00
24 #6 x 3” galvanized deck screws $4.00
50 3” x 5/16” carriage bolts, nuts and washers $10.00
6-mil plastic sheeting $11.00
5 60” stainless-steel sheathed utility hoses (female-female) each $11.00
4 or more male-male brass adapters each $2.00
1 3/4” full port valve $9.00
1 3/4” x 3-3/4” brass pipe nipple (bulkhead) $4.50
1 3/4” x 3-3/4” brass pipe nipple (valve extension) $4.50
1 3/4” x “x” pump inlet hose-size adapter (if required)
1 3/4” garden hose Y (two male out, female input) adapter $5.30
Teflon tape or pipe dope
Building our big fat mash tun
Plywood, the handyman’s friend, comes in 4’x8’ sheets. A plywood box 4’x8’x4’ tall has a capacity of 128 cubic feet. That’s plenty of room for our mash volume, but it’s a bit too hard to reach over. Cutting the sides down to 3’ yields a volume of 96 cubic feet, which should be sufficient to contain the mash at a reasonable mash thickness.
Begin construction with good quality 3/4” plywood and the straightest, most knot-free 2”x4” boards you can find. Pay extra; construction-grade isn’t good enough. But don’t buy cabinet-making grade, either. Good quality plywood is under $20 per sheet and quality 2”x4”s are about $3. You’ll need four sheets of plywood, plus four 2”x4”x8’s and two 2”x2”x8’s.

We began with a frame that elevates the tun bottom and stiffens it to prevent it from bowing down or outwards under the weight of the grain. This will also allow gravity to prime your pump and speed your runoff. The weight on the bottom of the mash tun is considerable; 230 gallons of water at 60° F weighs a cool 1,915 pounds. Sounds like a lot of weight — but it only adds up to 0.415 pounds per square inch, less than 7 ounces. Where we really need strength and support is at the corners. That’s where we have pressure pushing both down and out. So a majority of our fasteners are concentrated on keeping the sides attached to the bottom. (If your carpentry skills are nonexistent or your nuts and bolts are a bit wonky, you could spill the goods. Be careful!)

Our frame is simple and very rigid, a rectangle of 2”x4”s laid tall with two cross-braces. The framework is joined together with 3” spiral nails (Ardox) and the plywood bottom is fastened to the rectangle with 1-5/8” galvanized deck screws. All deck screws are driven slightly below the wood’s surface to prevent cutting the plastic liner, which we will add later. Before laying the plastic liner, we will cover each screw head with two layers of duct tape (if you’re a fanatic you could coat them with silicone sealant, it’s soft.)

With the frame and bottom complete, Red Ledge member and engineer Bejeir Brooks and I drilled holes through one side rail and one side. We began by clamping a 4’x8’ sheet of plywood to the 2”x4” base with the best side of the plywood facing into the tun, starting at one corner. Because almost every 2”x4” is slightly warped, we worked our way down its 8’ length, drilling 5/16” holes and attaching a bolt with washer and nut on the exterior. This allowed us to push and pull the frame into alignment with the true edge on the plywood. We spaced our bolts 2” from each end or brace, plus a centered bolt. That’s 9 bolts per side.

Next, we set one end loosely into the corner between side and bottom and added a vertical 2” x 2” batten. This is our “corner” for bolting side to end. Bolts are inserted on the sides, 2” from top and bottom and centered. End-securing bolts are inserted from inside to outside, 3” from the top and bottom and centered, making sure no bolt is closer than 1” to another. Be sure any bolt head is on the inside of the mash tun, not the bolt and nut.
At the base of each side piece, we attached a brace made of leftover 2”x2”. It’s attached with four 3” deck screws. This is the piece that prevents the ends from bowing and blowing out.
Bejeir and I attached the other end, then rotated the structure and attached the remaining side. Cutting the pieces to size, nailing up the frame, drilling holes and fitting required about 14 labor hours.

The next requirement, according to engineer Brooks, was to add a cross brace at the top to prevent the top from bowing out. By cutting this brace slightly (1/16-1/8”) undersized, the sides are placed in tension. This adds to overall stiffness. The brace is just a piece of 2”x2” that measured 47-7/8” long. We attached a large angle bracket at each end. The brace also helps us lay a sheet of plastic atop the mash tun while in use to keep heat in.

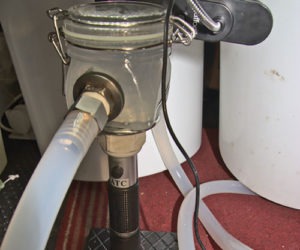
Last we created a portal for a bulkhead fitting. We attached a 6” piece of leftover 2”x4” centered atop one end brace. It’s screwed in from the inside with countersunk 1-5/8” galvanized deck screws. Then we drilled a 1” hole, sized to fit our 3/4” full port valve. Inside the mash tun, attached to the valve and 3” close nipple, will be a brass “Y” fitting. Threads will be sealed with Teflon tape and leaks will be prevented with a rubber “O” ring, one inside, one outside. The thickness of the wood will prevent any wobble in the valve or pipe.

Making a filter for lautering
So how will we lauter and manage the runoff? What kind of a manifold will we create? Stainless-steel braided hose. Yes, we thought of making a copper or CPVC manifold, but no one would volunteer to cut two kerfs per inch in four 8’ pipes. That’s 256 cuts.
Stainless-steel sheathed hoses have interior hoses; the sheathing is designed to protect the interior hose from bursting. To use the stainless sheath as a lautering device, first you have to remove the interior hose, which means cutting each hose into three sections: two ends and a middle.
Cut the tubing with a high-speed cutoff tool about 3” from each end and remove the tube from the middle. Then slip a stainless-steel Oetiker clamp over each short end, expand the mesh of the middle enough to push 1/2” to 3/4” of mesh over the short end, and clamp. Now you have 52” of highly effective stainless filter. With five hoses we have almost 60’ of manifold.
Join the hoses with male adapters for a garden hose, and lay them out in your mash tun. Done. But we’d suggest that all metal parts get a thorough washing in PBW prior to use, plus a rinse in Star San.

One of the design parameters was the ability to disassemble the mash tun, unless you’ve got some toddlers who need an above-ground pool. It took Bejeir and I under fifteen minutes to completely disassemble the tun and store it in a spare garage stall.
Prior to use, cover every screw with a piece of duct tape, line the container with 6-millimeter plastic sheet (one or two layers) and carefully cut the hole for your bulkhead fitting. Then add the stainless-steel manifold, grist and water, and send us a couple of bottles of your club’s big brew.
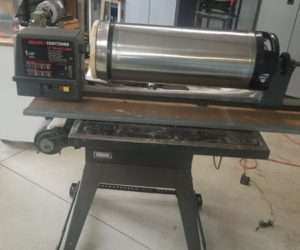
Doing the monster mash
Mash-in started at 8 AM and required the might of every three-burner system and every single kettle we could muster; heating 200 gallons of water is an effort.

Doubters? There were some in the Red Ledges group who said it couldn’t be done, that the rectangular mash tun would bulge, fold, fail catastrophically.
Ha! Phooey! Pffffffppp! We knocked out 190 gallons of 1.088 OG stout an hour after mash-in was complete and the temperature drop was only about 1° F over that time. Then we pulled another 80 gallons of second runnings at 1.047 OG. The mash tun ran at nearly full pump volume and the wort was clear with absolutely zero particulates. The projects crew was triumphant!