Make Your Own Malt
If you want to take your homebrew one step closer to 100 percent homemade, become a maltster. A maltster sprouts whole grain and adds a little heat to create the malts used in brewing. If you have a kitchen oven and large baking pan and can read a thermometer, then you possess all the equipment and skills required to make your own malt from scratch.
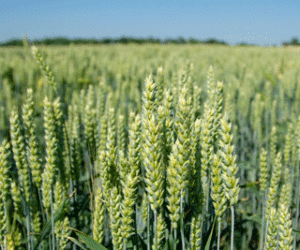
Barley by Any Other Name
This takes you another step toward putting the “home” in homebrewing. It will also save you a little money. It’s important, however, when buying whole barley to make sure it hasn’t been treated with pesticides or other chemicals that can make you sick.
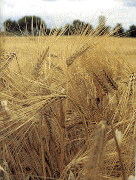
Whole barley means the grain with the husk on. Pearled barley and other kinds of de-husked barley cannot be used because the husk plays a vital role in the lautering process of mash brewing. Likely sources for whole barley are country stores that cater to ranchers and pet shops that sell bird seed. If you are lucky enough to live in a region where these grains are grown, you might find a real bargain by going directly to the farmer to buy a few bushels at harvest time in August and September. Before buying a large amount, test one pound to make sure it is viable seed capable of germinating. (At least 90 percent of the grains should sprout when you follow the procedure outlined below.) If it isn’t viable, try another supplier or a different brand.

You can also malt adjunct grains such as wheat and corn. Soft wheat berries are much better for homebrewing than hard wheat and can be found in health-food stores. Look for whole corn in pet shops and cattle-feed stores. Again, germinate a small amount before buying in bulk. Malted wheat can be used for up to 50 percent of the grain bill with good results, but malted corn will produce a disagreeable cidery flavor if it exceeds 20 percent Just remember that all grains are not created equal when it comes to homebrewing. Experiment with different varieties to see which one produces the best-tasting beer, and then stick with that grain.
How to Germinate
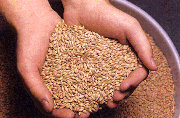
Raw barley will be your main ingredient. Until you get malting down pat (your potential extraction rate will improve with practice), use two pounds of whole barley for every gallon of all-barley malt homebrew you intend to make. Later you can alter the amount based on the specific gravity you wish to achieve.
Begin by thoroughly washing the barley in clean water to remove the chaff, which will mostly float to the surface. Drain and place in a covered container with enough water to reach two inches above the grain. Let the grain soak for eight hours, then drain and let stand for eight hours without water. After a final soaking of eight hours, the tips of the barley grain should begin to show whitish bulges. These are emerging roots.
The steeping regimen is the same for soft wheat berries and whole corn as it is for barley. Grains should never be soaked for longer than eight hours without a rest because the kernels might “drown” (die from lack of oxygen) and never sprout. After steeping, spread grain over paper towels in a large baking pan and place inside a black trash bag sealed air tight to hold in the moisture and keep out dust. At room temperature barley can take as little as four days and as long as six days to sprout to the proper size. The key factor is to stop germination when the main shoot (not the hair-like rootlets), called the acrospire, is three-fourths to one length of the grain. This produces fully modified barley malt that can be mashed with only a short protein rest and can help to avoid sluggish fermentation and hazy beer.
Because wheat and corn need less modification than barley, a sprouting time of three days is usually sufficient. Wet germinated barley contains about 50 percent more weight in absorbed water. This means your original test pound should now weigh about 24 ounces.
Kilning
Green malt is converted into pale malt or crystal (caramel) malt by drying it at different temperatures.
To make pale malt place the large baking pan of green malt over a heat source of 100° to 125° F for 24 hours or until the malt contains 12 percent moisture (18 ounces for the original test pound). The heat source can be an oven with only the pilot light on or the top of a gas refrigerator. Final drying takes place in your oven at a temperature of 140° to 160° F. To maintain this temperature range use your floating thermometer and turn on the oven for brief periods until the moisture content is reduced near 2 percent to 6 percent. The malt will weigh the original amount (16 ounces in the case of the test pound). The weight of the moisture in the malt is compensated by the absence of debris such as husk dirt that was washed off the grains during soaking. Turn the malt every half hour, and dry the malt slowly, raising the temperature over time to protect the starch-converting enzymes.
Malted wheat and corn should be dried entirely at the lower temperature of 100° to 125° F. The finished barley malt should be crunchy to the bite and taste slightly sweet. If it is rock hard and the interior glassy in appearance, don’t use it because something went wrong in the germination. Try another batch and be more careful the second time around.
To make crystal malt place green malt on a cookie sheet in a 212° F oven for one hour or until the grains turn golden brown. Crystal malt imparts sweetness and brown color to homebrew without the burnt flavor characteristic of roasted malts.
Other Specialty Malts
Besides crystal malt, you can also make the other specialty malts needed for porter, stout, and other styles of dark homebrew. The starting point is your homemade pale barley malt.
To create a reasonable facsimile of Munich malt, simply toast pale malt in a 350° F oven 10 minutes for ounces and 20 to 30 minutes for pounds.
Unfortunately, dark roasted grain must be made outdoors as this process releases a horrendous amount of smoke. Wrap pale malt or unmalted barley in aluminum foil and place over a barbecue grill until the grain is dark brown (not black). Turn often to avoid charring.
Malted wheat and corn are used without being roasted to lighten the body of the homebrew.
Drawbacks
Starting with raw barley, you can produced quite good specialty malts. But there are some drawbacks when it comes to homemade pale malt. For one thing it is lower in enzymes than store-bought pale malt. That means, as a rule of thumb, you have to use one-third more in recipes to obtain the same starting gravity. For another thing a lot more trub or unfermentable sediment may be produced with homemade pale malt. The extra trub can be ignored or removed by various techniques, but either way it results in a lower mashing efficiency. Because of those factors, try a longer protein rest and a longer mash at a low-end temperature to get the most out of your homemade pale malt. You should also remove the rootlets from the finished malt because they can contribute excess protein. Last but not least is the problem of dimethyl sulfide (DMS). Certain varieties of feedlot barley produce too much of this compound, which smells and tastes like cooked sweet corn and detracts from the flavor of the homebrew. The precursor compounds that lead to dimethyl sulfide can be eliminated by a higher temperature at final kilning, but this is a dicey proposition as it can also kill the enzymes.
An extra-long and vigorous wort boil of 1.5 to two hours can help reduce the amount of dimethyl sulfide in the final product. If you still end up with a noticeable flavor of sweet corn, try pushing the kilning temperature a little higher or buy a different variety of barley.
Recipe
You can use any recipe for your first batch of homebrew made from homemade malt as long as you remember to increase the grain bill by one-third; if the recipe calls for three pounds of pale malt, use four pounds of homemade.
The following is a recipe for an English-style ale that incorporates the different types of homemade malt outlined in this article.
English Ale
2 gallons, all-grain
Ingredients:
- 50 oz. pale malt
- 7 oz. malted wheat or malted corn
- 6 oz. crystal malt or toasted Munich-style malt
- 1 oz. dark-roasted malt
- 1/2 tsp. gypsum
- 8 g. Fuggle hop pellets, for 90 min.
- Dry Muntons ale yeast
- 1/3 cup priming sugar
Step by Step:
Mash into 6 qts. water at 127° F, then allow 45-minute protein rest at 122° F. Raise the temperature to 151° F and maintain for 90 minutes. Mash out at 167° F and sparge with 6 qts. 170° F water. Add hops and boil for 90 minutes. Cool to room temperature, aerate, and pitch yeast. When fermentation is complete, bottle with priming sugar and age two weeks before sampling. If the alcohol content of your first few batches is a little on the low side, don’t get discouraged. It will go up as you get better at malting. And you will have the satisfaction of knowing that, short of planting your own barley and hops, your beer is truly homemade.