Build A Homebrew Pump
You might have hot water waiting to mash-in or your wort is ready to transfer to the boil kettle, but you can’t seem to get anything to move. The pump is on and you can hear it spinning away. What gives? Did you set the pumps up to flow in the right direction? How about position? How about height in relation to your brew kettle or mash tun? Are the pumps self-priming? There’s a lot to these little homebrew power pushers and with a few modifications, your pump can be doing double duty.
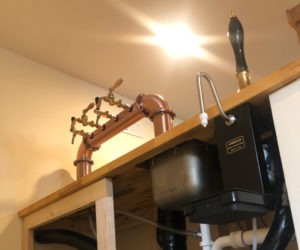
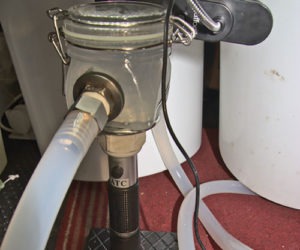
Bleed Valve and Throttle Assembly
Most affordable homebrew pumps on the market are not self-priming, which means that air is the enemy. The pump manufacturers state that “the pumps need to be positioned below the level of liquid for the input in order for the pumps to prime.” Speaking from many years of experience with these types of pumps, they don’t play nice all the time.
The pump will be full of air and that air needs a place to go. Adding a simple bleed or relief valve can help you release some of the trapped air in the pump chamber. The pump head must be filled with liquid before it will pump properly, so bleeding out the air will allow the pump to get going. It helps to run a tube from your bleed valve down into a bucket or reservoir to catch any small amounts of liquid during pressure relief. The additional outlet also comes in handy for gravity samples during the mash, sparge and final runoff to the fermenter and back flushing your system with cleanser. See Figure 1 (below) for a basic centrifugal magnetic drive pump with bleed and throttle valve.
FIGURE 1
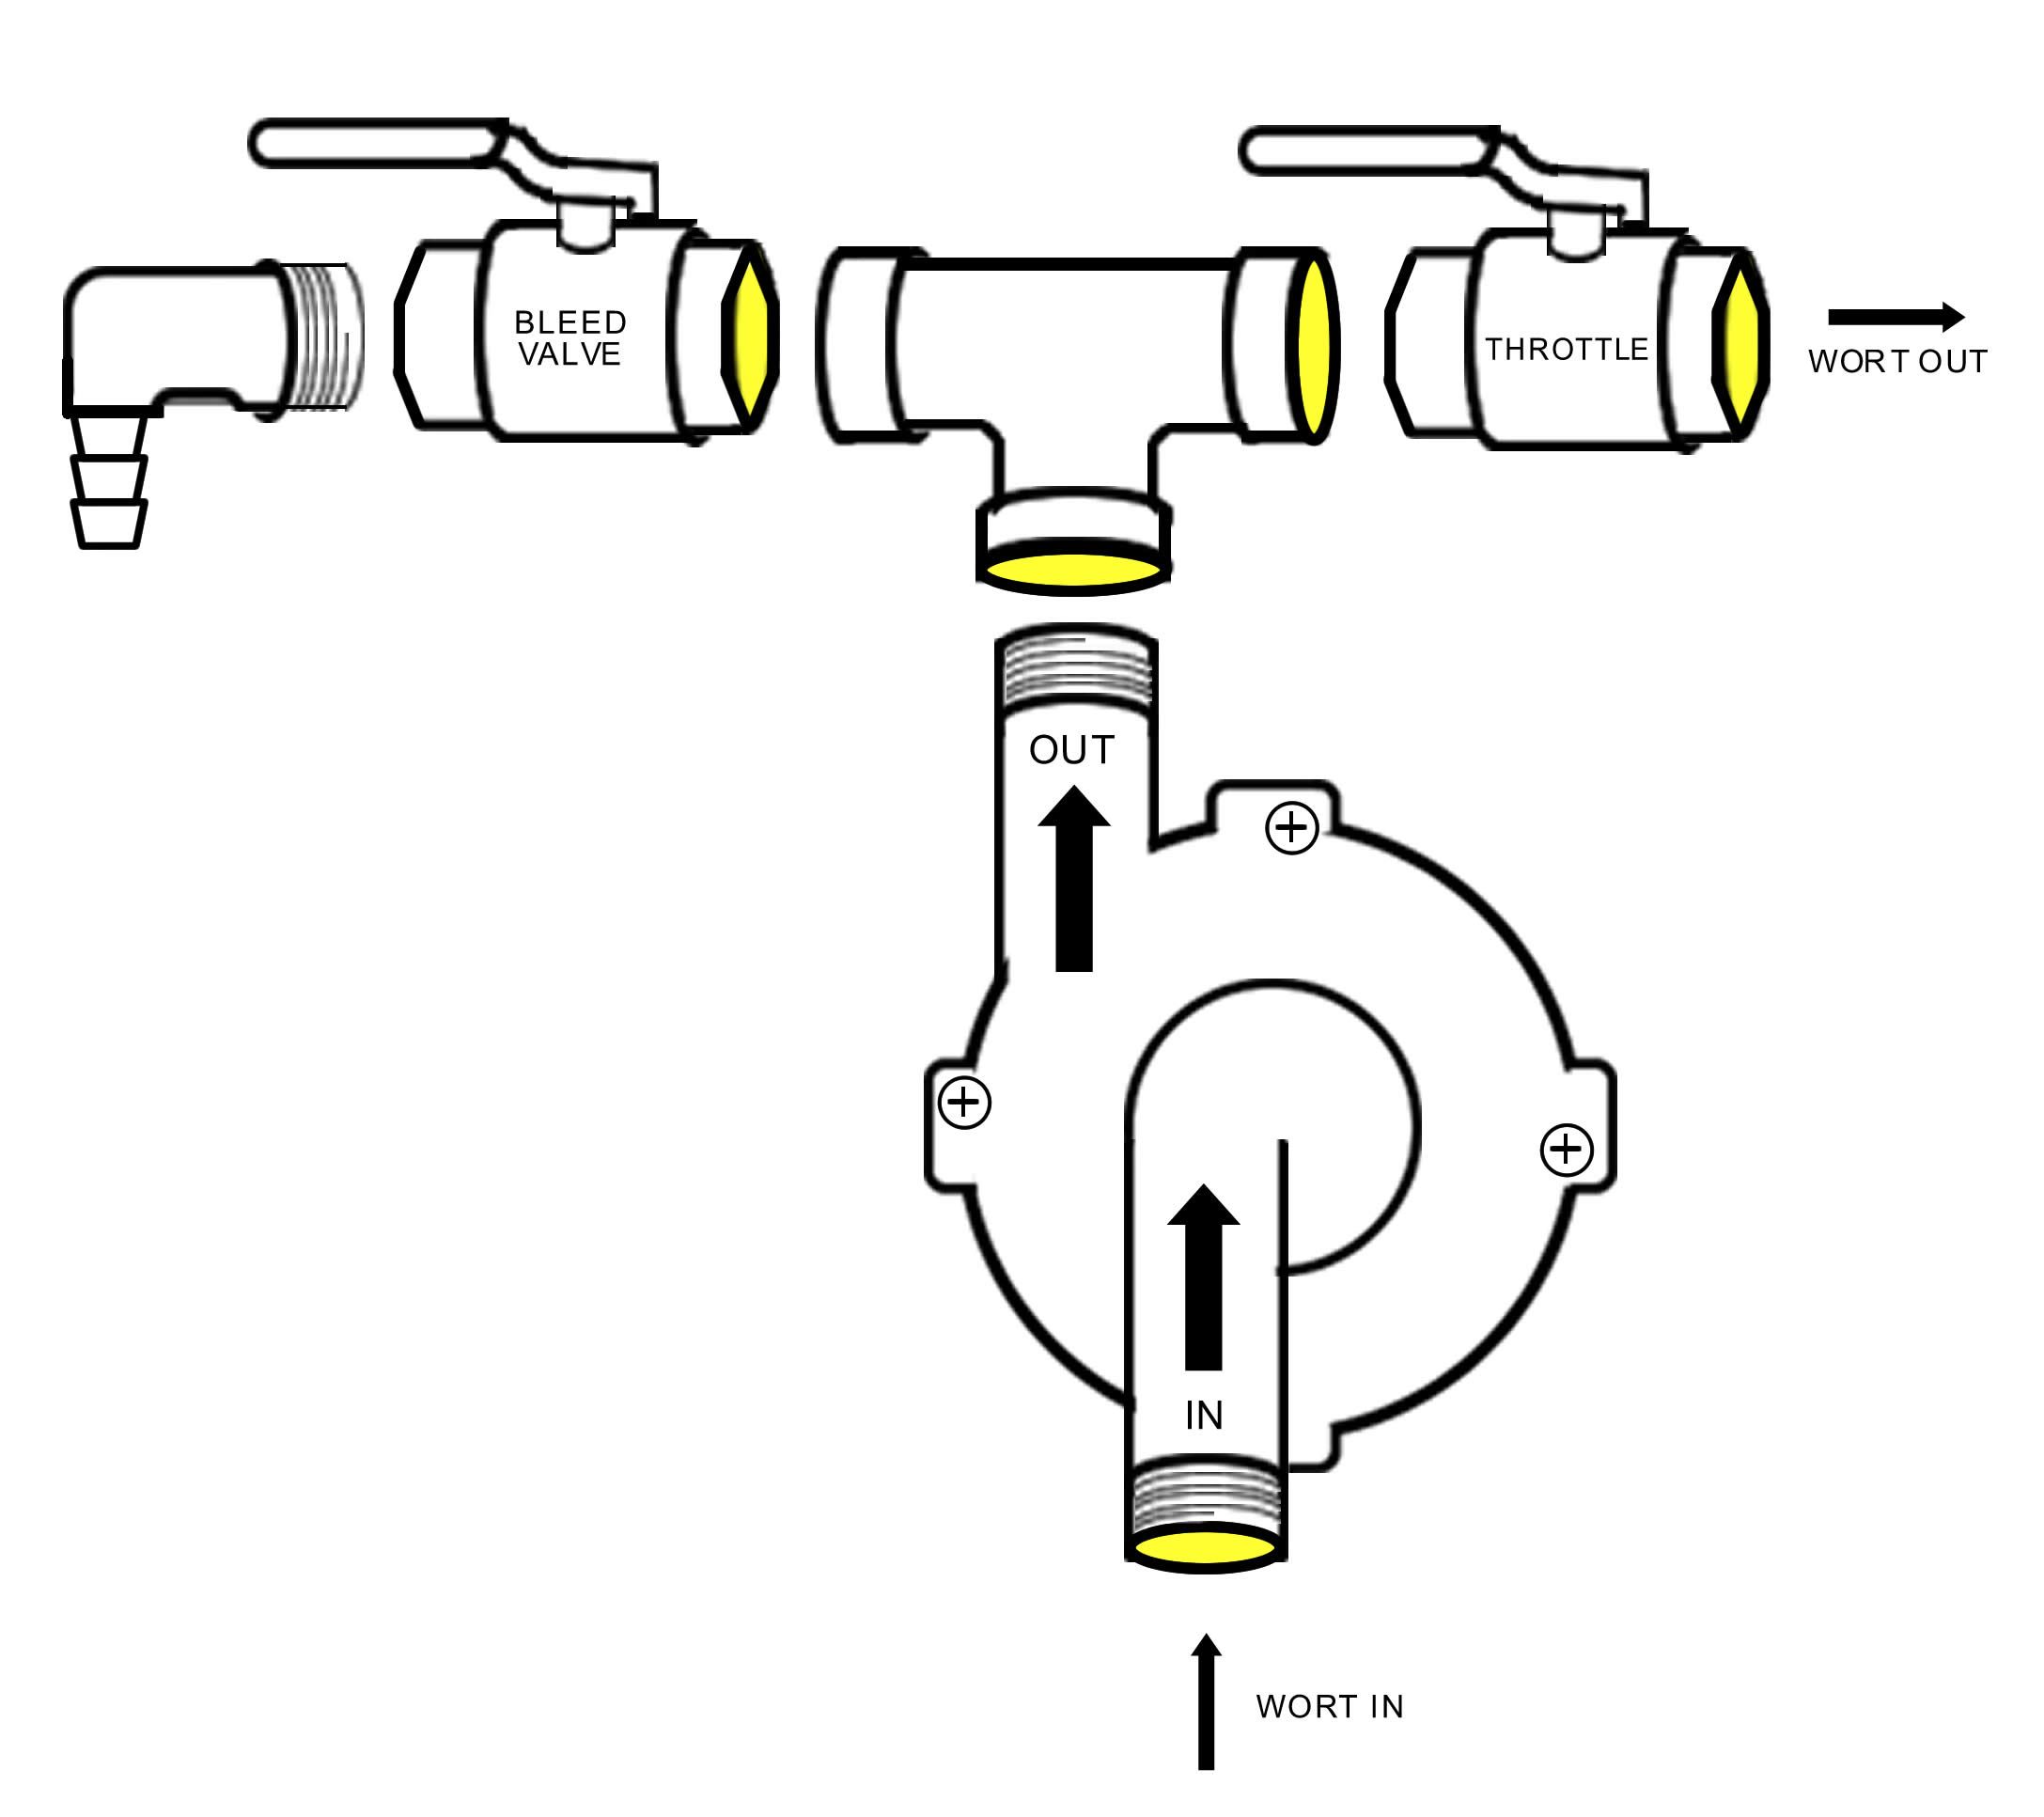
Adding a bleed valve to the discharge port allows air pockets out that might be trapped in the pump head. The flow regulating throttle valve is placed on the outlet also. This becomes especially paramount during sparge and transfers that need to be low flow to reduce agitation. It is not recommended to put the throttle valve on the wort-in port. This can cause cavitation because your pump will be trying to push more than it receives, creating a vacuum. Cavitating air pockets in your pump head can cause your pump motor stress and possibly lead to a shorter lifespan.
Advanced Two Pump Design
In a two pump all-grain homebrew system you have the ability to move all liquid from start to finish using pump power. Figure 2 (below) shows a sample schematic of a 10-gallon (38-L) system using two pumps for hot water transfer, mashing in, recirculation, sparge, final runoff transfer through a plate chiller and finally to the fermenter. The pumps, in conjunction with four 3-way ball valves, move the entire brew day along without the need to move hoses.
FIGURE 2
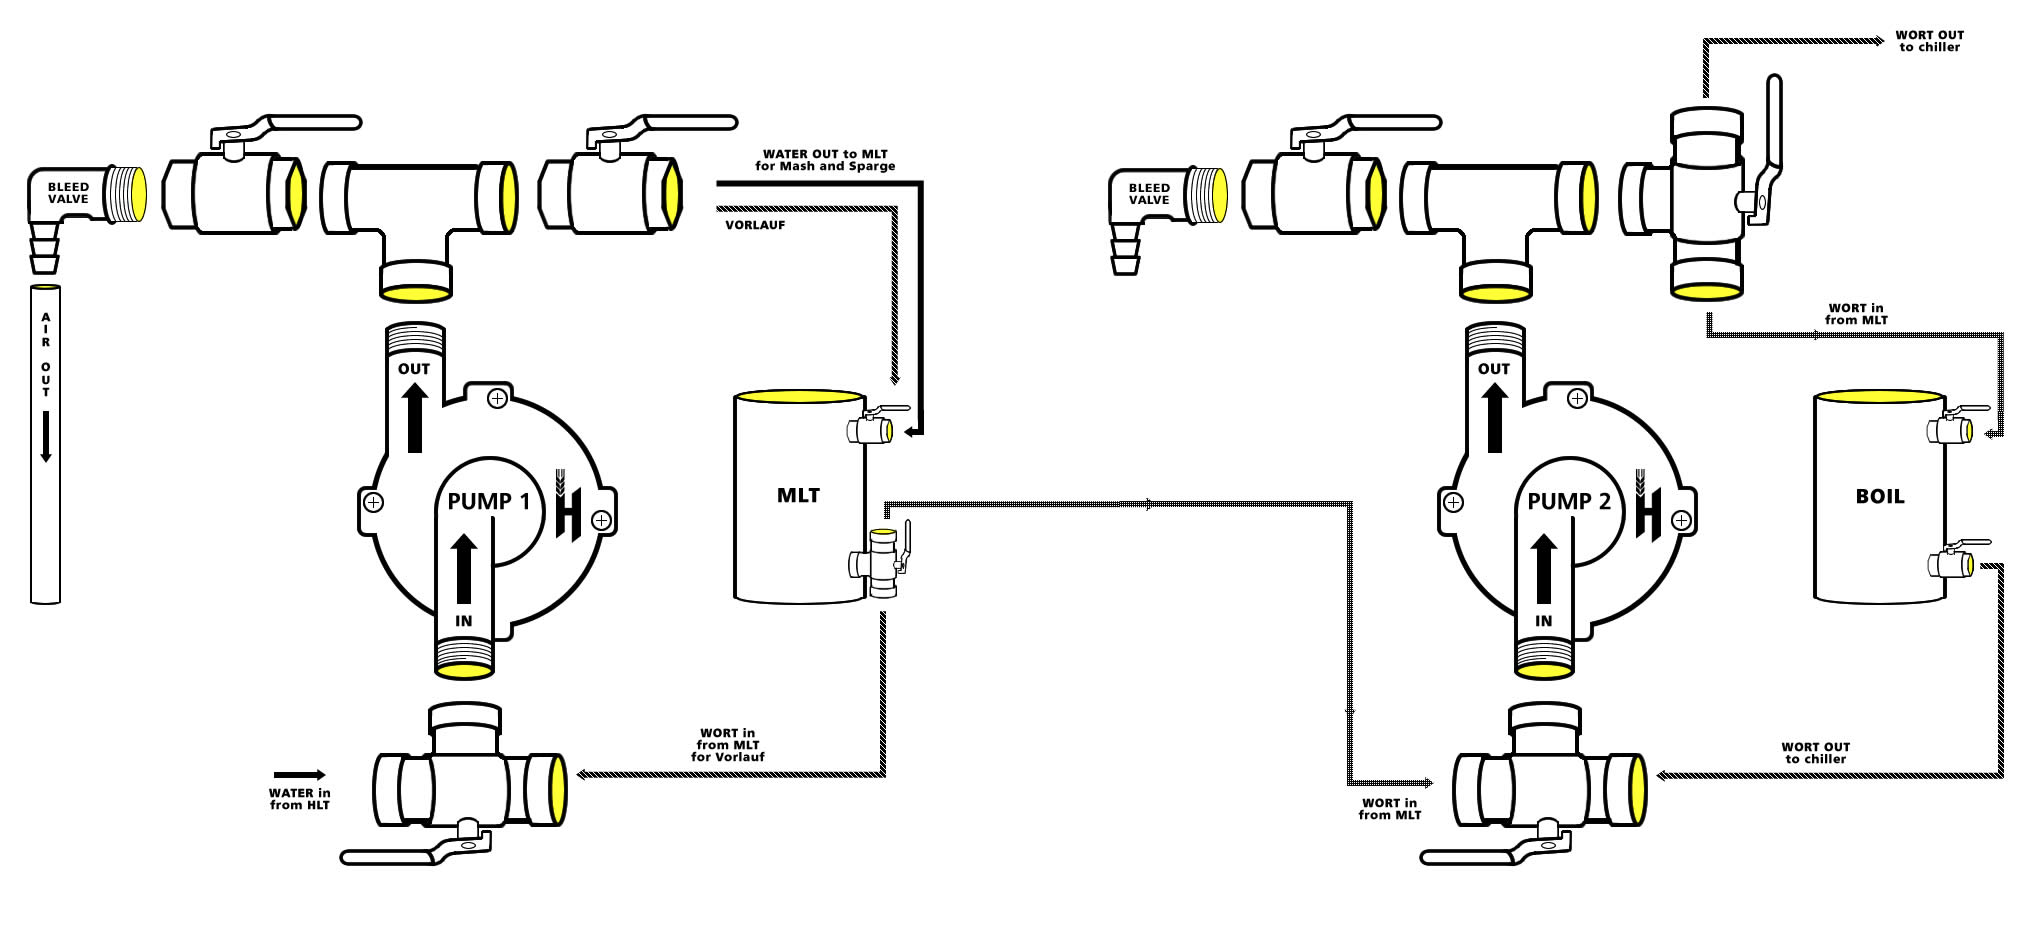
Hot water flows in from the hot liquor tank (HLT) and is then pumped through a 3-way ball valve on PUMP 1 and out to the mash lauter tun (MLT). After the mashing process is completed, the wort is recirculated through the same pump with a twist of the 3-way ball valve on PUMP 1. After recirculation is complete, the sparge process begins. The 3-way valve on PUMP 1 is set back to allow hot water to flow in from the HLT to the MLT’s sparge arm/assembly. (Using the Blichmann Auto-Sparge or the Ultimate Sparge Arm can give you even more control over your flow rates.)
The bottom 3-way valve on the MLT is set to divert runoff into PUMP 2 and out to the boil kettle. After the sparge and lautering pro-
cess winds down and you have boiled your wort, the PUMP 2 bottom valve is switched to allow flow from the boil kettle out to the plate chiller and finally into a closed fermenter. Not only is there no disconnection of hoses in this pump design, but the system remains “closed” during the final transfer to the fermenter. Closed transfers are considered the safest for minimizing exposure of bacteria and wild yeast.
Pump Position
There are many different ways to design your brewery and the previous example I mentioned was just one way to go. In that example the pumps would be mounted horizontally to a brewing rig or table below the vessels in order to help pump priming as the manufacturers suggest. The preferred pump head orientation is having the inlet on the bottom and the outlet on the top. Mounting the pump head on its side works too, but make sure the outlet is on the right side and the inlet is on the left. Mounting the pumps in the opposite configurations will cause air pockets and pump cavitation. See Figure 3 (below) for preferred pump head configurations.
In the end, pump head orientation is not something to get hung up on. The pumps should work in any position they are mounted with the use of a bleed valve. Making sure the position of the pump is below the liquid needing to be moved is more important.
FIGURE 3

The pump head material that most non self-priming models come with is Polysulfone (a tough and durable thermoplastic) with a maximum operating temperature of 250 °F (121 °C) (a great choice for homebrewing). The stainless steel heads run at the same max out temperatures and are made of food-grade metals that can withstand caustic chemicals. They can be effectively sanitized and are more common among professional brewers. Weigh the pros and cons of different models and choose what works best for your setup and budget.
Popular Homebrew Pumps
March, Chugger, and Steelhead centrifugal pumps are the most common pumps used by homebrewers. Any specific reason why? Yes. They are magnetic driven, which allows you to put a ball valve after the pump to slow down flow without taxing the motor. If you are looking to pump or transfer finished beer after fermentation you need a self-priming pump.
So, what does self-priming mean? A pump that is not self-priming does not suck air and must be fed liquid via gravity before it will begin to pump. The pump head and lines must be full before the pump is started. This is why the configuration of the pump head is so important. A pump that is self-priming will pump air and therefore can create a suction that will pull liquid from a kettle.
Other pumps that can be used by homebrewers for various liquid transfers include sous vide pumps, submersible pumps and pond/fountain pumps.
Pump head port configuration
Inline Style – The most common port configuration for homebrew transfers. Liquid takes two 90-degree turns, so this can cause cavitation and lower flow rates than the center inlet models.

Center Inlet – Liquid enters from the front port and immediately enters the pump impeller making it easier to prime. This port configuration helps prevent cavitation issues and achieves higher flow rates with the larger
diameter inlet.

Pump Maintenance Tips
• Take pumps apart after every brew and do a hot soak in Powdered Brewery Wash (PBW) cleaner for 30 minutes.
• Scrub each part of the pump with a brush.
• Spray the parts with sanitizer, air dry and then reassemble.
• (Optionally) Recirculate hot cleaner and sanitizer through the
assembled pump for 20-30 minutes.
• Oil pumps yearly with 4-5 drops of (3-in-one) SAE20 weight non-detergent oil in the labeled oil holes.
Pump Control
Not all homebrewers have big fancy control panels to power their pumps, but there are a few devices that can provide some quick control and hands free operation.
Pedal Foot Switch – Simply plug the foot switch into your electrical outlet, and then plug your pump into the pedal. Step on pedal once to activate pump and step again to deactivate.

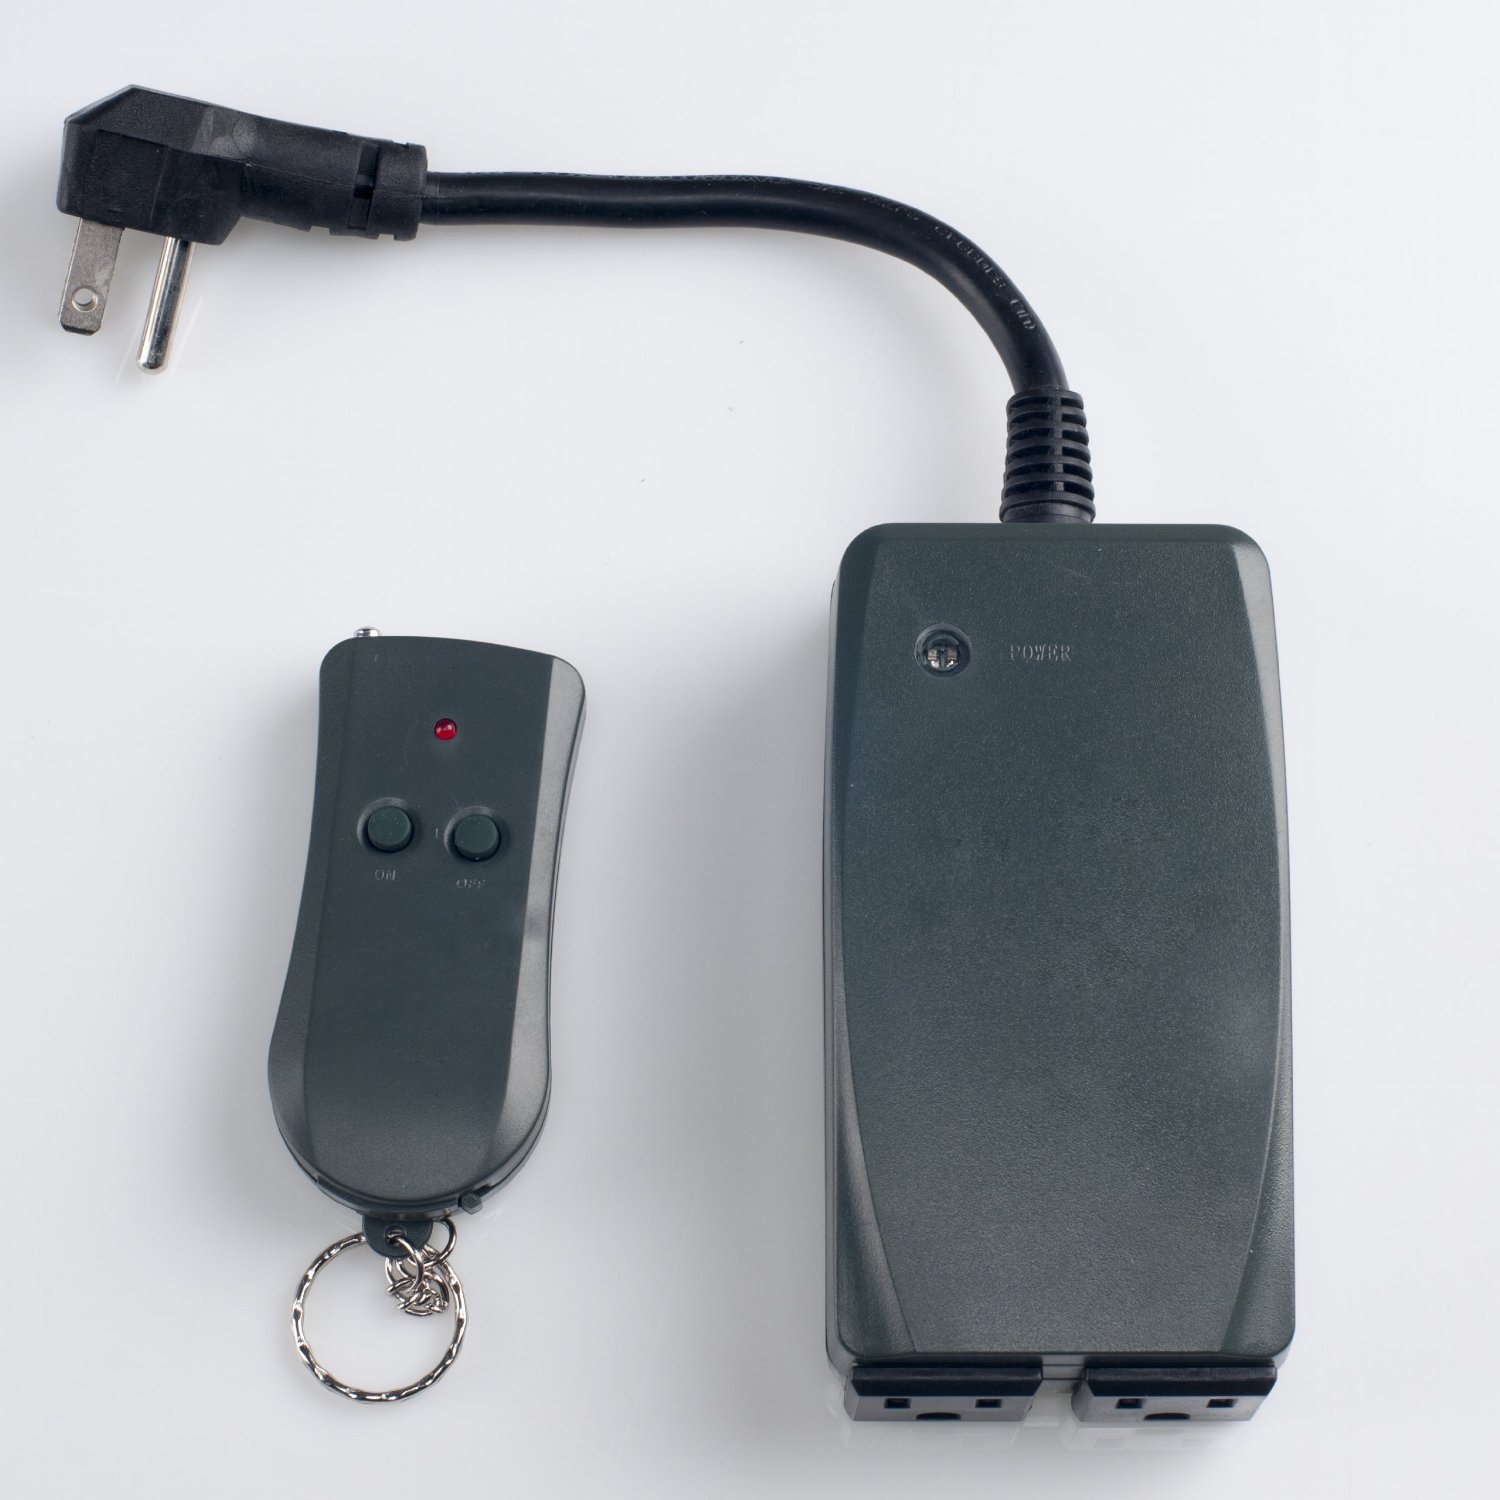
Remote Switch – Plugs into grounded electrical outlet. Remote button turn the pump on or off.
DISCLAIMER: ELECTRICITY CAN BE DANGEROUS Always use a ground fault circuit interrupter protected power source when using any electrical devices around your homebrewery to avoid the risk of shock.
Related Link:
• If you’re ready to automate your all-grain brew day, considering using a RIMS (Recirculating Infusion Mash System) or HERMS (Heat Exchanger Recirculating Mash System).
https://byo.com/story1325