Home Malting
 Although this column is typically devoted to techniques for making beer, this time we’re taking a step back and looking at making one of beer’s essential ingredients, the malt itself. Malt is simply barley that has been sprouted to the point where enzymes are produced that will convert its starchy interior to sugar. If a barley seed is carefully halted in its quest to grow, the result will be a starch-packed kernel with enzymes at the ready for mashing. Additionally, the kilning (heating) that occurs during malting develops color and flavor in the husks.
There are four basic steps to making malt: steeping, germination, drying and kilning. Now before you think this process is too difficult or complicated to do yourself, the only really specialized piece of equipment you may find particularly helpful is a food dehydrator. With a little planning and a few minutes of work a day for several days, a home malt-works is in the reach of most homebrewers.
From a practical standpoint, I make malt in 4.0 lb. (1.8 kg) batches because that’s how much grain fits on the big roasting pans and racks of the food dehydrator that I use. How many pounds you produce at a time will depend on the capacity of your set-up.
While malt could be made from practically any variety of barley (or any number of different starchy grains), there are several varieties that have been bred for making quality brewing malt. Some major malting varieties of barley grown here in the U.S. include six-row types: Drummond, Excel, Robust, Stander, Foster, Lacey, Legacy, Tradition and Stellar, and two-row types: Conlon, Harrington, Merit, AC Metcalfe and B1202. The designation of six-row and two-row comes from the habit of how the florets are arranged on the pedicel, creating the appearance of six-rows or two-rows of seeds in each head. Barley seed can be ordered from Howe Seeds (www.howeseeds.com), Johnny’s Selected Seeds (www.johnnyseeds.com), or if you live in an agricultural part of the country, ask your local county extension agent for sources. Purchasing seed retail can be expensive, but if you have a place to grow your own barley, a pound (0.45 kg) of seed can produce about 30 lbs. (14 kg) of grain for malting.

Steeping
The first step in malting is steeping. In this stage, the moisture content of the barley is increased from the 12–13% moisture present in barley seed to the 42–46% required for germination to proceed. Steeping has two components, wet steeping and air rests.
Since the barley kernels being malted are alive and respiring, they need air. Therefore, too long of a steep and the seeds will drown and die. Too short of a steep and the seeds will not take on enough water to successfully sprout.
For the initial wet steep, the barley should be steeped in cool (50–60 °F/10–15 °C), hard (or at least not softened) water for about eight hours, but no more than sixteen hours unless vigorous aeration is supplied. If you have an aquarium aerator or a trickle of water running to replenish oxygen, this will help supply oxygen to the kernels during the steeping period. I just use an ordinary 3 to 5 gallon (11–19 L) plastic pail.
After a period of steeping, excess water should be drained off and the grain allowed to rest for eight to ten hours in a cool (50–70 °F/10–21°C) place. The initial steeping water will carry away dirt from the outside of the barley kernel as well as dissolved husk components that would yield unpleasant flavors in your beer. This step is called an air rest. After the resting period, the barley needs to be steeped again for another eight hours. After the second steep, the water is drained off and the moisture content checked to make sure the barley has taken on an appropriate amount of water. After being properly steeped, the barley should contain about 42–46% moisture by weight. Shoot for the lower end of the range if you are trying to make a pale base malt, such as Pilsner malt. For a darker malt, like Munich malt, aim for the high end of the moisture range.
I aim for 45% moisture. This translates to 20 oz. (0.58 g) of wet barley for each pound (0.45 kg) of “dry” barley (12 % moisture) used at the start. I weigh out 4.0 lb. (1.8 kg) of barley seed before steeping. Then after steeping, I can check to see that it weighs about 5.1 lbs. (2.3 kg) to be sure it has taken on the proper amount of water. If the barley has imbibed the necessary amount of water, it will begin to sprout (or chit, in maltster lingo) and begin the process of germination.
In most modern malting plants, the duration of wet steeps are shorter (4–6 hours) and more water changes and air rests are employed. The above method, however, which is based on more traditional English malting methods, works well at home.
If you are malting sorghum for a gluten-free beer, your steeping temperature should be significantly higher (80–86 °F/27-30 °C). Use several short (4–6 hour) wet steeps, with air rests in between, until the moisture percentage reaches 52–58%.
Germination
During the second stage of malting, germination, the roots and shoot emerge from the kernel. Inside the kernel, the production of enzymes proceeds and the hard interior endosperm of the grain is broken down. The degree to which this is accomplished is called modification. Properly modified barley will have undergone changes to also modify the gums and proteins in the kernel. Good malt should have the enzymatic power to be able to convert not only the starch from its own kernels, but also that of other adjuncts in the mash.
Once steeping is complete, the germinated grains need to be spread out and allowed to sprout. Sprouting grain is obviously very much alive, and as such undergoes respiration, which produces heat. The sprouting grain must be kept cool and moist, but not wet and cold. Grain that is too wet and warm may encourage the growth of mold. Grain that is too dry or cold may not continue to sprout properly. If sprouting barley is kept moist and cool (55–64 °F/13–18 °C) the modification process should proceed smoothly. You can let the temperature rise up to 71 °F (22 °C) towards the end of the germination step. For darker malts, your germination temperature can be slightly higher — 73–77 °F (23–25 °C.)
Uniformity of modification is the goal during germination. All the barley should sprout and modify at the same pace so when the time comes to end the germination phase, every kernel will be properly modified. In order to achieve uniformity, it is necessary to turn the malt at least twice daily. Turning the malt by hand — using your fingers to untangle the rootlets — will make sure that as the grain is misted with water it is all moistened the same. Turning also allows heat to be dissipated, keeping all the grain at the same temperature.
A small-scale approach to the germination process is to lay the steeped grain about 3⁄4 in. (1.9 cm) deep over a single layer of paper towels on shallow roasting pans or cookie sheets. The pans can then be slid into plastic trash bags and the end folded under the pan to hold in moisture. When the grain needs to be turned, the pan can be removed from the bag, the grain turned and moistened with a little spray bottle filled with water. Then the pan of grain is returned to the bag again to continue sprouting.
Each time the grain is turned and moistened, it should be carefully inspected to monitor its progress. The shoot or acrospire will grow underneath the husk starting from the root-end of each grain (where the rootlets will begin to emerge and grow). The shoot is the part of the sprout that will become the above-ground part of the barley plant. The growing shoot is not easily observed under the husk. To monitor shoot development, take a kernel and cut it open with a razor-sharp blade. This will expose the shoot to determine its progress.
The sprouting process will usually take 3–5 days from when the steeped barley was spread out after steeping. Modification is complete when the shoot is almost the full length of the kernel of grain. By the time the first white shoot tips poke out of the husk, most of the remaining kernels should be fully modified. By this stage, there will also be 4 or 5 rootlets of various lengths protruding from the other end of the kernel. For darker malts, germination is allowed to proceed slightly farther than for malts destined to become pale malts.
If you are making sorghum malt, germination needs to proceed to the point that the shoots extend about 1.5–2 kernel lengths to ensure that adequate enzymatic power is developed.
A simple test for modification can be performed by biting a few kernels to see if they are crumbly inside. The modification process typically proceeds from the base of the kernel where the roots appear, and works toward the tip. To test for modification, put a kernel between your incisor teeth and bite down starting at the root end and working your way to the tip. The modified portion of the kernel will give way and be crumbly. Any unmodified part of the kernel will still be hard and “steely,” and resist being crushed by your teeth.
Drying and Kilning
Once the malt is fully modified, it is dried immediately and then cured at high temperatures. These are the final two steps of malting — drying and kilning.
Drying stops the sprouting process at the point where the endosperm has been converted to starch granules and the enzymes to convert starch to sugar have been produced.
Initial drying must be done with care. If the malt is dried at too high a temperature, the enzymes may be denatured (inactivated). Moist malted barley (called green malt) fresh from modification should be dried at temperatures less than 125 °F (52 °C) until it has dried down to 10–12% moisture or less. Below this level, the malt can be dried at higher temperature without affecting the enzymes.
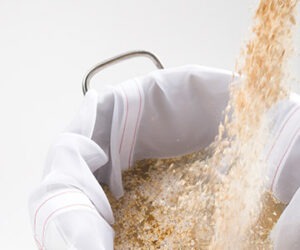
With this in mind, it is most practical to dry malt at a temperature of 100–125 °F (38–52°C) in a food dehydrator or some similar arrangement where a good air flow and proper temperature control can be maintained. At 10% moisture, the malt should weigh about 0.5 oz. (14 g) less per pound (0.45 kg) than your starting weight. After 10% moisture is reached, the temperature should be increased to 140–160 °F (60–71 °C) until the malt is at or below 6% moisture — 3–5% is the target for most malts. This will be a little less than 13 oz. (376 g) for each original pound (0.45 kg) of seed barley. There are various types of electronic grain moisture testing meters, but they are fairly expensive ($200 to $2,000), so unless you know a farmer or grain elevator manager you can borrow one from, you’ll just have to weigh your malt and do the math. The entire drying process typically takes six to eight hours in a food dehydrator. After the malt is dried, it should be sieved to remove the dried rootlets, which may cause problems during kilning, storage, or milling.
Kilning (roasting) the dried malt develops the final desired character and flavor. Unkilned malt will produce a “green” tasting wort and resulting beer. To produce standard pale malt, the dried malt should be kilned for three to five hours at 176–185 °F (80–85 °C). This can typically be achieved in your home oven with an inexpensive oven thermometer.
However, as we all know, there are a wide variety of brewing malts available in many different colors and flavors. Malt can be kilned at temperatures between 220–400 °F (104–204 °C) for various periods of time to produce darker or more aromatic malts. For example, try 220 °F (105 °C) for 4 hours for a Munich-style malt. Any malt kilned at temperatures over 194 °F (90 °C) will develop melanoidins, the “malty” flavor found in Munich and other dark malts. During the kilning process, occasional stirring will result in a more uniform final product. More highly kilned malts will have little or no enzymatic power.
Crystal malt is produced by “stewing,” rather than kilning, green malt. This approach is simply mashing within the kernel, by heating the green malt to mashing temperatures without letting it dry. Crystal malt can be produced by putting green malt in a covered dish and holding it between 150–170 °F (66–77 °C) for a couple hours then spreading it out on an open pan at 250 °F (121 °C) until it achieves the desired color. The longer it kilns, the darker and more caramelized the sugars will become.
After malt has been kilned sufficiently, the malt should be allowed to cool to room temperature then stored in a cool, dry place in a closed container. With some basic equipment and a little care, producing malt is within reach of any homebrewer who would like to add the technique of malt-making to their repertoire, and homemade malt to their next batch of homebrew.
Finally, there is one possible health and safety issue associated with malting your own grain. If your malting grain is infected with Fusarium mold, it will produce beer that may be unhealthy to drink. Fortunately, affected beer will also gush when opened, so you will know if you need to discard it. If you buy your grain, rather than grow it yourself, ask if it has been tested for Fusarium.