On the Yeast: Guide to Bottle Conditioning
So you have finished your latest batch of Belgian ale! You brewed it and fermented it. It looks great in the secondary. Now it is time to bottle … and to bottle condition. But you wonder: Are there any tricks to emulating the great Belgian breweries and achieving the authentic Belgian ale taste? In a word, the answer is yes. Think of it like any other beer style, with a twist.
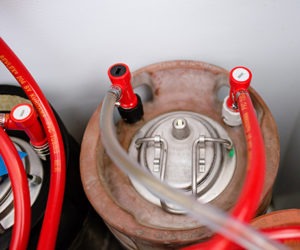
But first, a few words on bottle conditioning: This technique is the heart and soul of most homebrews. Unless you have the equipment to filter and “force carbonate” your brews by injecting carbon dioxide gas, every homebrew will need to be primed with sugar and undergo bottle conditioning. Why? Because this is the process, that final homebrewing step, that naturally carbonates your beer. Doing it right is as important as treating your brewing water, perfecting your sparge or selecting the right yeast.
And it’s an even more important technique when it comes to Belgian brews. The primary reason: Traditional Belgian yeast requires higher temperatures to condition efficiently, which has led most Belgian breweries to create special “warm rooms” for bottle conditioning. But it’s also about flavor and shelf-life. Belgian yeast, which under many circumstances is a wild or house-grown yeast, contributes special flavor attributes and texture to your finished beer. It also helps stabilize the beer; many homebrewers believe that bottle-conditioned beer stays fresher, longer.
For advice on mastering the art of bottle conditioning, we turned to two breweries renowned for their award-winning Belgian-style beers: Unibroue of Chambly, Quebec and Ommegang of Cooperstown, New York. Both breweries produce authentic Belgian brews and bottle-condition almost every style of beer they sell.

Before you start bottling, the first thing you need to procure are beer bottles. Regular 12-ounce or 22-ounce bottles are not appropriate for the job, since the higher pressure levels of Belgian ales will make these bottles explode. Champagne bottles in the 750-ml size are a traditional choice; you can also downsize to the 375-ml champagne bottle (also known as a “split”). Most homebrew shops carry champagne bottles, but for hefty prices. Look to spend $16 to $18 for a case of 750-ml bottles.
If you still can’t find good empty bottles, the next best thing (and my preferred method!) is to purchase full bottles of champagne or Belgian ales, drink them and save the bottles. The overall cost will be higher, but the fun makes it worth the cost. Since a 750-ml bottle holds slightly more than 25 ounces, you will need about 26 empty bottles for a 5-gallon (19-L) batch (or 52 bottles if you plan to use splits).
Yeast for bottle conditioning is your next concern, says Randy Thiel, the head brewer at Ommegang. Thiel explains that the yeast used during primary fermentation of strong Belgian brews —above 15° Plato or 1.060 original gravity — gets beat up during fermentation and will be of little value during bottle conditioning. If you condition your beer at least two weeks before bottling, most of this old yeast will drop out of suspension. Then you can add new yeast.
“Of the twelve beer styles we make, we referment nine,” says Paul Arnott, master brewer at Unibroue. “It’s a very favorable way to age beer, especially the strong, dark styles. With a normal filtered beer, after six months, you no longer want to drink it. With a refermented beer, the flavor gets better and more complex.”
Before bottling, slowly rack your beer into a sanitary carboy or large plastic bucket, leaving about one inch of beer above the sediment on the bottom of your conditioning tank. Do not disturb the sediment or this effort will have been wasted!
Now dose the transferred beer with priming sugar. As always, corn sugar is the best choice, since it imparts nominal flavor. To hit the standard CO2 level for a typical Belgian beer (about 8 grams per liter), Thiel recommends you add 200 grams of priming sugar for a 5-gallon/19-L batch. This amounts to about one cup of sugar, a bit more than the 3/4 cup suggested by most homebrew experts.
Next, add fresh yeast to your beer. Two notes: First, this step is entirely optional, since the remaining yeast in suspension should do a satisfactory job for bottle conditioning under most circumstances (especially for lower gravity Belgian ales between 1.048 to 1.056 original gravity; these should be fine without new yeast, says Thiel). Stronger, higher-gravity beers will benefit most from new yeast.
Second, if you add new yeast, it is always a good idea to “start” fresh yeast before pitching. This ensures sufficient yeast quantity and an active yeast. The day before bottling, I boil 1/4 cup of dried malt extract in three cups of treated water. Do not use too much malt extract, because some of this will make its way into your beer and will contribute to carbonation.
I boil the solution for several minutes, cover my boiling vessel, and cool it quickly by submersing the container in ice water. Then I transfer the chilled wort to a sterilized Mason jar, pitch my yeast and seal it with a bung and air lock. By the next day, that small batch is fermenting vigorously. Pour this entire mixture slowly into the beer you are preparing to bottle.
If you do add new yeast, Thiel says you can choose any kind for bottle conditioning your Belgian ale. Since the job of this yeast is to create CO2, any imparted flavor from the yeast will be very slight. You should consider what works best for you based on the following: lager yeast needs lower temperatures, so you will want to condition colder and longer. Regular ale yeast works great at room temperature and is fast. Typically, these are the best choice for homebrewers.
But since we are looking for authenticity, you will probably choose to add more Belgian yeast. This yeast works best at warmer temperatures — generally around 78 degrees Fahrenheit, which is above room temperature. Most Belgian breweries have a special “warm room” for conditioning purposes — it holds the temperature constant throughout the conditioning period. If you can maintain warm temperatures, conditioning will be completed in two weeks.
“Pick a strain that’s right for the type of beer you’re brewing, and try to use a liquid culture,” says Arnott. “Be sure to find a strain that can support the alcohol level of the beer. Also, the stronger and darker the beer, the more yeast you need.”
Once you have added the sugar and the yeast, give your beer several easy stirs with a sterilized spoon (be careful not to aerate the beer!). This circulates the yeast. Now you can begin bottling. For bottle closures, standard bottle caps fit most champagne bottles and are an acceptable option for sealing your brew. Use oxygen barrier bottle caps if you plan to store your beer for longer periods.
Champagne corks are the more traditional Belgian beer closure, though real mushroom-shaped champagne corks can be tough to find. Homebrewers will have more luck with other options, including plastic champagne corks. These are readily stocked by most homebrew shops and are simple to use. You just force them in by hand and clamp down with a wire.
Regular Size Nine wine corks are a good substitute for champagne corks. One brand, called the ALTEC cork from the French company, Sabaté, is a new-generation cork with superior sealing qualities. It also does not contribute the musty, stale flavors often associated with traditional corks. Homebrewers should be able to find these at the local homebrew store.
If you do find real champagne corks, you will need a champagne corker. This is a specially designed corker that fits over the mushroom top of the champagne cork and presses the cork down into the bottle. Champagne corkers are expensive and hard to find, though some homebrew shops might rent them to customers.
Once the cork is in the bottle — be it a real champagne cork or a regular wine cork — you will need wire cages to hold the corks in. You can either purchase these separately for about $5 for 50 closures or save them as you amass your collection of champagne bottles. Simply drape the wire cage over the cork and twist tightly around the neck of the bottle. Regular wine corks also can be held in place by putting a “crown cap” over the cork. Lindeman lambics are packaged in this way.
Once the bottles are corked, store them upright for several weeks (upright storage allows the yeast to settle at the bottom of the bottle; be sure not to lay the bottles down.) Arnott conditions his beer between 20° to 25° Celsius (68° to 77° Fahrenheit) and says it is carbonated in about three weeks. “It’s carbonated at that point, but with a refermented beer, the work never stops,” he says. “The yeast will continue to work and the beer will continue to evolve. The best time at which to drink it is a matter of personal taste. In good cases, refermented beers can last for several years without a problem.”
When carbonation is completed, further conditioning at 60 degrees Fahrenheit will stabilize the beer. Your brew should be drinkable in one week. But as Arnott says, give it time! When brewing Belgian style, patience is a virtue.