Tips to Brew Easier
Brewing is fun, but it also takes a lot of time and energy. It’s likely that we have all allowed work or family obligations to postpone or cancel a brew day. When our schedules get cramped, our brewing plans can sometimes get brushed aside. Finding a way to shave time from our brew day can mean the difference between 5 gallons (19 L) of beer fermenting away in a carboy and a bunch of beer ingredients waiting to be used.
There are ways to save time (and energy) in homebrewing. A few actually involve ways to perform various brewing steps faster. Most, however, involve arranging things so you can perform tasks in a more leisurely fashion and not have them all fall on your actual brewing day. There are no “magic bullets” here, but hopefully you can read the suggestions in this article and make your brew day a little shorter, a bit more enjoyable or both.
Clean Now, Not Later
The biggest time saver in homebrewing is well-known and obvious, but it bears repeating. If you clean your equipment immediately after using it, you will save a ton of time. Immediately after use, most homebrewing equipment can be rinsed, scrubbed and cleaned fairly easily. On the other hand, if mash tuns, brew kettles, fermenters or beer bottles sit around for awhile, you will need to use considerably more elbow grease to clean them.
Perhaps the worst task in homebrewing is cleaning and sanitizing a couple cases of grungy beer bottles prior to bottling. When I first started, bottling day always started with a few hours of scrubbing the moldy deposits out of beer bottles, washing the bottles and soaking them in sanitizing solution. You can avoid all this, however, if you just clean — and perhaps even sanitize — your bottles as you go.

For cleaning bottles, fill an empty bottle of dishwashing liquid (or other squirt bottle) with your favorite brewery cleaning solution. Keep it and a bottle brush near your sink. Every time you open a homebrew, rinse the bottle, squirt in some cleaning solution and give it a quick once over with the bottle brush. Then, rinse the bottle and place it upside down in a case box. The next time bottling day rolls around, you’ve got clean bottles ready to use.
Some homebrewers go so far as to have a small bucket of sanitizing solution made up at all times. Freshly cleaned bottles go in the bucket and, once the bucket is filled, they get rinsed and stuck in the case box.
Planning
Extract Brewers
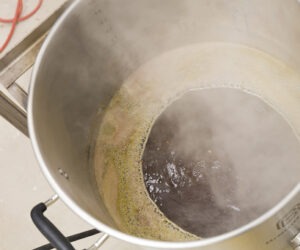
Malt extract brewers have a couple options to shorten their brew day. If you realize that liquid malt extract has been boiled during its manufacture, you will also realize there is no reason to boil it for a full 60 or 90 minutes. Plan to boil your wort only as long as the longest hop addition requires. Keep in mind that you can make adjustments to this as well. Many, perhaps most, homebrew recipes specify a bittering hop addition with 60 minutes left in the boil. You can cut your boil short by 15 minutes by simply moving this addition up to 45 minutes left in the boil. To compensate for the decrease in alpha acid extraction, just multiply the amount of “60 minute” hops by 1.2 to get an appropriate amount of “45 minute” hops. This movement will not greatly effect the taste of your beer. (In fact, for moderately hoppy beers, you likely won’t notice a difference. In a double IPA, you may notice a bit more hop flavor, comparatively.) Another hint for extract brewers is to use a wort chiller, if you don’t already. Compared to cooling your wort in a sink (or bathtub), a wort chiller works a lot faster.
Brew Big
Another obvious tack is to plan for and brew bigger batches of beer. If you have the equipment for it, it doesn’t take that much more time to brew a 10-gallon (38-L) — or larger — batch of beer than it does to make a 5-gallon (19-L) batch.
Buy Big
Your brewing time likely comes out of your total “free time,” and part of this free time involves shopping for brewing ingredients. If you plan out your next few brewing sessions, you can pick up the necessities for several brews in a single trip to your homebrew shop, leaving more time for actual brewing. This can be especially helpful, if — like me — your “local” homebrew shop is miles away.
Before Brew Day
Measure and Crush Early
In the few days leading up to brew day, you can use small chunks of free time to measure out the ingredients you need. I try to weigh out all my malts the day before, so I can proceed right to the crush on brew day. And, if I have the time, weighing out my hop additions and placing them in baggies saves some time on brew day. Of course, you can crush your grains the day before so they are ready to mash or steep on brew day.
For all-grain brewers, or extract brewers who perform full wort boils, filling your hot liquor tank or kettle and treating your brewing water the day before your brewing session will also help. (You can also use this time to add a Campden tablet and dechlorinate the water.)
Having your water treated, malt extract and grains weighed out (and perhaps crushed), plus all your kettle additions put in separate baggies, can help you shave a big chunk of time from the start of your brewing session.
Heat Water Automatically
Having your water and ingredients all set is nice, but what if you started your brew day with a mash tun or kettle full of hot water? Some brewers, especially those with “automatic” brewing rigs (RIMS, HERMS and the like), put the heater on their hot liquor tank on a timer. With this modification, an early morning brew session can start with a cup of hot coffee and a mash tun full of hot brewing liquor. Just dump in your (pre-measured and crushed) grains and go.
Quicky Yeast Starters
Making a yeast starter is an important, but time-consuming, step in brewing. Yeast starters are often described as a little batch of beer that you add to your big batch of beer. And, making a yeast starter can take almost as long as making a batch of extract brew if you boil the starter on your stove, cool it in your sink and transfer it to a sanitized jug.
You can save a lot of time by getting an Erlenmeyer flask (or laboratory media bottle) and making your starter in your microwave. To make your starter, add the appropriate amount of malt extract and water to a clean flask, cover it with microwave safe plastic wrap and boil the starter wort for 15 minutes in the microwave. Flasks and media bottles are made from “laboratory glass” and won’t shatter when exposed to large temperature swings. So you can fill your sink, or a bucket, with ice water and crash cool the starter. This saves you the time of washing a pot, sanitizing a jug and transferring your starter wort. The only drawback is that most microwaves can only handle 1 L flasks or bottles.
Brew Day
The Obvious Stuff
A brewing session is filled with a number of steps that take quite awhile, but don’t need constant attention. For the most part, you don’t need to sit and watch your water heat, grains mash or your wort boil. Using the time while these steps are going on to look ahead and do miscellaneous tasks saves a bunch of time during your brew day. This, of course, is obvious and well-known and I only mention it so I don’t have to answer 800 emails pointing out that I failed to mention it. There are, however, some less obvious ways to speed up your brew day, particularly near the end.
Chill Quickly
If you use an immersion chiller, swirling the chiller continually will speed your cooling time greatly. I’ve switched from occasionally swirling my immersion chiller, then letting the kettle sit (covered) for a few minutes to taking the first 5 to 8 minutes of the cooling period to constantly swirl the chiller. (Hint: Hold the chiller by the “cold water in” side, not the “hot water out” side, unless you wear oven mitts.) The only drawback to this method is that the kettle is exposed to the environment while you stand over it, moving the chiller. I usually cool down to about 140 °F (60 °C), then cover the kettle when the temperature drops in to the wort spoiler “danger zone” (the temperature range most hospitable to airborne wort spoiling microorganisms.)
Use a Pre-Chiller
A pre-chiller is an immersion chiller that sits in an ice bath and cools the water en route to your main chiller. A pre-chiller helps speed your wort cooling greatly. I begin cooling my wort without the chiller, then dunk the pre-chiller in ice water once the outside of my kettle is cool enough to touch. Initially, even ‘warm” tap water is cold enough to cool just boiled wort. Dunking the pre-chiller too early is just melting ice.
Big Racking Cane
I was in my local homebrew shop a couple months ago when I noticed something I hadn’t seen before — racking canes with a larger inside diameter. A bigger tube for transferring your wort means faster transfers. And, think about how many times you need to transfer wort or beer — from the kettle to the fermenter, primary to secondary and secondary to kettle or bottling bucket.
It’s In The Bag
One thing I have heard of, but never actually seen, is fermenting in sterile, food-grade plastic bags. The idea is to ferment your beer with the bag lining your brew bucket. Once the beer is racked from primary, just throw away the bag. Brew on premise places sometimes use this approach to save the time of cleaning and sanitizing their fermenters. If you don’t use this option, you should at least have your fermenter cleaned and sanitized before you start chilling your wort.
Wrapping Up
At the end of a brew day, it’s often tempting to just set everything aside and deal with it later. However, just a little extra effort before you call it quits will save you a lot of time later.
At a bare minimum, rinse or hose off all your equipment. Better yet, as you cool your wort, save some of the hot water that exits your chiller in a couple buckets or large picnic coolers. Use one container for your cleaning solution and the hotter one as rinse water. Hot cleaning solution (I use PBW) will quickly blast through any deposits on your mash tun or kettle. And, with hot rinse water, your equipment will dry quickly. A long handled scrub brush will also make things go faster.
Packaging
Bigger Bottles
Of all the tasks homebrewers perform, bottling is the one that most cite as the most tedious and time-consuming. You can save time on bottling day if you pick the biggest bottle size that will fit your needs. A 5-gallon (19-L) batch requires fifty-three 12 oz. (355 mL) bottles, forty 16 oz. (473 mL) bottles, twenty-nine 22 oz. (650 mL), nineteen liter bottles (such as brewpub “bombers”) or not quite ten 2 qt. (2 L) bottles (such as brewpub “growlers” or 2 L soda bottles).
Keg It!
What if you only had one “bottle” to fill? That’s what homebrewers who keg face when their beer is ready. Although kegging involves an initial start up cost, it saves a ton of time. It also allows for options such as filtering your beer, counter-pressure bottling and pushing with nitrogen (see page 33). I have never heard a “kegger” say, “I’ve decided to go back to bottling.”
In a pinch, some homebrewers even rely on the ultimate time-saver — buying commercial beer. Problem is, although there are many good breweries out there, the best beer in the world is the one you made yourself.