Yeast on Repeat

re-pitched between batches.
We have often said that all we do as brewers is set our yeasty friends up for success. We create a sugary, nutritious lagoon of goodness to send well-invigorated cells. They eat to their fill while ignoring the “no swimming for 30 minutes after eating” rule. (Can’t you hear your parents stern pleading?) In return for their gluttonous bacchanal, they provide us with a well-attenuated, flavorful beverage filled with Dionysian delights for a weary soul. And like us, at the end of a long day, all our buds want is a good nap before getting back at it.
Let’s explore how we provide for our yeast in between their swim meets!
Why?
We’ve spent a fair amount of time, both here in this column and in our writings, seminars, internet calls, and podcasting adventures over the years extolling the virtues of vital, healthy yeast. For all of the incredibly stupid, lazy, and lackadaisical things we do as homebrewers, if we just get yeast cells that are raring to go into the waiting wort, good Saint Nicholas will forgive our sins and reward us with a snappy malt beverage.
With the increased availability of a wide range of yeast options to choose from — a near-endless number of strains and multiple form factors, all available at the click of a mouse — it’s easy to use a new pack of yeast every time we make a batch of beer, but there are several reasons to save your yeast for another go:
1. Cost: With individual packages of liquid yeast costing over $10 and dried yeast being over $5 in most places, yeast is a good amount of the cost we pay for our brew days. And as much as we scrimp and shave costs on other ingredients, being able to reuse yeast, even once, gives us a heck of a discount. (And have you seen how much yeast you throw away at the end of a batch!?)
2. Yeast Health/Generational Changes: As yeast generations increase (aka the more a culture is re-pitched) there are performance changes. In talking with professional brewers, many believe that yeast cultures begin behaving normal after the first generation. Drew has even found that some firmly believe the classic Wyeast 1056 (American Ale) Chico strain reaches peak performance at around seven re-pitches.
3. Banking: In an era where FoMO (Fear of Missing Out) is a marketing strategy, yeast providers are always rotating available strains. Yeast labs do it for less nefarious reasons than say Disney putting “films into the vault.” There are practical reasons for not keeping “all the strains, all the time.” But if you want that limited edition strain year-round, you’re going to need to work some magic of your own.
4. “House Yeast”: Lastly, along with the performance changes that happen, over time yeast strains will drift as repeated brew runs select for new variants with different characteristics that thrive under your brew conditions and practices. Before strict microbiological practices gave rise to the modern world of single-strain brewing, the general philosophy among brewers was “our yeast is our yeast and this is how it tastes.” Your mileage on developing a good house strain will no doubt vary as we’ve both known old timey brewers who disclaim, “I bought yeast once back in Nineteen Dickety Two and just reuse it.” Invariably, their beer tastes like it too!
Setting Our Goals
When we go to save a yeast for reuse, what is it that we want to do? To our way of thinking, we want to preserve the generation of fresh and vital yeast (to curry the favor of the beer goddess). Unless we’re heading for “house yeast,” we want to preserve the strain characteristics that draw us to this particular strain. We want to avoid picking up any off characters. We definitely don’t want to do any more work than is necessary! In other words – easy, same, and healthy.
When To Grab Your Yeast
One thing to consider is the timing of grabbing your yeast slurry for saving. In this time of hop to hell everything, our one consistent rule is to grab your yeast before dry hopping. You don’t want hop matter and hop oils to interfere with yeast health and having future flavor impacts. (In fact, this is why many brewers now wait until they do a yeast drop before they add any hops to primary.)
Ways to Save Your Yeasts
The challenge to saving yeast for reuse is that it’s a semi-fragile, living culture. It must be tended to — given nutrition and the right environmental conditions to survive and eventually thrive. It’s not quite as delicate as the three-day-old thawed fish sitting forgotten in your meat drawer, but it’s not far off. Maybe much more like a sourdough starter, but more fragile since we really want certain characters from it, not just “make my bread rise.”
So here we present to you, the ways we’ve saved yeast for reuse. We’ve ordered these in terms of “value” (a blend of success and ease — again, lazy!). Please note, this doesn’t include some techniques like the home drying methods used for preserving kveik strains.
One other note — now that we’re entering the very different world from “sanitize the packet, cut, and dump,” sanitation at all steps of the way becomes direly important. Even if you perfectly preserve your yeast, preserving bacteria along with it renders your work useless. Once we get into long-term storage, sterilization will become the watchword, but regardless, minimize transfers, minimize dust flow, flame sterilize glass lips, etc. This also includes skipping an oft discussed technique — yeast washing. Neither of us see a practical benefit to it at our level and doing so provides more chance to introduce harm.
Oh, and don’t forget, from the moment you pitch the yeast, you should treat your formerly dried yeast as a liquid yeast culture.
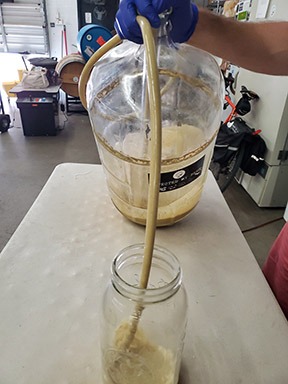
1. Immediate Reuse: For us, this is really the way. Instead of saving the yeast in increasingly complicated ways, just reuse the yeast “immediately.” In a brewery, this would be a matter of cone-to-cone transfer from a finished batch or using a yeast brink. At our level, it’s much more likely that we’re reusing fermenters.
We recommend transferring the finished beer, removing the yeast slurry to a cleaned and sanitized jar/growler. Keep it capped with foil while you clean out the fermenter and re-sanitize. Add your wort and pitch the yeast as normal. With a slurry, there’s no reason to add all the yeast (unless you’re doing a massive beer). Drew generally adds about 1⁄3 of the yeast cake. If you want precise measurements, Dr. Chris White of White Labs recommends 300 mL per 5 gallons (19 L) to get an appropriate colony going.
While we label this as “immediate,” you can save the slurry overnight and pitch it the next day.
If you’re a daring Dickety Two brewer, you could go straight into the same fermenter without cleaning and sanitizing, but remember you’re going onto a full bed of yeast, dead cells, hop matter, and any other critters that are trapped in the trub or in the carboy on transfer. In general, we just don’t like it. (And hey, for once as a homebrewer — you’d be overpitching!)
2. Store under wort/water: The problem with immediate reuse is, well, sometimes you’re not ready to re-brew. We’ve both successfully saved yeast by storing a slurry in mason jars/growlers in a fridge for a couple of weeks. Again, the same rules apply — sanitize everything like you were thinking about performing surgery. Keep the yeast cold and if you put the lid on it, do not tighten so air is able to escape. Alternatively, a lid with an airlock is a really good idea here.
When we first started brewing, the big online debate about saving yeast was “under wort” or “under water.” Water proponents felt that it was a better, safer, cleaner medium under which to store the slurry. Wort proponents felt that fermented wort was the natural resting place for yeast to begin with and wouldn’t cause osmotic issues with the cells like sitting in pure water. Theoretically, at least, wort provides nutrients for the dormant yeast.
We’ve tried it both ways and haven’t found a great reason to use water, at our level. Instead, just store the yeast under some of the beer it came from and keep moving!
Don’t be tempted to rinse your yeast. It’s unnecessary and could be detrimental. This is what our good friend and Yeast Whisperer Mark Van Ditta had to say on our website:
“While using a secondary fermentation vessel to prevent autolysis has gone the way of the dodo bird, amateur brewers still cling to yeast rinsing, a practice that is not based on science and provides no microbiological advantage . . . When a brewer rinses yeast with boiled water, he/she removes the protective force field that a yeast culture built for itself, basically opening it up to infection from house microflora while providing zero microbiological advantage. A yeast culture does not need to be kept free from trub and hop particulate matter. It needs to be kept as free from wild microflora as possible because every time a culture is pitched it is an opportunity for microflora other than the culture to replicate . . . If you need further evidence that yeast rinsing is an amateur brewer fabrication that is not based on microbiology, watch how a craft or industrial brewery bottom crops yeast. They either pump it out of the cone into a yeast brink for temporary storage or into a fermentation vessel with fresh wort. I have yet to see a professional brewery rinse yeast with water before re-pitching it.”
3. The Everlasting Starter: Another trick we’ve seen used by abstemious brewers is to treat a slurry (or their starters) as a source for new starters. Again, like our sourdough cousins, we’re just keeping something growing continuously by feeding it more wort until it’s time to jump up into a starter. If doing this, it’d be recommended to make a larger volume of wort and can it, so you have it on hand and ready when your yeast needs a snack. Much like a regular starter, this won’t hold indefinitely!
4. Plating: Now’s the time when you get to play full mad scientist. If you want to truly store your yeast in the best condition for more than a few weeks under beer, you’ll need to become an amateur microbiologist.
This topic includes way, way too much to cover in the amount of column inches we have here. With a few extra tools (a nichrome loop, a burner, a pressure cooker, plates, growth media, etc.) and a steady and patient hand, it’s possible to properly store your favorite yeasts for a near indefinite period in the fridge. Be warned that maintaining a “yeast ranch” is another hobby in and of itself as you periodically replate your cultures onto new plates to ensure your culture’s viability.
You can read more about yeast ranching on plates, stabs, and slants in Yeast from Brewers Publications. Drew learned from Pierre Rajotte’s First Steps in Yeast Culture.
Drew ran a little yeast ranch for a few years, but eventually with time and patience running in short supply, the ranch fell to ruin and all those yeastie dogs ran off to the great pasture in the sky.
5. Freezing: What about freezing your yeasts? There are techniques that one can use — blending yeast slurry with glycerol can allow you to safely freeze a strain in small (30- to 50-mL) vials without too much damage to the cells. (Glycerol effectively interrupts the formation of sharp ice crystals that bust open cell walls.) The blend depends on the strength of the glycerol solution.
If you’re not storing in a lab freezer — and you’re probably not — you should store your tubes in a small cooler to protect the slurry from the warm thawing cycle that most residential freezers perform.
Revitalizing Your Yeast
No matter how you choose to store your yeast, you’ll want to make sure they’re rip ready to go for the next assignment.
If your slurry is more than a week old, we recommend pitching into a yeast starter to create new cell growth and new energetic yeast. If you’re starting from plates/slants/stabs/frozen vials, you should start with a much smaller starter (10-mL for plates/slants/stabs, 250-mL for frozen vials). Let the yeast grow for a few days before moving into your pitchable starter size.
At every step of this process, check your yeast. Does it look normal? Any fuzzy spots? Is the strain growing/fermenting in solution? Is it sluggish? Does the starter smell off? (Reminder, starters smell radically different than beer.) If the culture doesn’t seem healthy and ready to go, dump the starter and try again (or use fresh yeast). Don’t be penny wise/pound foolish with your beer’s yeast.