Adjusting Body and Gravity

Beer is alcoholic — we all know that. What too often gets lost in the shuffle of recipes and flavor profiles and hopping rates and more is that the underlying source of that alcohol (sugar, as measured by gravity) has important effects on other ingredients and on the finished product. Brewers do pay attention to the mix of sugars — fermentable and unfermentable — in the recipe, but may not utilize their knowledge of it to its fullest extent! We’re going to give these two areas a thorough once-over today by examining how and why we adjust gravity and body in each stage of the brewing process. Gravity and body matter, and are quite tightly linked. Gravity matters, obviously, because of its relationship to the potential alcohol level of your finished product. Beyond that, though, it also interacts with other ingredients whose output we care about, particularly hops and yeast. Hops utilization rates decrease as gravity increases – a more-sugary wort is less adept at extracting and isomerizing hops acids – so a proper assessment of bittering potential relies on an accurate prediction and/or measurement of gravity in the wort. Yeast health and performance are also a function of gravity, because alcohol is toxic to yeast cells. Given that, we should be cognizant of the potential alcohol in our wort. And, of course, the ratio of alcohol and residual and/or unfermentable sugars in your finished beer will have a significant impact on the mouthfeel of it. Body is important in its own right, but a thin/thick mouthfeel will also impact the expression of flavors from malts, hops, and even water. In short, time spent planning for and tweaking specific levels of gravity, alcohol, and body is time well-spent if we’re looking to produce our best beer. This is also a feature that we can “work” the entire way through our process, from the moment we pull the recipe log down off the shelf to the moment we drain the last drop from the keg.
Make a Plan
This all begins in recipe design. Before brewing, always make a recipe (you almost certainly do already, but it can’t hurt to say it). That’s not to say you can never just freestyle it and add whatever you have whenever you want, but if you do you’d better be content with never brewing (or improving) that beer ever again! The good news is that planning a recipe and deriving the statistics that will guide your process has never been easier. Free and inexpensive brewing software abounds, and at a minimum these programs always provide information like original gravity, target final gravity, predicted ABV, calculated IBUs, and more. The rest is up to you. Start adding your ingredients (on paper), then take a look at your predicted ABV (or, even better, decide on a target in advance and build up your grist and adjunct sugars to it). Then, consider not just the predicted gravity, but how much of that is actually fermentable — what’s the mix of fermentable and unfermentable sugars? Base malts, if handled properly, can contribute a high percentage of fermentable sugars, while crystal/caramel malts and roasted malts contribute less as they move up the Lovibond scale. Toasted malts or unmalted grains may add fermentable sugars. It’s important to know what you’re adding, and what it can/will do. The software you’re using may or may not be doing that math for you (it probably isn’t – they tend to treat all grain additions as effectively identical in terms of fermentability), and your six-pound (2.7-kg) crystal malt addition could be interpreted as adding a meaningful amount of alcohol when in reality it’s adding a lot of residual, unfermentable sugars. By contrast, your maple syrup or candi sugar addition is 100 percent fermentable. Some of this is a question of experience and experimentation and good record-keeping — hard and fast rules on fermentability and grain/adjunct types are hard to come by — but your recipes should aim to limit less-fermentable additions if your goal is greater attenuation, and increase them in beers that require less attenuation.
Brew day Adjustments
So, you’ve written your recipe, and you’re in-process. It’s brew day! It’ll all turn out just like the computer said, right? Well, maybe, but you still have plenty of choices to make, and if things don’t sync up to your projected numbers you still have some adjustment options. The first thing — and this might have been part of your recipe planning — is to decide on mash temperature and thickness. The traditional brewer’s “window” for mashing is a range of temperatures that enables both alpha- and beta-amylase activity in the mash, which are types of enzymatic activity that will create an appropriate mix of more-fermentable and less-fermentable sugars (we’re leaving a lot of science out, here!). The center of that range is typically considered 152 °F (67 °C). If you’re targeting “medium body” in your beer, that’s where you’re probably mashing. Increasing that temperature towards 155–159 °F (68–71 °C) should produce a less-fermentable wort, while dropping it towards 149 °F (65 °C) should yield a more-fermentable wort. Mash thickness also matters (though probably only incrementally), with thicker mashes (about one quart per pound of grain) producing more-fermentable wort and thinner mashes (closer to two quarts per pound of grain) producing less-fermentable wort. Both, though, are probably only making minor differences, except at extreme ends of each variable. Don’t sweat it too much, and consider the virtues of consistency here and maybe just stick to a standard mashing procedure, regardless of targeted body/attenuation! There are ways of addressing body and alcohol downstream, as we’ll see. After you mash, lauter, and sparge, check your gravity. Remember, your hop’s utilization depends in part on the gravity of the beer, and if you’re off, now is the time to find out. If you’re low, you can add some malt extract (you keep some on hand, right?) to bring up your gravity to the appropriate level. If you’re too high and have room in your kettle (and fermenter) to dilute your mash with some water, go ahead and do so. If you don’t, then hop back on your brewing software and punch in the new gravity, then adjust your hopping schedule accordingly. If you don’t have extract handy, you can use simple sugars to bring up the gravity, but this can thin out your finished beer because those sugars will be 100 percent fermented off into alcohol while malt extract is closer to 70 percent. Any adjustment small enough to make that consideration (a hotter, thinner beer) irrelevant is also probably small enough to ignore. And you don’t need to hit your numbers spot-on — if I’m within five gravity points, I consider that close enough. One last gravity adjustment option at this stage (boiling) is to simply extend the length of your boil to increase evaporation and concentration — just be sure to time your hops consistently, from the end of the boil.
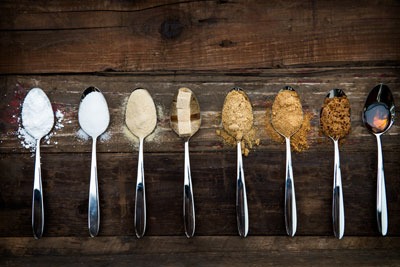
Now that you’ve finished boiling (and before you chill), check your gravity. If it’s too high, dilute with water. If it’s too low, bring it on up with some of that extract (you did run out and get some earlier if you didn’t have it already, right? Maybe just keep a bag in the brewery from now on . . .). The whirlpool is a perfect time to do so, since you have very hot wort that isn’t being actively heated and is being stirred, so dissolving liquids or powders is fairly straightforward. It’s at this point that you might also consider an addition for body. If you know in advance that you’re brewing a beer that needs some heft (a milk stout, for example, or a session beer that you’re bulking up so it isn’t too light and thin), you can add it manually here by using products like lactose sugar or dextrin powder. Both are nearly unfermentable. Lactose will add a smooth sweetness in addition to body, but dextrin (maltodextrin powder) is basically flavorless, and should just add weight. At the same time, if you’re brewing up a beer with light, digestible body (a Belgian quad, for example), now is a great time to add your candi syrup, molasses, dextrose (corn sugar), honey, or other simple sugar additions.
In the Fermenter
After any adjustments, go ahead and chill your wort and pitch your yeast. Done! Not quite. If you want a more fully-attenuated beer, consider a quick dose of pure oxygen aeration (via diffusion stone) to assure the yeast are receiving enough of this vital element for proper reproduction. Doing so will promote yeast health and get you a quicker, cleaner start at the beginning of fermentation. Not every brewer agrees that this has much impact on the final result in lower- to moderate-gravity beers (yeast are hardy buggers, and brewing is a robust process), but it may have incremental effects that, combined with other attenuation-encouraging steps like a cooler mash, will yield a better result. But this step is vital in bigger beers that need healthy yeast to complete fermentation. The stress of a high-sugar environment at the start of fermentation as well the stress of a highly toxic, ethanol environment at the end of fermentation can produce off-flavors and an under-attenuated beer. Proper aeration is key in this style of beer. We can also manage temperature in the fermenter to encourage greater/lesser attenuation – warmer or temperature-ramped fermentations will push your yeast to consume all of the sugars they can, whereas cooler fermentations may leave some amount of sugar behind due to a general sluggishness in activity at colder temperatures. Let me encourage you, though, not to attempt to under-attenuate your beer. Make sure to try to stay within the recommended range provided by the yeast manufacturer, or you may want to try to push above it at the very end of fermentation. If you deliberately stress your yeast to discourage their metabolism, you can produce significant off-flavors. While you may be successful temporarily, if the yeast wake up in a warm bottle to find a lot of simple sugars laying around, you’ll produce over-pressured gushers or dangerous bottle-bombs. Fermentation is done — congratulations! We’re finished! Well . . . actually there is room for more tweaks. Post-fermentation, you can still adjust for body and gravity. If things are too thin and/or over-attenuated, your lactose/dextrin approach is still viable here, and you can always bulk that beer back up. If your final gravity is higher than you’d like, you can try moving the fermenter to a warmer room and/or rousing the yeast to try to get them to re-engage and work a bit longer. If that fails, a small simple sugar addition will increase your ABV and decrease your apparent final gravity, as well as lighten the body of the beer. This may also be the time that, after all of your efforts at fully attenuating have failed and you don’t get your way-too-high gravity down to tolerable levels, that you go ahead and go radical: Introduce some bugs. Wild yeast and bacteria cultures/strains/blends can often break down those long, unfermentable sugars that your brewer’s yeast couldn’t handle, and over time you could end up with a fantastic funky/sour beer!
Packaging
It’s time to package up — congratulations! You’re finished! Not quite . . . one last step remains: Carbonation/conditioning. Carbonation is an undervalued step, flavor, and style characteristic, but it’s essential to getting the appropriate mouthfeel and presentation of the finished beer’s flavors. The higher the carbonation, the fuller the mouthfeel; the lower the carbonation, the thinner the mouthfeel. Cask English bitters pour down your throat as smooth as silk, and not just because they’re delicious: Their low level of carbonation makes them highly drinkable and light on your palate and in your stomach. Carbonation also accentuates bitterness (as carbonic “bite” joins bitter flavors on the palate), and can affect the overall aromatic quality of the beer. High carbonation can carry more flavors up and out of the beer into your nostrils — but be aware that at high enough levels that it can also smell faintly metallic. Much like we did back in the recipe-building stage, we should make a decision based on our target style or goals, and consider the effect of carbonation in-context. Often brewers will base the carbonation levels on a beer-style’s traditional carbonation level. For example, British beers were often served on cask and have lower levels of carbonation while German weizens and weisse beers can benefit from being highly carbonated with a big frothy head on top of the beer and carbonic bite. Now, though, we can also consider the final flavor of our beer. Once your beer is carbonated, it’s time to drink, and adjustments are done! In fact, no . . . just kidding. I mean, we could talk about glassware and how it affects perceptions of alcohol and body, but we won’t. There are also some minor adjustments that could be done in the glass (like adding a lime wedge or salt) . . . but again, not going to touch that subject. You’ve done more than enough. Your beer is yours — make it all yours, including managing its gravity and body from start to finish. Fill that glass, and enjoy!

