Step-by-Step All-Grain Brewing
 Like many homebrewers, my first batch of beer was made with a basic extract kit, complete with instructions and all the ingredients necessary for my brew of choice. I enjoyed the whole experience, but the end product and sharing my libation creations with others is what kept me brewing. I continued extract brewing for seven years, longer than a lot of people, simply because I always lived in cramped apartments with barely enough space for myself let alone my equipment. At the time, I was also only brewing about three or four batches a year and couldn’t justify the added time commitment and cost associated with all-grain brewing. In addition, terms like alpha and beta amylase, lautering, and vorlauf were foreign to me. Over time, I gradually wanted more control over the process and decided to take the plunge into all-grain brewing.
Whether you have been extract brewing for six months or six years, the leap to all-grain can seem like a daunting task, even if you have guidance from an experienced brewer. This article will provide you with a basic understanding of the equipment and procedures necessary to start all-grain brewing, which hopefully will help you determine if the journey is right for you.
How do you know if you are ready to transition to all-grain brewing? This is of course the million-dollar question. My advice to anyone considering moving from extract brewing to all-grain is to consider the quality of your current homebrew. Is it free of off flavors? I realize some off flavors can be hard to recognize so I would ask the honest opinion of a seasoned brewer or even enter your beer into a local homebrew competition. Beer judges are usually brutally honest (I have gotten a beating more than a few times in my homebrewing career). If your beer is plagued by off flavors, it’s best to figure out what is causing them before changing your brewing method. However, if you can generally say that your beer lacks unwanted off flavors, and you want more control over the process of brewing, slightly longer brew days and a thirst for knowledge, then all-grain brewing might be for you. One disclaimer before I move forward is that you shouldn’t think that moving from extract to all-grain will instantly improve the quality of your homebrews. I have had some amazing extract beers and some down right awful all-grain homebrews. Just like with extract brewing, all-grain brewing requires paying close attention to cleaning and sanitation, and a lot of practice.
How is All-Grain different than extract?
Simply put, the basic difference between all-grain and extract brewing is that the brewer is responsible for producing the sugars used in the boil by activating natural components of the grain (enzymes) during the mashing process. During the mash the enzyme activity, which breaks the grain starches into small molecules of sugar for the yeast to consume during fermentation, depends on numerous factors such as temperature and pH. If this sounds overwhelming, don’t worry; this article is aimed at helping the extract brewer understand this process. Next, I have outlined the main procedures you should become familiar with for successful brewing.

Mashing
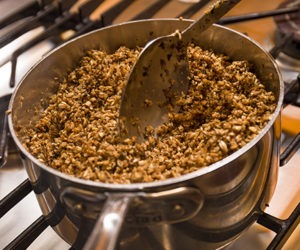
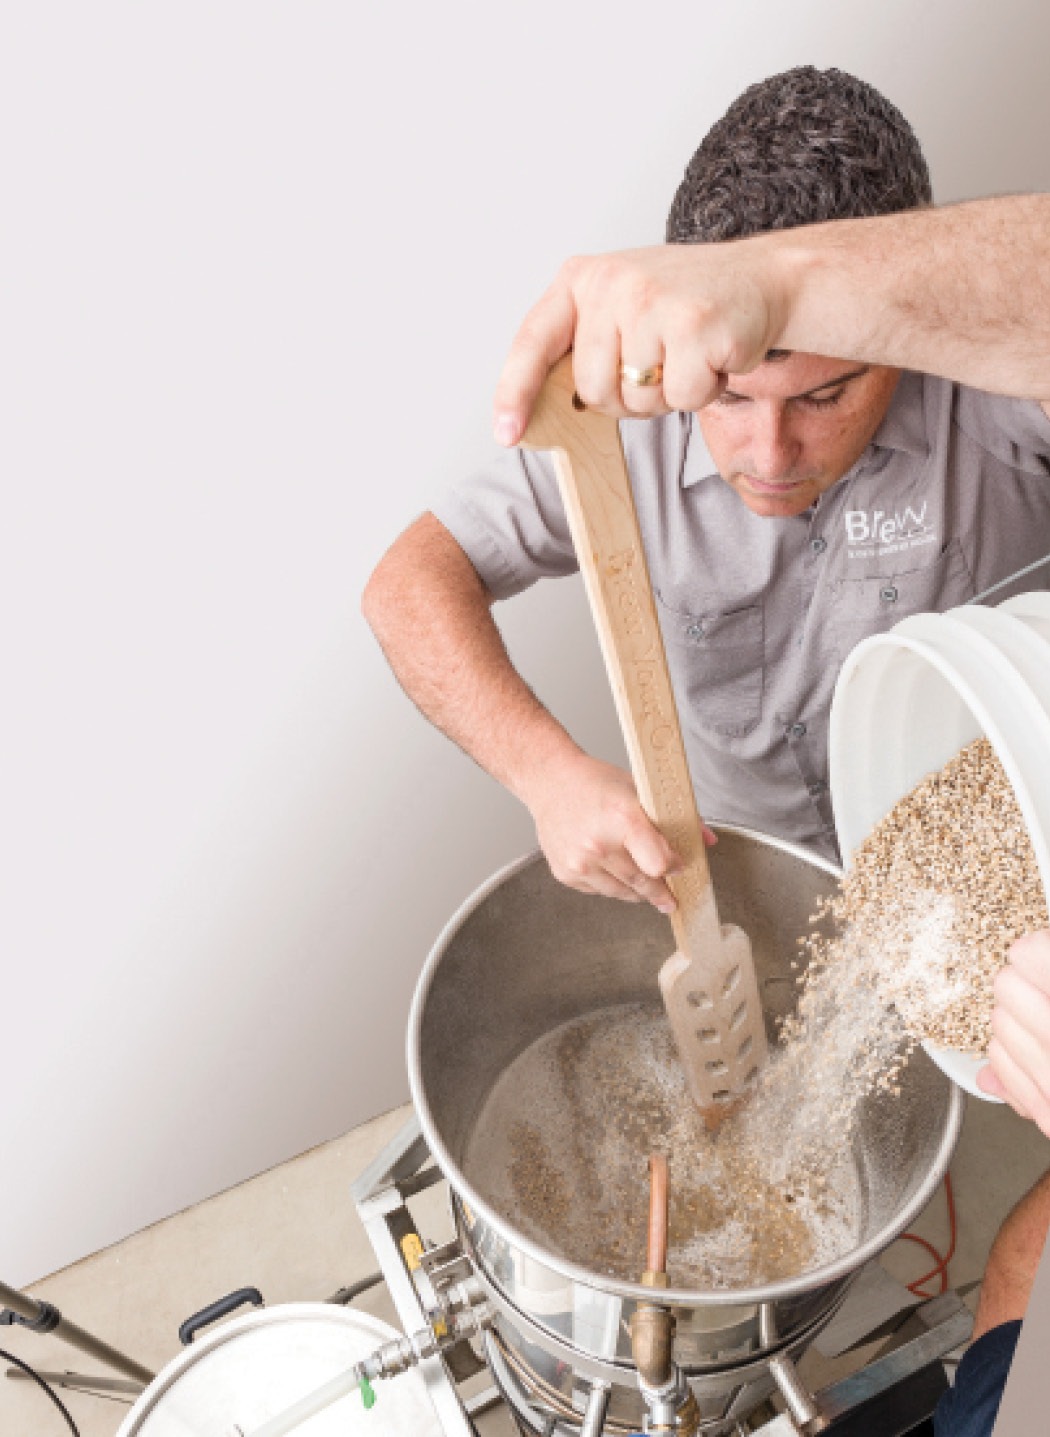
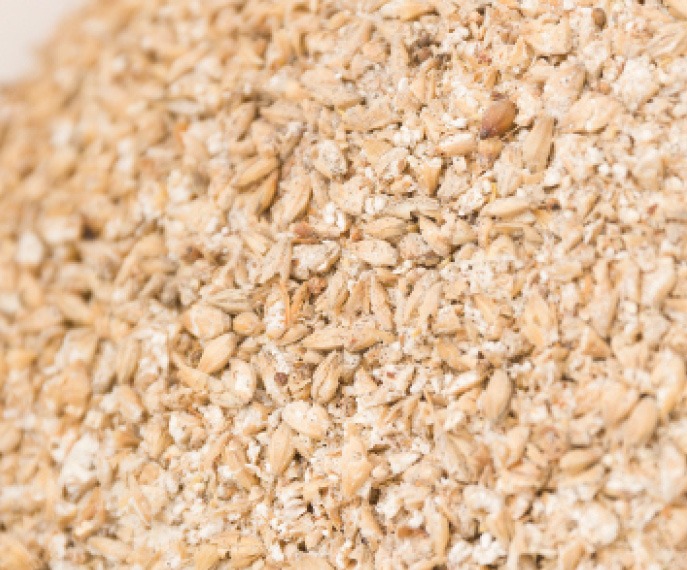
This is the process where the brewer converts the starch in the grain to fermentable sugars through activation of enzymes by heat and pH. There are many enzymes at work during the mash, but for simplicity I will only talk about the two main enzymes, alpha amylase and beta amylase. The most basic thing you should know about enzymes is that they are active within a relatively wide range of temperatures and pH, but work best within a small range. The amylases work together during the mash, but depending on the temperature used, the brewer can favor one or the other. Alpha amylase works best at a temperature range of 154–167 °F (67–75 °C) and beta amylase works best between 130–150 °F (54–65 °C). The first step in preparing for the mash is to mill (crush) the grain so the husk breaks open, giving the water access to the grain starches and enzymes. Hot water (also called hot liquor) is added to the mashing vessel, called a mash tun, so that when mixed with the grain it is at a temperature that appropriately activates the enzymes. Next the crushed grain is added and mixed such that there are no clumps of grain. Following this, the mash is allowed to rest for around one hour in order to give the enzymes enough time to break apart the starches.
A single infusion mash is the most common method used in homebrewing and is when one temperature is employed between 145 and 162 °F (62 to 72 °C), activating both enzymes to varying degrees. The lower end of this temperature favors activation of beta amylase, which produces smaller maltose molecules. These are very easy for yeast to consume and therefore produce wort that is highly fermentable with less body. A temperature towards the higher end of this range will favor alpha amylase. This enzyme leaves the sugars larger and harder for the yeast to consume and thus, produces wort with more body and less fermentability. As the brewer, it is your decision to figure out whether your beer would benefit from wort with more fermentability, more body or somewhere in between. Other mashing techniques include step mashes where the temperature is increased and held at temperatures over the course of the mash in order to sequentially activate various enzymes in their optimal target range. German brewers and those homebrewers interested in replicating their barley-based beverages might also employ a single or multi-step decoction mash. This process entails removing a portion of the mash and boiling it in a separate vessel, then returning it to the main mash. It is believed that this process, called decoction mashing adds a distinctive malt flavor that cannot be replicated in any other way.
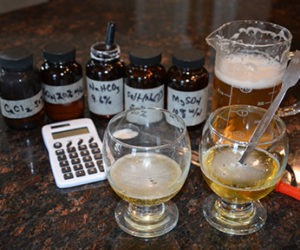
I suggest that after you get a handle on the mashing process and you really want to maximize the potential of your mash that you invest in a water report for your specific region. This will tell you what ions are available for your mash and which are lacking and might need supplementation. This report may be available online or through brewing buddies that have sent a sample out for analysis. The efficiency of the mash is very dependent on calcium as well as other ions, but this is more of an advanced topic.
Following the mash rest, lautering begins. Lautering is the process following the mash where the liquid (wort) and the solid (grain husks) are separated and the liquid wort transferred into the kettle. The temperature of the mash makes it ideal for lautering as hot water is able to extract more sugar and also decreases the viscosity so that it can be lautered more easily. When using a high adjunct or wheat proportion make sure to add around 0.5–1 lbs. (0.22–0.45 kg) of rice hulls to the mash to aid in lautering as high levels of protein in certain adjuncts, or grains that are huskless, can make lautering more difficult.
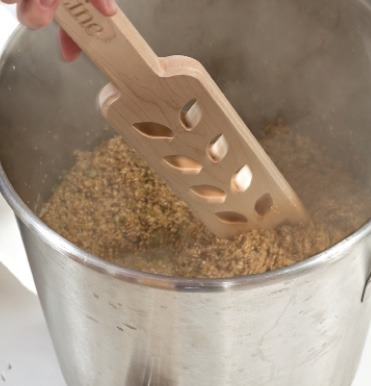
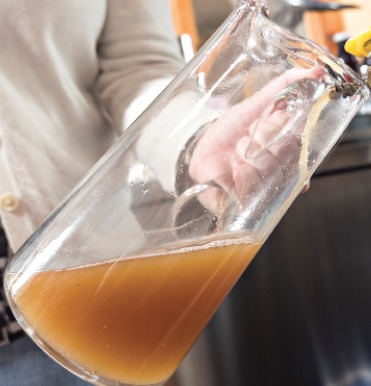
The first 20% of the lauter will be very cloudy and more than likely contain grain husks. This should be slowly added back to the mash with minimal disturbance of the grains. As the grain bed sets, it acts like a filter to remove the proteins and husks present in the first runnings. The collection and return of wort back to the mash tun is called the vorlauf (see photo at the top of this page). I use a 1-gallon (3.8-L) glass jug to collect liquid until it is free of grain husks and is mostly clear. Usually for a 5-gallon (19-L) batch this will be around 2 to 3 gallons (7.5 to 11 L).
Be aware that the lautering process should be relatively slow to stop channels from forming within your mash. Slow lautering will allow for better extraction of the fermentable sugars during the next step, the sparge. Sparging is the last step specific to all-grain brewing and consists of adding water to the mash in order to rinse the remaining sugars from the grains. This step, like lautering, should occur slowly so that channels do not form in the grain bed. There are numerous methods of handling the sparge such as batch sparge, fly sparge, and no sparge techniques. If you’re interested in learning more, there is a wealth of information on the Internet to help you decide which is best for you. Most brewers will sparge until they reach a specific wort volume, but if you are unsure how long to sparge make sure you stop when the gravity of the run off is no lower than 1.010 to 1.008. Sparging below this gravity will extract tannins from the grain. Once the majority of the sugary wort is rinsed from the grain and drained into the kettle, the brewing process is the same as extract brewing.
Equipment essentials
As you might imagine, all-grain brewing requires a few extra pieces of equipment, increasing the upfront cost. On the plus side, depending on what equipment you are currently using, you may already have some of these items. In order for the enzymes in the mash to work their magic on the starches the grain must be crushed. For this you will need a grain mill. The space between the rollers where the grain is crushed should be about the width of two credit cards . This will roughly be the right width so that the husk of the grain is broken apart, but it is not pulverized.
When the crushed grain is added to the mash, the broken husks will act like a filter and help the sugars become rinsed away into the kettle. If you don’t want to invest in a grain mill, you can always have the grain crushed wherever you buy it. Back before I had a grain mill I did this, but always make sure to use the crushed grain within a week or two because once crushed it will go bad quicker than if uncrushed. Another essential piece of equipment is a mash tun. There are many different options for this piece of equipment anywhere from a separate kettle that can be heated to an insulated cooler (which cannot be heated). The common feature of whichever mash tun you opt for is that the liquid can be removed while the crushed grain remains. This requires a false bottom or tubing manifold with small holes in it to separate the liquid from the solid.
If you are not currently doing full volume boils you will need a boil kettle that will hold the total volume of your mash run off. For a 5-gallon (19-L) batch this will require approximately 7 gallons (26 L) of volume in your kettle, but to prevent boil overs you won’t want to fill your kettle to the brim (see photo on page 66). A good rule of thumb is to use a kettle that is approximately double your final batch size. For the full boil, also say goodbye to boiling your wort on the kitchen stove. For this you will need a burner. Options can run from an inexpensive turkey fryer to the more expensive models.
Next, in order to heat and hold hot water for the mash and sparge you will need a hot liquor tank. This vessel can be anything from another kettle to a plastic bucket with a spigot. Plastic buckets may be an economical method utilizing equipment you may already have on hand making them an inexpensive option, but remember that the water will have to be heated in another vessel then transferred to the bucket.
The final all-grain brewing tool you will need is wort-chilling equipment. While it may be a tempting way to cut costs, using your sink/bathtub filled with ice to cool your wort following the boil is not a safe option. Most kettles are not designed so that they can be safely moved while filled with liquid, especially near-boiling liquid! The two most common are counterflow chillers and immersion chillers.
Brewing Software
Although not essential to extract or all-grain methods, brewing software can help you fit your beer into style guidelines, implement changes in water chemistry, and scale your recipes up or down in size. Another feature is that it can help with converting your extract recipes to all-grain. This can be important, especially if you have an excellent recipe or two that is dialed in. When I first started brewing all-grain, I had a few tried and true extract recipes I wanted to brew all-grain. A Google search could easily provide the details of converting an extract recipe to all-grain, but I relied on BeerSmith brewing software to convert mine. I find it is simple to use and it also takes out the human error. If brewing software isn’t your thing here is an article that provides calculations to convert from extract to all-grain and vice versa. For me, another major advantage of the software is that it keeps track of recipes and processes. This can help you improve each subsequent batch of beer by making small changes over time. Brewing software has been one of the most useful resources in my homebrewing tool kit.
Final thoughts
In all, I think the increased knowledge, beer quality, and process control that is gained from all-grain brewing far outweighs the added time, and equipment compared to extract brewing. Although I’m sure there are a few out there, I can’t say I know a single homebrewer that started all-grain brewing and then decided to permanently go back to strictly extract brewing. What might be good for one homebrewer might not be the best move for the other, but in the end the overarching goal remains the same. . . make the best homebrew possible. So with that in mind move forward with all-grain brewing at your own pace and only do what you are comfortable with. In the end, this is an amazing hobby that allows anyone with a kettle, some ingredients, and a bucket to make beer. What hobby is better than that?


You will need a boil kettle that will hold the total volume of your mash run off. For a 5-gallon (19-L) batch this will require approximately 7 gallons (26 L) of volume in your kettle.