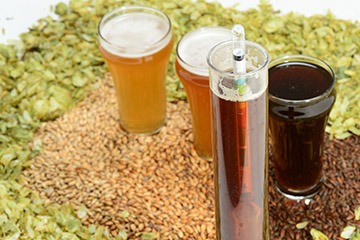
Attenuation & Finishing Gravity

It’s a satisfying feeling when your beer has finished fermenting and you pour a sample into a hydrometer test jar, drop the hydrometer in, give it a spin, and watch it land on the exact finishing gravity you had anticipated. But there are a number of factors that control how the beer got there and most can be manipulated by the brewer in order to adjust where it lands, as well as mess it up. Each of these factors, when summed together, control the beer’s attenuation.
What is Attenuation?
In the physics world attenuation has to do with a general reduction of something, like electric power or force due to resistance. In the brewing world, it’s related to the reduction of sugar levels from active fermentation as yeast convert it to ethyl alcohol and carbon dioxide. This leads to a diminishing density that we often measure as either specific gravity or Plato (Plato is more commonly used in the professional brewing world). The greater the attenuation the more sugars are consumed, resulting in a lower final gravity and higher alcohol level.
Measuring For Gravity
A float hydrometer is one of the most common tools in a homebrewer’s kit. It is going to be the easiest and most accurate way to measure the finishing gravity of your beer. If you have opted for a refractometer, while they are great at measuring starting gravity, ethanol has a greater effect on its accuracy. Calculators have been developed to sidestep this shortcoming, but is an extra hassle compared to the ease of a hydrometer.
If the beer is carbonated, then you will want to leave the sample out overnight or pour the beer back and forth between two containers to allow it to de-gas before getting the reading. Dissolved CO2 will lift the float hydrometer, providing an inaccurate result.
Calculating Attenuation
To obtain the attenuation level of a beer you need both the starting and finishing gravity readings. What we homebrewers care most about is apparent attenuation (real attenuation requires laboratory testing). To calculate percent apparent attenuation, start by changing the specific gravity (SG) to gravity points (GP) . . . that means 1.042 SG is 42 GP, 1.012 SG is 12 GP. Subtract the finishing gravity points from the starting gravity points, divide by starting gravity points, then multiply by 100. Apparent attenuation for a standard ale or lager generally falls between 65–80%, but there are plenty of exceptions to this and manufacturers will provide a range for each strain.
Taking Control
One of the easiest ways homebrewers can adjust their expected final gravity and attenuation is through their yeast selection. Some yeast strains are well known for tearing through the carbohydrates the brewer provides, creating a lower finishing gravity given the same starting wort. These strains may be a great choice to balance an otherwise high-finishing gravity beer or if a slightly drier finish is desired. Other strains, most notably ones that struggle to or can’t ferment the sugar maltotriose, will leave a higher gravity beer. These may be the yeast of choice for lower alcohol beers, providing more mouthfeel to the beer.
Controlling the finishing gravity through grain and/or sugar selection is also a common lever brewers pull. More specialty grains like dextrin and caramel malts as well as roasted grains will leave the brewer with a higher gravity beer. On the other side of the coin, corn and table sugars are commonly used to create a higher alcohol beer without increasing the final gravity due to the ease of fermentation by yeast. This will create a higher apparent attenuation. Maltodextrin and lactose are two sugars that yeast cannot ferment, which allow the brewer to create more mouthfeel, increase final gravity, and lower apparent attenuation.
All-grain brewers have an added lever they can pull in the form of mash temperature. Mashing on the higher side of typical single infusion mash range will provide a higher finishing gravity and less attenuation by decreasing wort fermentability. Lower-temperature single infusion mashes, step mashes, and decoction mashes are typically ways all-grain brewers will lower expected finishing gravity and more attenuation by increasing wort fermentability.
Also, there are many ways brewers can negatively impact attenuation and these can sometimes lead to off-flavors. Fermenting too cold may cause the yeast to flocculate (clump together) and fall out of solution too soon, leaving an under-attenuated and unstable beer. Try to stay within the yeast strain’s suggested fermentation temperature range per the manufacturer. Other ways things can go wrong is not providing the yeast the proper nutrients they need, pitching far too few yeast cells, and having an uncalibrated mash thermometer.
Why Do We Care?
Measuring the starting and finishing gravity of each and every batch should be a priority for all homebrewers. This allows you to track your alcohol level, which may be important if you’re looking to fall within range for style or you have friends over that are driving.
Tracking apparent attenuation is more about meeting your expectations as a brewer. The better you’re able to predict outcomes from various tweakings, the more you’ll grow in the hobby.


