CO2 Out the Wazoo
All brewers know that the yeasty-beasties they pitch chew up the sugar in their wort and make carbon dioxide (CO2) and alcohol. However, when the party is over and the sugar is gone, the amount of CO2 dissolved in beer fermented at atmospheric pressure is usually too low for our tastes.
It should be intuitive that if you put the beer in a closed container and pressurize it with CO2, you can dissolve more CO2 into the beer than you can without pressure. It may not be intuitive, but if you chill the beer at a given pressure, you can also dissolve more CO2. There are many places on the Internet that have carbonation charts that show the relationship between pressure, temperature and dissolved volumes of CO2.
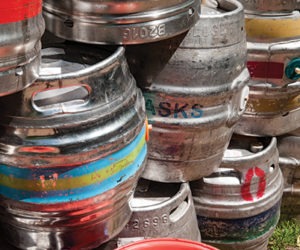
Homebrewers that use kegs have had three basic methods to force-carbonating their kegs — (1) pressurize-and-wait, (2) pressurize-and-shake or (3) inject the CO2. The exact machinations used by homebrewers to force carbonate their kegs, including hybrids of these methods, are as numerous as fleas on a dog’s back. However, with the acquisition of a simple device, there is a fourth possibility — (4) pressurize-and-measure.
With the pressurize-and-wait method, you chill the keg, connect your CO2 cylinder and set the CO2 pressure to give the desired dissolved volume of CO2 at the keg temperature. Then, you wait. This method will give very consistent results. But, there are some disadvantages. The waiting time is usually weeks. This is because the rate at which the CO2 will dissolve is dependent upon the surface area of beer exposed to the CO2 and Corny kegs are very “vertical,” leaving a comparatively small surface area per volume of beer. Also, if you have even a small leak at an o-ring or fitting, you will empty your CO2 bottle in a New York minute. The ultimate disadvantage of this method is that it takes a very long time to find out if it worked, and if so, how well. And if it didn’t, you wait some more.

With the pressurize-and-shake method, you chill the keg, connect your CO2 cylinder and set the CO2 pressure to give the desired dissolved CO2 volumes at the keg temperature. Then, you shake the keg. The advantage of this method over pressurize-and-wait is that the surface area exposed to CO2 is greatly increased so the carbonation time is much shorter. Many of the homebrewer variations of this method involve the various keg shaking techniques. A common method is to roll the keg back and forth with your foot for a set amount of time — say 10 minutes. Another is to put the keg in the rocking chair and play rock-a-bye-baby.
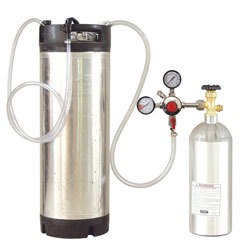
Injecting CO2 into the keg sometimes takes the low-tech form of attaching the gas to the “OUT” post of the keg. The idea is that the gas travels down the long dip tube and bubbles up through the beer. To do this, you need to switch your keg fittings so your regulator can be attached to the “beer/OUT” post. You can also bubble CO2 into a keg using a carbonation stone. (See Thom Cannell’s article, “Keg Lid Carbonator,” for one way to do this.)
The results from the shaking method will usually be quicker and more reproducible than the waiting approach. However, the pressurize-and-measure method removes all doubt. To use the pressurize-and-measure method, you need one additional piece of hardware — a rotometer. A rotometer is a small flow measuring device. The thing-uh-ma-bob that does the job is a small tube with a ball in it. The diameter of the tube gradually increases from bottom to top. Gas flows from bottom to top, lifting the ball — which is also called the float. The more gas flow, the higher the ball raises. You can find them on eBay for $15.
It doesn’t matter what size you buy, although smaller is better. It doesn’t matter what the calibration is, either. Standard cubic feet per hour (SCFH) is a common measure of airflow, but firkins per fortnight is just fine. Connect your rotometer to the CO2 bottle. Select the correct pressure and temperature required to reach your desired level of carbonation. Then, start carbonating by shaking the keg. Keep shaking and watch the rotometer float. Eventually the ball will fall, indicating the flow of gas has stopped (or been reduced to below the level the rotometer can measure). When the ball falls and will not rise no matter how much you shake the keg, no more CO2 is dissolving and the beer is carbonated. Voila! Your keg is carbonated to the correct level.
At this point, experienced “shakers” might be asking, “Why not just listen for when the gas stops hissing or the regulator stops ‘groaning?’” As you shake a keg during force carbonation, you can hear all sorts of noises from your tank and regulator when the flow of CO2 is sufficiently high. As you approach CO2 saturation, however, the noises diminish. The reason to use a rotometer is that it is more sensitive than your ears are. The float will still show that gas is flowing beyond the point that you can hear any noise. If you want to bring your keg up to your target level of carbonation, and know when you can quit shaking, use a rotometer. Once you’ve carbonated the beer, you’ll need to let the beer settle. Give it at least a week and it will be much better behaved.