Evaluating Brewing Ingredients

Homebrewing has become a very technical pursuit. From humble beginnings of boiling extract on stovetops, the last 30 years have brought ever more science and sophisticated equipment into the homebrewing process. A recent podcast guest of mine commented that many homebrewers are far more sophisticated in their equipment and processes than the average professional craft brewer. It’s commonplace these days to speak with homebrewers who carefully craft water profiles, mash schedules, and even mash pH adjustments in search of the perfect beer.
Unfortunately, sometimes the artistic side of brewing can be lost in our relentless pursuit of technical excellence. Beer brewing is not merely an exercise in tracking numbers. It is a profoundly creative pursuit as well. It is the intersection between art and science that makes a great beer, and not just chemistry and hitting all of your numbers.
Central to the artistic side is the understanding and careful blending of flavor and aroma. For even beer brewed using sound techniques can taste bad, and I’ve sampled many examples of outstanding beers brewed in far from ideal conditions. I’d argue there is a more recent trend entering both the craft beer and homebrewing markets that focuses on flavor and not just science.
Pancakes and Beer
I was making breakfast one morning with a box of BisquickTM at my side. BisquickTM is a simple boxed pancake mix composed mostly of flour with a bit of rising agent in it. However, on the side of the box of BisquickTM is a series of recipes for other things you can make from the mix. Recipes included biscuits, shortcake, pancakes, dumplings, and waffles. A quick search online turns up more recipes for things like cakes, pies, cheese balls, pot pies, stuffed mushrooms, and many other foods that use BisquickTM as the primary ingredient.
Browsing the recipes on the side of the box, I noticed that they all share some combination of common ingredients like milk, butter, eggs, oil, sugar, and vanilla, but these ingredients are arranged in slightly different ways to create the wide variety of BisquickTM-based foods. All these foods are based on subtle combinations of the same basic ingredients.
The other thing that I found interesting is that as adults we all have knowledge of the various ingredients. Each of you know what butter, sugar, milk, vanilla, eggs, flour, and oil taste like because you’ve been tasting them since you were big enough to stick your finger in the butter or bowl of sugar and put it into your mouth. You literally have a lifetime of knowledge on each of the ingredients used to make biscuits, pancakes, shortcake, or any number of other foods.
Beyond that you also know what combinations of ingredients taste like whether it be butter and sugar mixed to create cookie dough or flour and oil used to make bread. This knowledge has been developed over a lifetime of tasting, cooking, and enjoying foods made from a handful of staple
baking ingredients.
But what of beer? Do you really understand the difference in flavor between a brown malt and a crystal 60 malt? How is the flavor and aroma of Citra® different than Mosaic®? What happens to the beer flavor if you use an English ale yeast instead of a California ale yeast? These are questions that are important to be able to answer if you want to build the best recipes as flavor and aroma are at the very core of brewing – even more so than mash chemistry or yeast pitch rates.
Expanding Your Flavor Knowledge
There are several ways to develop a larger base of expert knowledge on ingredient flavor and aroma and how those flavors manifest themselves in a finished beer. The first of these is to gain expertise in judging beers.
Becoming a formal or informal beer judge will expose you to the major styles, flavors, and off-flavors in beer as well as the terminology used to describe beer flavors. Understanding that “diacetyl” refers to a buttery popcorn-like finish in the beer, for example, gives you a common reference point and term you can use that fellow brewers understand. You also will gain knowledge of common imbalances in beer and how they affect flavor.
Formal beer judging can also be a great experience as you’ll understand a wider variety of beer styles, often have access to the underlying recipe used in homebrew competitions, and have a chance to compare your opinion on beer with other judges who may be more experienced.
As you gain experience judging you can expand to evaluating commercial beers, even though you may not know the exact recipe used. I try to take a few minutes with any new beer I taste to evaluate it as impartially as possible to see if I can pick up imbalances, off-flavors, distinct ingredients used, as well as formulate an overall impression in my mind. With time it is not hard to pick out a specific hop or
malt used.
Another great method for expanding your flavor expertise is Single Malt and Single Hop (SMaSH) brewing. This involves brewing small batches of beer with only one malt and one hop so you can see precisely what the flavor from those ingredients is. You can expand this to brewing batches varying only the water or yeast, or adding a second hop or malt to see how it impacts flavor as well. Learn more about SMaSH brewing in this article on the subject.
Ingredient Sensory Evaluation
Beyond beer judging and SMaSH brewing, another method to develop ingredient knowledge is through sensory evaluation. This involves methods to individually taste or smell ingredients to simulate what they might smell or taste like in a finished beer without having to brew the beer. These methods will be the focus of the remainder of this article.
Hop Sensory Evaluation

Hops add well over 500 flavor and aroma compounds to beer. As a result of the craft brewing revolution and dominant position of IPAs in the craft beer market, we know more about hop bitterness, flavor, and aroma than ever before. There has also been a revolution in how we use hops. While at one time hops were mainly valued for their preservative and bittering properties, the most prized hops are now selected for their aromatic properties.
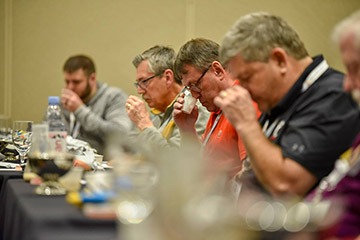
Fortunately, sensory analysis of hops is simple to do and provides an excellent indication of hop aroma, freshness, and flavor. I personally prefer to evaluate several varieties of hops at a time as I find that this gives a baseline for evaluation and helps to highlight hops that are truly fresh as well as those that are of poor quality. The best way to perform sensory analysis of hops is to have at least three varieties available, though certainly more can be used. Most professionals use a small panel of people, which lets each person evaluate and discuss their own perceptions. Having a hop sensory panel is a great activity for a brew club or small group of brewers.
When evaluating hop pellets, begin with a few pellets and crush them up with the back of a spoon until you get a fine powder. Put a pinch of the powder into your hand and rub both hands together until the hops begin to warm slightly and then open your hands and insert your nose down into the hops. This is called a “dry rub” and it should give you a burst of aroma highlighting the hop variety used. You can also do hop rubs with fresh hop cones (which can give you a sense of when to harvest if you grow your own hops) or dried whole-leaf hops. In this case, place one or two hop cones between your hands and do the rub. As you perform your sensory analysis it is helpful to take notes on the aromas and flavors you pick up from each variety.
By using several varieties, you can also get a strong indication of the freshness of each. Likely one or more varieties will really be fresh and popping with myriad aromas. It is also likely you may run into a few stinkers with a muted, stale, or otherwise unpleasant aroma. Often these poor-quality hops were not harvested, processed, packaged, or stored right, and may not necessarily reflect the underlying flavor of the variety itself, so before writing off a variety try evaluating them from a few different crops/vintages/suppliers.
I do urge all brewers to perform a basic dry rub on their hops before you begin to brew. In my experience as many as 1 in 10 homebrew-sized packages of hops I’ve sampled can be of poor quality. The last thing you want to do is brew a great beer and drop sub-par hops into it.
Hop suppliers have been performing aroma sensory evaluation for many years, and many suppliers publish this information online. Most hop suppliers and merchants express data using spider charts on their website showing panel aroma evaluations for all their varieties. For instance, Hopsteiner hops are evaluated by a panel of judges for aroma on a scale of zero to five in the following characteristics: Citrus, Fruity, Floral, Herbal, Spicy, Resinous, Sugar-like, and Other. They also publish an aroma specification for each hop and in many cases suitable substitute hops to use. This type of information is useful to help you narrow your hop search and provides a guide when performing sensory analysis to see which aromas you can pick up yourself. Other suppliers provide similar flavor profiles and aroma intensity information on their websites as well.
With the wealth of information from hop suppliers, it makes sense to use it to your advantage as you begin your ingredient evaluation, but always evaluate hops yourself in a sensory panel.
Grain Sensory Analysis
Evaluating the flavor of malts has traditionally been a bit tricky short of brewing with them. Many of us have tried chewing raw malt, which does give some sense of the flavor of the malt, however I find it unsatisfying and hard on your teeth. Fortunately, several years back the American Society of Brewing Chemists (ASBC) published a “hot steep” method for malt sensory analysis that is easy to perform at home but still gives you a good representation of the flavor profile of the malt.
This method involves making “hot tea” using finely crushed malt, hot water, and a coffee filter. The process is best done with several malts at a time so you can do a comparative analysis. Like hop sensory analysis, this is a great project for a homebrew club or panel of brewers working together and sharing impressions.
The precise method to use is summarized here. Note that different quantities are used depending on the malt type (base malts, specialty malts, or roasted malts):

Weigh a sample of 50 grams (1.75 oz.) of base malt. If evaluating specialty malts, instead use 25 g (0.88 oz.) of specialty malt blended with another 25 g (0.88 oz.) of pale base malt. For dark roasted malts, use 7.5 g (0.25 oz.) of roast malt with 42.5 g (1.5 oz.) of pale base malt. Obviously, you can double or triple the amount of malt and water if you need a larger sample for a group
to evaluate.
Mill the grains in a clean electric grinder for about 10 seconds. A coffee grinder works well for this as you want a coarse flour consistency — finer than what you would typically use for brewing.
Heat 450 mL (15 fl oz.) of water to 149 °F (65 °C) and combine it with the crushed grain sample in an insulated Thermos or growler and shake it for 20 seconds to mix the grain and water. Let the mixture stand for 15 minutes.
While the mixture is steeping, place some filter paper (Alstrom 515) at the top of a clean beaker or glass. A coffee filter is a suitable substitute if you don’t have access to lab paper filters. Wet the paper with some deionized water.
Swirl the Thermos/growler to bring the particles back into solution and pour the mixture into the filter. Draw the first 100 mL (just under 1⁄2 cup) off the collected wort and pour it back into the thermos to collect any remaining grains then pour that also into the filter. Allow the filter to drain completely leaving your liquid sample.
Let the sample cool and do your sensory evaluation when it has reached room temperature, within four hours of filtering.
The final sensory analysis is done by tasting the cooled samples. While more time-consuming than chewing raw malt, this method provides a good approximation of the finished malt flavor and provides a great baseline for comparing the flavor and aroma of two similar malts. It is basically the gold standard for malt sensory analysis short of brewing a beer with it.
As with hops, some of the larger malt providers publish sensory analysis along with their malt data on their websites. Many maltsters provide spider charts or flavor wheels on their websites for all their malts with the sensory profile done by a panel using the ASBC hot steep method. These generally offer panel evaluation of the following flavors: Sweet, Malty, Bready, Graham Cracker, Honey, Biscuit, Nutty, Toast, and Grainy. Along with this they provide general descriptions and recommended applications for each malt. These data sheets and analysis can be used to aid in searching for grains as well as guides when doing your own sensory evaluation of the malts.
Yeast Analysis
Unfortunately, there is no known method to do yeast sensory analysis short of brewing beer. If you are fortunate enough to be near the White Labs breweries in Asheville, North Carolina, or San Diego, California, they do offer a variety of beers made with the same wort but different yeasts. Here you can sample, side-by-side, identical beers made with different yeasts to see what the differences are in the finished beers. Obviously, you can do the same at home by splitting a batch of beer before fermentation and using two different yeasts to compare strain traits. Be sure to record the results!
All major yeast labs provide fermentation data that can help you compare yeast strains on paper and determine what flavors to expect in a finished beer. The basic data you will find from most yeast provider data sheets includes:
Type – The type of yeast – typically Ale, Lager, Wheat, Hybrid, Wine, or Champagne.
Attenuation – The percent of the sugars (gravity points) you can expect to ferment into alcohol — usually quoted as “apparent attenuation.”
Temperature – The recommended fermentation range for the yeast.
Flocculation – An indication of how quickly the yeast “falls out” of beer after fermentation.
Alcohol Tolerance – Highest alcohol percentage the yeast can tolerate before it goes dormant.
Other Variables – These days you will often find if a yeast strain is POF+ (positive for phenolic off-flavor), STA-1+ (positive of the STA-1
gene that indicates diastaticus), as well as whether a strain will ferment maltotriose.
Out of the above, the genetics of the yeast strain found in Other Variables is probably the most impactful and helps dictate attenuation. A high attenuation yeast will give you more alcohol but fewer sugars, resulting in a cleaner but lower bodied beer. A low attenuation yeast will leave more unfermented sugars for a maltier finish with more body and malty flavor in the beer.
Also of interest is the fermentation data, which is collected by analyzing beer made with a given strain. Unfortunately, this data can be hard to find and depends on multiple factors related to wort and fermentation process, but some yeast providers have started publishing it. These may include:
Isoamyl Alcohol/Acetate: The primary ester in beer and a measure of ester production for yeast. Banana or pear blossom flavor in small quantities.
Acetaldehyde: Intermediate compound produced during fermentation (green apple flavor).
Ethyl Acetate: (Ester) Strongest of the common esters (fruits, pears, solvents if too much).
2,3 Pentainedione: Vicinal Diketone (VDK like diacetyl) gives a honey flavor, but has 10x lower flavor threshold.
Diacetyl: (VDK) Buttery popcorn-like flavor.
1-Propanol: Fusel alcohol can give off alcoholic odor to a strong solvent-like or moonshine flavor at higher concentrations.
Ethanol: Simply the alcohol percentage of the test batch
Hours to 50%: Time it takes to reach 50% fermented — indication of how quickly the yeast ferments out.
You may notice that many of the flavors listed are considered “off-flavors” above certain thresholds in certain beers. For example, excessive esters or diacetyl would not be desirable at all in a European lager but might be perfectly at home in an English pale ale. While these compounds are natural byproducts of fermentation in both cases, a European lager yeast would produce much lower levels of both. So, if you have access to this data for your yeast strains you can use that data to help make flavor comparisons.
Water Analysis
Sensory analysis can also be performed on water. John Palmer has been running sessions for several years now where participants sample various water profiles, often built up from distilled water and salt additions to create specific profiles used in brewing. You can purchase distilled water from your local grocery store and calculate the adjustment salts to add using your favorite brewing software or online water calculator. Most people can taste the difference between different water profiles using this method, and it can be a useful introduction to the varied world of brewing water.
The challenge, of course, is that the water chemistry does react with other ingredients during the brewing and fermentation processes so tasting water alone does not really give you a completely accurate picture of how the water might manifest itself in a finished beer. For example, waters with different sulfate-to-chloride ratios may taste slightly different in their plain form, but they won’t reflect the malt/hop balance you will get in a finished beer without the actual malt and hops.
Not surprisingly, changing your water profile does have a profound impact on the finished beer and in blind taste tests water is one of the simpler changes to detect. This is probably because it makes up over 90% of the base in most beers and also that many of the major water ions do interact during the mash or fermentation to produce slightly different flavors in the finished beer.
While there is no “water supplier” guide you can use to help you select the perfect water profile, there are many available water profiles that you can easily match using brewing or water software. These generally have two forms — either “match a city” or “match a style.” Most brewers have moved away from matching particular brewing cities, in part because the breweries in these cities often make small changes to their water. Also, as our knowledge of water has improved, we’re now able to make more precise adjustments to achieve a given goal.
While mash pH and sulfate/chloride water adjustments are a topic that could easily fill several more articles, a good place to start is to find a water profile that is suitable for the style of beer you are brewing and then adjust your local water as needed to match that profile.
Summary
The recent focus on flavor in both craft beer and homebrewing has pushed more brewers beyond “technical” brewing to understand the artistic side of brewing. Fundamental to this approach is understanding the flavors and aromas of beer ingredients and how those flavors manifest themselves in beer.
I encourage you to carefully evaluate new beers from a flavor and aroma perspective, and to use sensory analysis where possible on individual ingredients to understand their contribution. Over time you can gain expert knowledge of ingredient flavors and aromas like the expert knowledge you have for common baking ingredients and foods. Only by understanding ingredient flavor and aroma can you make the shift from brewing by the numbers to brewing to create specific flavors and aroma in your beer.