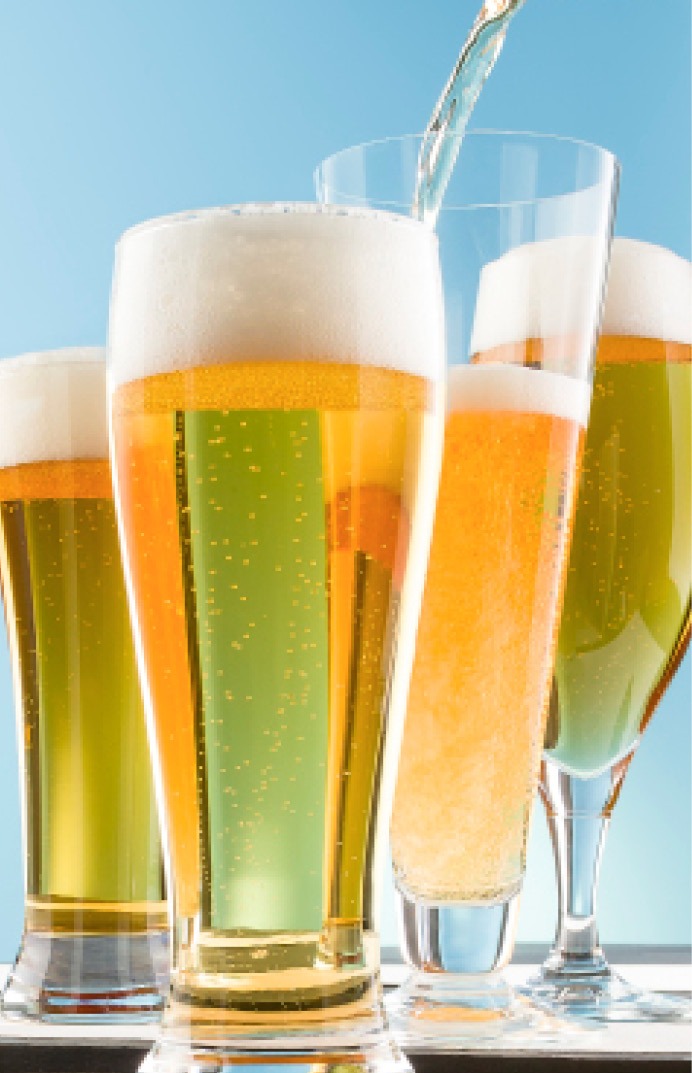
Fast Lagers: Ferment Your Favorite Lagers in Less Time
When I was a new homebrewer, I think I was like pretty much every other new homebrewer. The thrill of making beer for yourself overwhelmed me and I wanted to brew pretty much every style of beer I saw or read about. Like a lot of you, I started with dark beers. Porters and stouts were what I craved and I brewed as many of them in as many different variations as I could. That eventually gave way to things like pale ales and IPAs, and after that I bounced to things like altbier and various Belgian styles. But it took me 10 years before I got up the nerve to try a lager. It certainly wasn’t because I didn’t like lagers. German Pilsner has always been one of my favorite beer styles, and a good doppelbock makes me salivate. No, it was because lagers had the reputation of being difficult, time consuming beers to brew. The actual brewing itself wasn’t so much the issue. It was the fermentation. You needed to ferment them for a long time at cold temperatures before lagering them for months after the fermentation was done. It’s well known that I’m lazy, but I’m also impatient — I just didn’t want to deal with that!
Finally, I broke down and entered LagerLand. I didn’t have any means to really control fermentation, so I would only brew them in the winter. That meant that I could only brew a few lagers a year. I would ferment them in a tub of water to help keep temperatures steady over the course of the weeks (or sometimes months) that they were fermenting. After the fermentation was complete, I’d set them in a corner of my garage and hope that the lagering was done before spring came around and the temperature warmed up. Eventually I got a chest freezer and temperature controller. But I had to tie up my chest freezer for those long periods of time, meaning that while a lager was working I couldn’t brew anything else. Sure, being lazy, impatient me meant that I rushed things a few times and it didn’t seem to hurt the beer most of the time. But sometimes it did. And I wondered if maybe I was on the right track but the details were wrong.
Finally I began to hear talk of a fast lager fermentation method that made stellar lagers. It made sense because I knew that big lager breweries couldn’t take that long. Tying up their equipment for months at a time to make lagers would be financially disastrous for them.
As I looked into the “fast lager” technique further, it appeared that this method had been known and used for quite a long time. Once again, we homebrewers had been fooled by a myth. We had accepted that lager fermentation was a lengthy procedure without really looking for evidence to the contrary. But now, that myth has been busted and those days are over. Basically, it’s like this: Once fermentation has reached the first half (or so) of the expected total attenuation, you can start raising the temperature to speed fermentation without experiencing detrimental effects on the beer. Most people cite the book Abriss der Bierbrauerei (Overview of Beer Brewing) by Ludwig Narziss as the source of their fast fermentation information. It’s also found in New Brewing Lager Beer by Greg Noonan, and more recently on the websites of Kai Troester (www.braukaiser.com) and Brülosophy. Information has also come from homebrewer Mike “Tasty” McDole and the book Homebrew All Stars, co authored by yours truly and Drew Beechum.

Theory from John Palmer
You’d think that with the sometimes blind regard homebrewers often have for commercial breweries that the fast lager method would have become a common practice long ago, especially since many homebrewers are already using a similar process for fermenting ales. But it has only recently become popular with homebrewers. I asked John Palmer, the author of How To Brew, for his thoughts on it:
“One hundred to one hundred-fifty years ago, fermentation was open, followed by maturation in a wooden cask,” said Palmer. “The beer was prone to contamination. This could be mitigated by heavy hopping and long warm maturation to wait for the bitterness to die down, or by long cold maturation (lagering) to use temperature to keep the contamination down.
“Yeast have three phases in their life cycle: Adaptation, high growth, and stationary. (See Yeast by Chris White and Jamil Zainasheff). They do not have a maturation phase where they clean up byproducts. Adaptation phase is where they take in oxygen and build sterols and other lipids, assess the sugar composition and build enzymes, etc. Once those activities are done, they start the high growth phase, eating and reproducing. The number of cell divisions is limited by their lipid reserves they made during adaptation. These reserves are shared with each daughter cell. When those lipid reserves are exhausted, the cell stops reproducing. In addition, when those reserves are exhausted, the cell is old and cannot eat or excrete waste efficiently across its cell membrane. “A yeast cell typically can reproduce about four times during a typical fermentation, after that it is old and tired and tends to enter stationary phase where it shuts down most of its metabolism and flocculates, waiting for the next batch of aerated wort. Stationary phase is essentially an inactivity phase, resting on the bottom.
“Like I said, there is no conditioning phase as far as the yeast is concerned. Byproducts can be consumed at any point during the high growth phase, but they are a lower energy source than sugar, so guess what? Byproducts are not a biological priority. The brewer therefore needs to plan his pitching rate and fermentation conditions such that the yeast run out of fermentable wort sugar before their lipid reserves are exhausted and they go into stationary phase. Now you have a majority of vigorous yeast that have only undergone 2 reproductions (for example), the sugar is gone, and they are still hungry, so they turn to acetaldehyde and diacetyl as alternate energy sources and maturate the beer.
“You can help this by doing a diacetyl rest by raising the temperature a few degrees after the first half of fermentation, to keep the yeast active and eating. Where in the fermentation? After the first half, 2⁄3 to 3⁄4, when most of the attenuation has occurred and raising the temperature is not going to cause rampant growth and the off-flavors associated with it.
“Modern brewers have use of closed stainless steel tanks, which allows them to prevent oxidation, pull the yeast, and control the temperature. This plus our understanding of the yeast cycle above changes the way we ferment lagers, so now lager beer fermentation is started cooler to control yeast growth and allowed or controlled to rise during fermentation to the diacetyl rest, such that ALL of the fermentation and maturation is complete before the beer is cooled to lagering temperature. The effect of temperature at this stage is strictly physical, increasing the strength of hydrogen bonds to coagulate beer haze and help it settle out. The yeast are still susceptible to temperature shock and lipid excretion, so the cooling to lager temperature 35–38 °F (2–3 °C) still has to be slow, i.e. 5 °F (3 °C) per day.
“Please note that this behavior and fermentation technique is applicable to ALL beers, not just lager beer.”
What John is saying is that starting to raise the temperature when the fermentation is only partially done, you’ll help the yeast be sure that the sugar is consumed sooner and that there will be plenty of lipids left to “nourish” the yeast and clean up byproducts. Since they turn to byproducts once the fermentable sugars are gone, you want those sugars fermented out before the yeast runs out of “oomph.”
Fast Tasty Lagers
One of the big proponents of the technique in the homebrew world is well-known homebrewer Mike “Tasty” McDole. Mike says, “Because of the podcast platform and its far reach, I’ve influenced a large number of brewers to give the Narziss fermentation a try. My personal experience lines up with the feedback I get from brewers. They report no appreciable difference between a 2-week and a 5-week lager.”
So, how the heck do you actually do it? For that, we’ll turn to the book Homebrew All Stars and Mike’s description of the process. Mike has played with and refined what he considers the perfect fast lager schedule for us homebrewers. Here’s how he describes it:
“I pitch and oxygenate at 55 °F (13 °C) and hold until the gravity drops 50 percent of the way to terminal gravity. For example, if my OG is 1.052, and I expect to finish at about 1.010, then a drop of 21 gravity points would be 50 percent.”
The math works like this:
Original Gravity (OG) = 1.052 or 52 points
Final Gravity (FG) = 1.010 or 10 points
Total Gravity Drop (TGD) = OG – FG = 52 – 10 = 42
Mike is watching for a 50 percent gravity drop or 21 points (42 divided by 2) for this hypothetical lager. In other words, when the beer reaches 1.031 SG (52 minus 21), it’s time to move onto the next step.
Mike continues: “I then raise the fermentation temperature by 3 degrees to 58 °F (14 °C) and hold until the gravity drops 75 percent of the way to terminal gravity.”
For our example beer, the fermentations at 58 °F (14 °C) would continue until it reaches 1.020 to 1.021 DG. We arrive at that figure by calculating our total gravity drop x 0.75 and subtracting that from the original gravity or:
Target gravity = OG – (TGD x 0.75)
Target gravity = 52 – (42 x 0.75)
Target gravity = 52 – 31.5
Target gravity = 20.5
Onto the next step with Mike: “I then raise the fermentation temperature by 4 degrees to 62 °F (17 °C) and hold until the gravity drops 90 percent of the way to terminal gravity.”
Target gravity = 52 – (42 x 0.9)
Target gravity = 52 – 37.8
Target gravity = 14.2
So, hold at 62 °F (17 °C) until about 1.014 SG.
Finally to the finish line:
“I then raise the fermentation temperature by 4 °F (2 °C) to 66 °F (19 °C) and hold until I reach terminal gravity. With this method, 75 percent of the fermentation takes place at 58 °F (14 °C) or below, 90 percent at 62 °F (17 °C) or below.
In my experience, the first part (50 percent gravity drop) can be as short as four to five days. The important thing is to check the gravity — no guessing! A high gravity lager will take longer to reach this point than an ‘average’ 1.045 to 1.055 OG lager.
But the most amazing part of this technique is that a lager can be in your glass in as little as two weeks after brewing it. No guarantees, of course, since it depends on your beer, but it’s proof that you don’t need months to make a great lager.”
REVIEW: THE TASTY FAST LAGER SCHEDULE
Calculate your total gravity drop based on original gravity and yeast strain choice (75 to 80 percent is usual).
1. Chill the wort to 55 °F (13 °C) and pitch the yeast.
2. When the ferment is 50 percent complete, raise temperature to 58 °F (14 °C).
3. When the ferment is 75 percent complete, raise to 62 °F (17 °C).
4. When the ferment is 90 percent complete, raise to 66 °F (19 °C) and hold until at terminal gravity.
The Brülosophy Method
If you look around, you’ll see some alternative fast lager ideas floating around there. Brülosohphy founder Marshall Schott has a hybrid method that incorporates a traditional lager cold crash (http://brulosophy.com/methods/lager-method/). Instead of Mike’s gravity-based checkpoints, Marshall waits for the beer to hit 50 percent attenuation and then ramps the temperature a steady five degrees every twelve hours until he reaches 65 to 68 °F (18 to 20 °C). Once the beer is stable and without diacetyl (butter) or acetaldehyde (green apple), Marshall chills the beer 5 to 8 °F (3 to 4 °C) every twelve hours until it reaches 32 °F (0 °C). Once there, he lets it hang for two to three days to clarify. Here’s a quick overview of Marshall’s method:
Primary Fermentation
Chill wort to pitching temperature of 48–53 °F (9–12°C), pitch an adequately sized starter (decanted), set regulator to initial fermentation temperature between 50–55 °F (10–13 °C), and leave the beer to ferment until it is at least 50% attenuated. I’ve found the time this takes is dependent on two primary factors:
1. Original Gravity: A 1.080 OG doppelbock is going to take longer to reach 50% attenuation than a 1.048 OG helles.
2. Yeast Type: In my experience, rehydrated dry lager yeasts take 12–36 hours longer to show signs of active fermentation compared to liquid yeasts built up in starters or even slurry harvested from a prior batch.
I originally advised leaving the fermenting beer at primary temperature for five days assuming folks were checking SG (specific gravity) prior to making temperature changes. This was a mistake on my part. While it is possible even high OG beers will reach 50% attenuation in this amount of time, I’ve heard from a couple folks who experience differently. As such, Figure 1 at the bottom of the page are my new better-safe-than-sorry recommendations.
Another factor to consider is your preferred primary fermentation temperature, as yeast is going to work a bit faster at 54 °F (12 °C) compared to 48 °F (9°C). The original five-day recommendation will likely hold true for most folks, as it has for me, I just want to emphasize the importance of taking SG measurements prior to making temperature changes.
Ramp Up
Once 50% attenuation is reached, remove the probe from the side of the fermenter so it measures ambient temperature in the chamber and start bumping the regulator up 5 °F (3 °C) every 12 hours until it reaches 65–68 °F (18–20 °C). Allow the beer to remain at this temperature until fermentation is complete and the yeast have cleaned-up after themselves, which can take anywhere from 4 to 10 days.
Alternate Option : Keep the temperature probe attached to the fermenter and forgo the incremental temperature increases but immediately setting your regulator to 65–68 °F (18–20 °C). While I still prefer the more gentle approach to temperature increases, I’ve heard from many people that have had great success using this slightly less time-consuming approach.
Ramp Down
When FG is stable and no diacetyl or acetaldehyde is detected in the beer, begin ramping the temperature down in 5–8 °F (3–4 °C) increments every 12 hours or so until it reaches 30–32 °F (-1–0 °C). Allow the beer to remain at this temperature for 3–5 days, during which it will begin to drop clear.
Alternate Option: Setting the regulator to 30–32 °F (-1–0 °C) without gradually stepping the temp down will shave 2–3 days off of the entire process. Many brewers have done this with positive results, myself included, though I still tend to prefer the original method if only to reduce the amount of airlock fluid that gets sucked into the beer as it crashes.
Author’s note: I always use the alternate “temperature crash” method. As long as fermentation is completely done, there’s no reason to do a ramp down. The theory behind doing that is that the yeast will keep slowly working to clean up byproducts in the beer. But if that has been done before the temperature crash, there’s no reason to do it again.
My own experience has used both Mike’s and Marshall’s processes with great success. I guess the takeaway is that the theory is more important than the exact process. There are at least a couple ways to go about speeding up lager fermentation, and as long as you understand what’s going on and why it works, you’re free to adjust the process based on your own schedule and theories. And although this article is about using the technique to speed up lagers, please note that, as John Palmer says, it’s equally applicable to ales.
One question that frequently comes up when describing the fast lager fermentation process is “Are there certain strains of yeast that react better to the method? Are there some that I should avoid when I do this?” What I and other homebrewers have found is that the method is not yeast strain dependent. You can still keep using your favorite lager yeast with the fast lager fermentation method.
Fermentation Recommendations
OG of Wort: ≤ 1.060, Yeast Type: Liquid, Approximate Primary Time: 4–7 days
OG of Wort: ≤ 1.060, Yeast Type: Dry, Approximate Primary Time: 5–8 days
OG of Wort:≥ 1.061, Yeast Type: Liquid, Approximate Primary Time: 6–10 days
OG of Wort:≥ 1.061, Yeast Type: Dry, Approximate Primary Time: 7–14 days
Start Fast Lagering
If you’ve been avoiding lagers like I did, fearing that they were just too time consuming, you need to try this method. You can have a great lager ready to drink in as little as two weeks. And even if it takes you a bit longer, you’ll still be ahead of the “traditional” timetable. Yes, it does take a bit more effort to monitor the gravity and adjust the temperature control on your freezer, but not that much time…and hey, who doesn’t like to play with their beer?
So, what are you waiting for? Doesn’t a nice German Pilsner or helles, or bock, or any other tasty lager sound good right about now? Give the fast lager fermentation process a try and by the time the next issue of Brew Your Own hits your inbox, you could be drinking a delicious lager you brewed yourself!
Blonde Doppelbock
(5 gallons/19 L, all-grain)
OG = 1.078 FG = 1.018
IBU = 28 SRM = 7 ABV = 8.4%
A high-caliber Doppelbock, brewed using the Fast Tasty Lagers method of fermentation.
Ingredients
16 lbs. (7.3 kg) German Pilsener malt
8 oz. (227 g) aromatic malt
4 oz. (113 g) melanoidin malt
4 oz. (113 g) Caravienna® malt
3 AAU German Spalt hops (60 min.)
(1 oz./28 g at 3% alpha acids)
4.3 AAU German Tettnang hops
(60 min.) (1 oz./28 g at 4.3% alpha acids)
4.4 AAU Czech Saaz hops (10 min.)
(1 oz./28 g at 4.4% alpha acids)
1⁄2 tsp. yeast nutrient (10 min.)
1⁄2 Whirlfloc tablet (5 min.)
Wyeast 2206 (Bavarian Lager) or White Labs WLP820 (Oktoberfest/Märzen Lager) yeast
2⁄3 cup corn sugar (if priming)
Step by Step
This is a multi-step mash schedule. Mill the grains and mix with 17 qts. (16 L) of 148 °F (64 °C) strike water to reach a mash temperature of 132 °F (56 °C). Hold this temperature for 15 minutes. Infuse the mash with 8.2 qts. (7.8 L) boiling water to raise the mash temperature up to 155 °F (68 °C). Hold at this temperature for 60 minutes. If you can, raise the grain bed up to mash out temperature of 168 °F (76 °C). Otherwise, begin your vorlauf until your runnings are clear. Sparge the grains with enough water to collect 7 gallons (26.5 L) of wort in the kettle. Boil for 90 minutes, adding hops, yeast nutrient and kettle fining according to the ingredients list.
There should be 5.5 gallons (21 L) of wort in the kettle when finished with the boil. After the boil, chill the wort to slightly below fermentation temperature, about 55 °F (13 °C). Aerate the wort with pure oxygen or filtered air, transfer to the fermenter and pitch yeast. Ferment at 55 °F (12 °C) until gravity reaches 1.048, then raise the temperature to 58 °F (14 °C). Hold at this temperature until gravity reaches 1.033, then raise the temperature to 62 °F (17 °C). Hold at this temperature until gravity reaches 1.024, then raise the temperature to 66 °F (19 °C) until terminal gravity is reached. Cool the beer to allow the yeast to settle. Bottle or keg.
Partial mash option:
Scale the German Pilsener malt down to 1 lb. (0.45 kg), and add 8.5 lbs. (3.9 kg) dried malt extract to your ingredients list. Mill the grains and place in a muslin bag. Submerge the grain in 3 qts. (3 L) of 168 °F (76 °C) water to stabilize the mash at 155 °F (68 °C). Hold at this temperature for 60 minutes. Remove the grain bag and place them in a colander. Wash the grains with 1 gallon (4 L) hot water, collecting the wash water back in the brew pot. Stir in the dried malt extract and stir until completely dissolved. Top off to 6.5 gallons (25 L) of wort in the kettle. Now follow remainder of the all-grain recipe.
Czech Dunkel
(5 gallons/19 L, all-grain)
OG = 1.051 FG = 1.011
IBU = 26 SRM = 17
ABV = 5.4%
A smooth drinking Dunkel, brewed using the The Brülosophy Method of fermentation.
Ingredients
5 lbs. (2.27 kg) Belgian Pilsner malt
3 lbs. (1.36 kg) US light Munich malt (10 °L)
2 lbs. (0.91 kg) US dark Munich malt (20 °L)
8 oz. (227 g) caramel Munich malt (80 °L)
2 oz. (57 g) Carafa® II malt (430 °L)
2 AAU Hallertau Tradition hops
(first wort hop) (0.5 oz./14 g at 4% alpha acids)
5 AAU Hallertau Tradition hops
(60 min.) (1.25 oz./35 g at 4% alpha acids)
1 Whirlfloc tablet (15 min.)
White Labs WLP833 (German Bock Lager) or Wyeast 2308 (Munich Lager) yeast
2⁄3 cup corn sugar (if priming)
Step by Step
This is a multi-step mash schedule. Mill the grains and mix with 10.6 qts. (10 L) of 162 °F (72 °C) strike water to reach a mash temperature of
142 °F (61 °C). Hold this temperature for 30 minutes. Infuse the mash with 3.6 qts. (3.4 L) boiling water to raise the mash temperature up to 158 °F (70 °C). Hold at this temperature for 30 minutes. Infuse the mash with 3.6 qts. (3.4 L) boiling water to raise the mash temperature up to 168 °F (76 °C). Hold at this temperature for 10 minutes. Begin your vorlauf until your runnings are clear. Sparge the grains with enough water to collect 6 gallons (23 L) of wort in the kettle, adding the first wort hops to the kettle early in the sparge phase. Boil for 60 minutes, adding hops and kettle fining according to the ingredients list. There should be 5 gallons (19 L) of wort in the kettle when finished with the boil.
After the boil, chill the wort to slightly below fermentation temperature, about 51 °F (11 °C). Aerate the wort with pure oxygen or filtered air, transfer to the fermenter and pitch yeast. Ferment at 53 °F (12 °C) until gravity reaches 1.031, then begin raising the temperature about 5 °F (3 °C) every 12 hours until the fermenter reaches a temperature of 65–68 °F (18–20 °C). Hold at this temperature for 2–3 days or until no signs of diacetyl or acetaldehyde are present. Begin slowly cooling the beer, dropping the temperature 5–8 °F (3–4 °C) every 12 hours until it reaches 32 °F (0 °C). Bottle or keg as normal.


