Forced Carbing: Don’t take this ingredient for granted
We take great care in selecting our ingredients but we make almost no distinction as to the quality of our carbon dioxide (CO2) and the precision with which we use it. Carbonation plays a significant role in developing the mouthfeel, aroma, flavor, and presentation of the beer. CO2 is also weakly acidic, so it can affect the pH of the final beer. For this column I’ll be focusing on the bottled form of carbon dioxide that many of us buy from a local homebrew shop or gas shop. So let’s take a little time to understand the intricacies of this ingredient to help us maximize our time, effort, and investment in every beer we brew.
CO2 is a handy and often-used tool by brewers to move liquids around (racking), flushing the oxygen from storage vessels (purging), and of course the most important — providing CO2 to force carbonate kegged beer. Carbonating a keg is something I always see questions about. While it is a very simple concept there are a few things to keep in mind and a few errors in the way we are taught. So let’s start this journey by learning about some of the traps we may fall prey to.
Our Handy CO2 Chart
The first thing we are taught is to find a reliable CO2 chart that will guide us through the forced carbonation process. The two main variables found on these charts are temperature and pressure. Often our kegerators are set to a certain temperature, so the temperature is often a fixed setting. The pressure from the CO2 tank can be changed rather easily thanks to our regulators, so often we will adjust the pressure in the keg to adjust the carbonation level of the beer. Therefore, for most brewers, the pressure on the beer is the control point . . . in other words, the thing that gets adjusted to get our desired level. When we line up the beer’s temperature with the keg’s pressure we assume to find the carbonation level.
So the first major decision we need to make when we are ready to package the beer is: What carbonation level am I seeking for this beer? As an aside, I have noticed that the CO2 levels over the last 10 years have been creeping up. Beers styles that were commonly 2.6 are 2.8 now. But I digress — many homebrewers may be running several kegs on one regulator. So if your kegerator is run on one regulator you may be left with doing a “best-fit” carbonation level . . . one that will work for all beers you have on tap. But for those more invested brewers, having multiple regulators allows you to have simultaneous kegs running at various carbonation levels. Something to think about!

My suggested CO2 levels:
Cask ales: 1.5 to 2.0 volumes
Ales: 2.3 to 2.6 volumes
Lagers: 2.4 to 2.6 volumes
Highly carbonated beers: 3.0+ (Note: Champagne is 6.3 and requires a special bottle.)
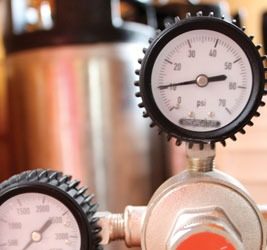
The carbonation chart will guide us to a specific pressure to set our regulator based on the gauge found on said regulator. This is where we may run into potential problems with the CO2 chart. You may not actually get the desired volume you were looking for when you pour your beer. Let’s look at some of the considerations not listed on a standard CO2 chart. One source of error is the difference between the gauge’s pressure and something called absolute pressure. We read gauge pressure as the difference (or delta) in pressure between atmospheric and the keg pressure. But carbonation levels only care about absolute pressure, which is the difference between a vacuum and the keg pressure. To get absolute pressure we need to add 14.7 psi (100 kPa) at sea level to our chart (this should already have been incorporated into the chart though). Atmospheric pressure drops roughly 0.5 psi (3.5 kPa) every 1,000 ft. (305 m) gained in elevation. So in Denver you need a full 3 psi (21 kPa) over the chart to get your beer to your carbonation level.
If you’re a brewer that likes to carbonate from the bottom of the keg, unitank, or serving vessel, then that different contact point affects the gauge pressure too. This “bottom up” approach to forced carbing can help speed things up, but we also need to increase pressure to account for the head pressure resulting from the weight of the beer. As a result, you’ll need an additional one psi (7 kPa) for every 28 in. (71 cm) of beer above the carbonation point.
Another source of error is the alcohol. Alcohol has a different CO2 solubility than water. The standard CO2 chart was measured with the alcohol at 4.8% ABV. As we move away from this alcohol level the chart becomes less and less accurate. This would be a good place for a curve fit equation but I have always used a liner assumption of 0.32 psi (2.2 kPa) per % alcohol above 4.8%. This is really accurate if we are close to 4.8%. At around 10% it needs some further correction.
Finally, the residual starches and sugars change carbon dioxide’s solubility so we need a final gravity correction as well. Our carbonation chart was made with the assumption that the FG is 1.015. As we move away from this number, solubility of CO2 also changes.
Pressure Correctness
So how do we convert a chart to an equation? Fortunately, beer guru AJ deLange has done a great job of working this out for us already using Henry’s Law:
Pabsolute = [(V + 0.003342)/(0.01821 + 0.090115e-((T – 32)/43.11))] – 14.7
P = Pressure (in psi)
V = Volumes of CO2 (1 volume = 1.96 g/L)
T = Temperature (in °F)
This equation simply allow us to come close to the CO2 chart data. But for those serving beer at high elevation, serving a big honker of a beer, carbonating from the bottom of a tank, or serving a super dry or super high FG beer, you may consider taking these into consideration.
Paltitude = (A/1000) x 0.53049
Where A is altitude in feet is our elevation correction.
Palcohol = (AVB – 4.8) x 0.32
Where ABV is alcohol by volume is our alcohol correction.
Phead = H/28
Where H is our height in inches from the carbonation point to the top of the beer is our height correction.
Pstarch = (FG – 1.015) x 5
Where FG is the final gravity is our residual sugar correction.
If we put these all together we end up with our master carbonation equation you could set up in a spreadsheet:
Pcorrected = Pabsolute + Paltitude + Palcohol + Phead + Pstarch
This equation can be improved if we make some curve fitting equations (such as the alcohol factor) for some of our corrections but in practice it works very well as is.
As an example, the kegerator is 40 °F (4 °C) and I want 2.8 volumes (5.5 g/L) of CO2 in my beer. My elevation is 1,000 ft. (305 m), the beer’s ABV is 5.5%, the carbonation point is 30 in. (76 cm) down in the tank, and the final gravity reading is 1.009. Plug it into my spreadsheet and I find my Pabsolute is 15.4 psi (106 kPa), Paltitude is 0.53 psi (3.7 kPa), Palcohol is 0.22 psi (1.5 kPa), Phead is 1.07 psi (7.7 kPa), and Pstarch is -0.03 psi (-0.2 kPa), meaning I need 17.2 psi (119 kPa) of gauge pressure to hit my desired carbonation level. Note that the pressure in the CO2 line will not equal the pressure on the top of the tank. Don’t use head space pressure here.
A final point to consider is if an air stone is added, often to the bottom of the keg/unitank, we insert a pressure drop called the wetting pressure. Fortunately it is pretty easy to measure the wetting pressure of our stone: Hook up your stone to CO2 and set the gauge to 0. Immerse your stone in water then slowly increase your pressure until you see bubbles start to form on the stone. This is your wetting pressure that should be added to the equation. Note: If your stone becomes clogged, your wetting pressure will change. This measurement is also a good way to check your cleaning methods.
Forcing a Forced Carbonation?
Now that we have our desired pressure we quickly realize that CO2 takes some time to dissolve into solution. As many of us do, we then try all the tricks to speed up this carbonation process. You’ll find folks who will roll the keg, rock the keg, hook up the CO2 to the beverage-in side and burp the keg, run over-pressure (very high pressure for a day or so) . . . all of these methods have advantages and disadvantages.
Anyone that has force carbonated before knows that dissolving the gas from the surface down through the top of the beer is the slowest method. Its rate is proportional to the surface area of the top of the beer and the volume of the beer. A short flat tank is the fastest. When we fill a corny keg completely full, it is very hard to carbonate from the top because there is very little surface area.
Adding an airstone at the bottom of the keg can help speed things up. This has the advantage of increasing the surface area of the bubbles and lowering the carbonation point lower in the keg helps give the bubbles more contact time before they rise to the surface. This would require a designated carbonation keg though for those brewers with multiple kegs and require added cleaning.
The other methods of shortening the carbonation time also come with disadvantages. The first is over-pressuring . . . cranking up the pressure for a set time frame then lower it to serving pressure when fully carbed. Over-pressuring the keg runs the risk of over-carbonation. Setting a reminder on your phone can be a helpful way to remember, and be sure to be safe rather than sorry — it is very difficult to lower the carbonation level of a keg once over-carbonated.
Another method popular in the homebrew world is shaking or rolling the keg to increase surface area. This may speed things up, but it also stirs up all of the sediment our aging process has removed. Some fining agents work much better the first time they settle than the second time, making a once clear beer cloudy after agitation.
The Source of our CO2
There are many ways to create CO2, but in the US the dominant methods are recovering CO2 from an industrial process that would normally be vented to the air. Industrial plants create CO2 from processes that produce hydrogen or ammonia from natural gas, coal, or other hydrocarbons as well as all processes that use yeast to make ethanol.
CO2 is purified after capture and divided into different grades. For brewing we use food-grade CO2. Food-grade can be used for most applications we brewers need CO2 and most local gas shops only offer this grade (since they have a single system to bottle CO2). But even food-grade CO2 comes with contaminants. The one that bothers me the most is benzene. Benzene is an aromatic hydrocarbon often found in CO2 from petroleum processing. It is usually undetectable but some people are sensitive to the headache it can cause.
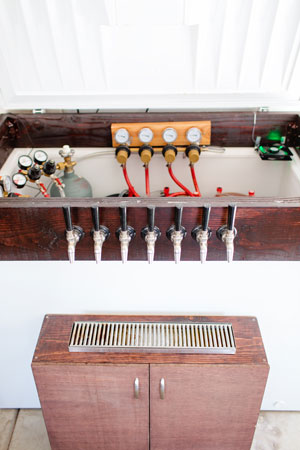
Many breweries and taprooms install CO2 filtration on the CO2 supply. A CO2 filter usually has a particle filter, a water trap, an activated carbon stage, sulfur removal stage, and finally another finer particle filter. Homebrewers could install an inline CO2 filter to their systems as well, but they aren’t that cheap, usually around $150–$200. One addtion that doesn’t cost as much and can easily be added to a draft system is a sterile filter. Adding a sterile filter to the end of lines can protect the gas system from getting back-contaminated by accidental backflows of beer.
Special thanks to Dinesh Padir for help with understanding natural logarithms in this work. He is a physicist, homebrewer, and all around good egg.