Growing and Brewing With Mushrooms
Narrow Gauge Forest Farm is a farm in Perry County, Pennsylvania, that cultivates mushrooms using hardwood logs from the forests of Pennsylvania. Chris and Lauren Chubb use the back portion of their property in the forest to grow several varieties of mushrooms on a cleared area where an abandoned rail line is located (the common rail sizes of the era were standard gauge and narrow gauge, which inspired the farm’s name).
After meeting the Chubbs at the local farmer’s market, we started discussing the possibility of brewing a beer using mushrooms. Besides my homebrewing, which I still do regularly, I am also the brewer at Lindgren Craft Brewery in nearby Duncannon, Pennsylvania. With our brewery motto being “Adventurously Brewed,” we felt like we had to take on this opportunity to make a special collaboration. To be adventurous we wanted to go along for the ride with Narrow Gauge Forest Farm and help them with all the tasks that it takes to grow and harvest mushrooms, then use those mushrooms in the brewing process. The process was one I believe many homebrewers may enjoy taking on as well.
Mushroom Variety Selection
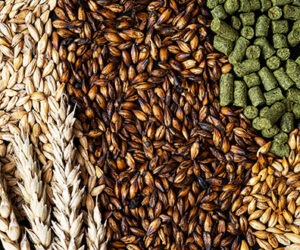
We started by selecting a mushroom variety that we wanted to use. You can grow and/or use any mushroom variety you would like. For our project we reviewed the several varieties that Narrow Gauge cultivates, which includes lion’s mane, oyster (golden, white, and grey), nameko, and shiitake being their main crop. For this year’s inoculation we chose the Night Velvet variety of shiitake mushrooms, which have a unique rich white chocolate character. At Narrow Gauge they have many log stacks from prior years that were inoculated with other shiitake varieties such as WR-46, West Wind, Halo, and Double Jewel. By stacking the logs by variety when harvest time arrives you can keep your varieties separate for individual variety use or mix them as they are harvested. For our project we wanted as much weight as possible so we harvested all of the varieties when they were ready for picking.
If you plan on skipping the cultivating section and purchasing your mushrooms from your local store then the world is your oyster (mushroom). Whatever variety you choose, it is best to do a little research on the flavor profiles before making your selection. A great example is lion’s mane as it is said to taste like lobster or crab, and is known for making crab cake-like dishes. This may, or may not, be what you are looking for in a beer.

Shiitake (Lentinula edodes) mushrooms, which we used, are native to East Asia and were introduced into the United States for cultivation in 1972. In Japanese, “shii” comes from the shii tree (Castanopsis cuspidata) which is a hardwood tree similar to oak that mushrooms prefer to grow on, and “take” means “mushroom.” The flavor profile of shiitake mushrooms ranges from earthy, smokey, meaty, buttery, and chocolate. We have noticed that we got all of these descriptors in the mushrooms, but it is all dependent on the growing conditions and especially the time and quality of mushroom during harvest.
Growing Mushrooms
If you’re into gardening and growing ingredients for your brews, mushrooms are a fun project to take on. We’ll next go through the steps of growing mushrooms, beginning with log selection; however, if you prefer to purchase mushrooms for your brew, feel free to skip ahead and we will pick back up in the brewing section below.
LOG SELECTION
I was surprised to find out that the logs we selected were not going to be ready until the following year as it takes 9-18 months for the spores to start sprouting. Once the mushrooms fruit out of the logs they will continue to produce throughout the season and will last 4+ years depending on the thickness and quality of the wood.
Different types of mushrooms prefer different types of wood to grow on. shiitake mushrooms are best grown on deciduous hardwood trees such as oak, sugar maple, beech, alder, ironwood, and sweet gum. It is said the wood variety does not impact the final flavor of the mushrooms, though some chefs would debate that point. This is our second year doing this collaboration project and both years we primarily harvested mushrooms from white oak, with a few from sugar maple logs as well.
*Disclaimer: We sourced our logs from forests that were located on private property with permission to log. Be sure that you have permission of the property owner before entering and harvesting logs.
During the cold winter months, the deciduous trees are in hibernation mode, so January is when we go out into the forest looking for logs. It is best to find areas with large limbs or trunks that have already fallen to the ground. It is best not to go cutting down trees that are alive and well. We do not want large logs that are difficult to move, instead we would rather have smaller logs that are cut to 3-4 feet (0.9–1.2 m) long with a diameter of 4-6 inches (10–15 cm). Keeping the logs small helps with moving from the woods to the soaking tanks, and then to the fruiting area.
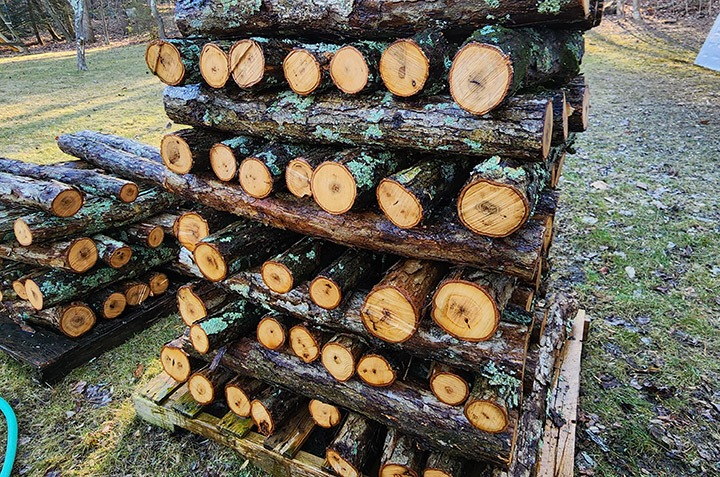
After the tree limbs have been cut into the desired size you must wait roughly four weeks for the tree’s natural immune system to then die off. If you do not wait there is a possibility that the tree’s lingering immune system will kill the mycelium inoculation. At the beginning of this waiting period, stack the logs in a square to allow the most surface area exposed to the air.
INOCULATION
For shiitake mushrooms in Pennsylvania, the end of March and early April are warm and damp enough for inoculation of the logs with mycelium. Mycelium is the living mother fungus network where the spores for reproduction are underneath the cap. We are not interested in cultivating from spores; rather we want the living organism to be inoculated. Mycelium mixed in oak sawdust can be purchased online in 5-lb. (2.3-kg) bags through various suppliers for about $30. A 5-lb. (2.3-kg) mycelium mix is good for inoculating roughly 30 logs, depending on size. Once you receive the mycelium, store it in the refrigerator until ready for use.
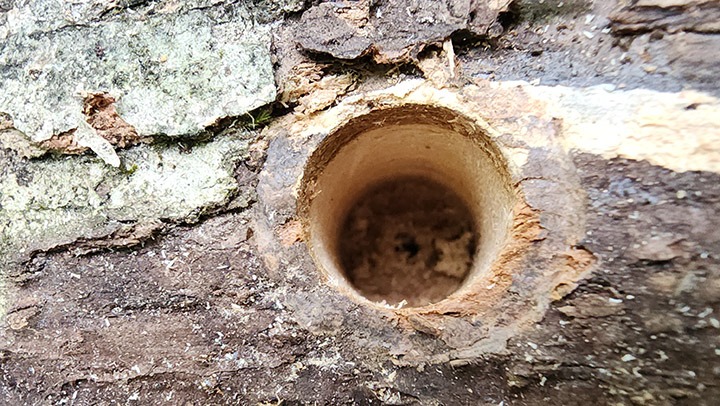
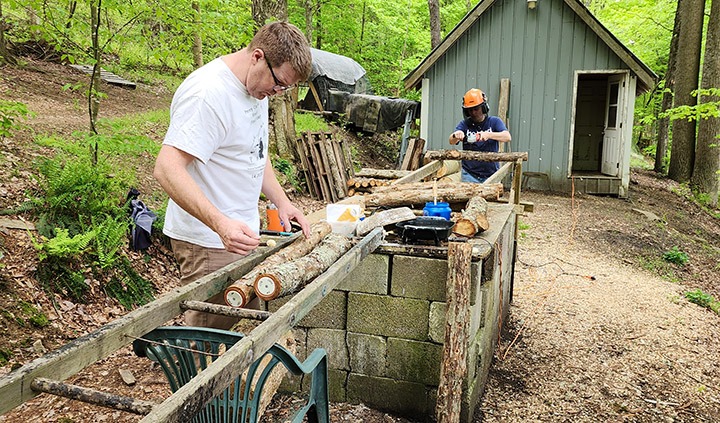
You are going to need to drill holes about 4 inches (10 cm) apart in an off-centered pattern around the log. Each hole is 7⁄10-inch (18-mm) wide and 2 inches (5 cm) deep. Avoid drilling in knots. Drill out the holes on the log first then fill the holes with the mycelium mix, called a plug. There is a useful tool that is simply called an inoculation device that can pack the right amount of mix into a plug and release it with a plunger in the holes for optimal use. This speeds up the process and makes it much easier, but you can also use a funnel and stick.
Once the holes are filled with the mycelium mix you seal the holes with melted food-grade wax at around 300 °F (150 °C), which is warm enough to melt the wax, but not so hot to kill the living mycelium. This wax protects against insects. The wax can be heated on the stove with a temperature gauge to monitor heat, however Chris and Lauren Chubb held a large chunk of wax and used a hot rounded griddle with a temperature setting on the heating element from the thrift store. There is a sponge on a metal stick that makes applying the hot wax easy and fast (shown in the bottom image to the right).
Once the logs have been inoculated and waxed, a Mason jar lid was screwed into one of the log ends and the date and variety of mushroom the log is inoculated with is written on it.
The lots are then restacked in a log cabin-like square about chest high in an area with about 60–80% shade and 30% or higher humidity levels. Sometimes it is appropriate to cover the stacks with pine branches for extra shade and retention of humidity. While stacked the logs rest to allow a spawn run of 9–18 months. This is where the living mycelium works its way into the wood before fruiting into mushrooms. Logs that are inoculated in March will be ready for fruiting in late May of the following year.
SOAKING AND GROWING
The cold wet environment of early spring helps start the fruiting process of shiitake mushrooms. Using this knowledge, mushroom cultivators can use a cold water soak for 24 hours, which will help jumpstart the mycelium to produce fruiting mushrooms just as in nature, but faster. Once the logs have been soaked you restack the wood and await fruiting and harvest. If you do not soak the logs for that initial jumpstart then the logs are just left stacked as the mushroom’s fruit. The mushrooms that are grown outside on logs are more likely to experience stress from the weather causing the mushrooms to grow slower, but they result in heartier and more flavorful mushrooms than those grown inside.
Shiitake mushrooms sprout in about four days and pop out of the log, then in about four more days the mushrooms begin to fruit. In early spring and late autumn, cold temperatures at night that drop below 58 °F (14 °C) can stop the growth. Colder autumn weather towards the end of the season in October will slow the growth and stunt the quality of the mushroom. On the positive side with cold temperatures, there is no need to soak the logs.
For those that raise free range poultry like chickens and ducks, they are great to have around the logs as they eat many of the pests such as slugs.
HARVEST
At first I was mistaken by thinking that you only get one harvest per season, however that is not the case. Shiitake mushrooms start fruiting in early May–June and will continue to produce throughout the season until early- to mid-October when colder weather arrives.

It is best to harvest the mushrooms when the outermost part of the cap called the fringe separates from the underside of the cap where the gills and spores are located. Once the fringe separation has occurred the mushroom is ready to harvest. You don’t want the mushroom to fully open like a pancake. The log will continue to fruit and produce mushrooms through the season so how long and how big you want the mushrooms to be is up to the grower. Every decision you make in the growing and harvesting process, and how long you have them between harvest and brewing, will slightly alter the flavor of the mushrooms.
When brewing homebrew-sized batches, we found that you can usually harvest enough mushrooms in one harvest then move on with your brew day. However, when brewing larger commercial batches — unless you have a huge mushroom farm — multiple harvests will be necessary to meet the recipe quota. The few days waiting from harvest and brew will cause various drying rates and a blend of mushrooms from freshly picked to dried/aged 3 or so days. This will give slightly different characteristics based on your particular situation. I find it similar to single-hop variety blending when you have multiple days worth of harvest from larger farms vs. a smaller farm’s single day harvest during the golden picking time of “now.”
A general rule of thumb is that you can harvest roughly 1.5 pounds (0.68 kg) of fresh mushrooms every year per foot of log. Depending on log size and weather conditions, a single 4-ft log could yield 6 pounds (2.7 kg) per year, or upwards of 24 pounds (~11 kg) over a log’s average lifespan of four years before the decomposition of the wood makes the log unusable. If you choose to dry the mushrooms then the percentage of weight loss will depend on your drying method. I suggest using the mushrooms as fresh as possible.
Brewing with Mushrooms
Our test batch was a 12-gallon (45-L) post-boil recipe using 30 pounds (13.6 kg) of fresh shiitake mushrooms (2.5 pounds of mushrooms per gallon, or 300 g/L). We really enjoyed the beer and how the fresh shiitake mushrooms complemented the overall beer profile. The plan and recipe for the following year’s batch was on the 3-bbl system (110 gallons/415 L actual post-boil volume). Using the same dosing rate we would need a whopping 275 pounds (125 kg)! Concerns were made that we might be exceeding Narrow Gauge’s yearly capacity, as well as concerns around handling our own harvesting and storage for that amount. For the second year we had a poor growing season for everyone, including our state’s hop growers. Given that poor growing season, we were not sure if we could achieve our absurd target harvest goals. We eventually decided to brew another small, this time 20-gallon (76-L), batch. Narrow Gauge Forest Farm harvested shiitake mushrooms from our stack throughout the harvest season and yielded a total of 23 pounds (10.5 kg) of mushrooms that were frozen after harvest. This included the entire range of mushrooms from early harvest to late harvest. We used them all in the batch to create a uniform flavor that I think actually added a bit of mushroom flavor depth that we initially did not consider vs. using all fresh from a single harvest.
Depending on if you grow your own or are buying mushrooms, you have options of using fresh, frozen, or dried mushrooms, which are each unique:
FRESH
Fresh is best! The shiitakes at harvest were lightly earthy in aroma, but when you cut them open you were hit with an intense, sweet white chocolate aroma and soft butter meaty flavor. The aroma really filled up the brewery and we laughed all day about how that white chocolate aroma came from those shiitake mushrooms. Depending on your recipe size, if you plan your brew day in alignment with harvesting you might be able to use 100% fresh mushrooms.
If you are not growing mushrooms and are choosing to purchase your mushrooms from the store it is best to choose a place that has the freshest products. Many farmer’s markets offer a wide variety of fresh mushrooms from local growers that you can choose from for your recipe.

FROZEN
We had some freshly harvested shiitake mushrooms frozen in a common household deep freezer and we noticed that the mushrooms held up fairly well. Some of the lighter delicate aromatics faded, but overall the flavor, character, and firmness were still intact. For our second batch we came across an equipment issue at the brewery that pushed back our scheduling and 3-barrel batch size, but when it comes to farming and harvesting there is no waiting. For this reason we fell back on freezing the majority of the harvest in a deep freezer in Ziplock bags until we could brew with them.
This situation was not ideal, but with no way to dry and package the full mushroom harvest, along with a generally poor growing season, we chose to brew another small batch with what we had frozen and their last harvest. With a look into Google’s searches on the topic of toxicity of deep freezing shiitake mushrooms I did not find any evidence of toxins being formed when storing in a deep freezer. We did not see much change in the physical character of the mushroom, however there is a chance of them getting mushy. In the end, you are placing these frozen/thawed mushrooms into the mash tun/whirlpool so I am not too picky on appearance. There are articles and instructions on freezing mushrooms for culinary purposes that include steaming or adding oil to keep them plump once thawed. I personally feel that actions like these will take away from the overall character of the mushroom, this includes freezing, and I will again recommend that fresh is best when possible.
DRIED
It is said that you can pick up a pleasant smoky undertone as the mushrooms age and begin to dry or dehydrate. This is something that we noticed as the older mushrooms from the earlier harvest started to age. The smoky character was more in the aroma than the flavor, and was reminiscent of a deep, rich, sweet raisin, pipe tobacco. I feel that having a portion of these aged/dried mushrooms really added to the overall complexity of the resulting mushroom character in the beer.
Please note that we used naturally aged and partially dried mushrooms to get this mushroom profile — not rapid dehydration and packaging of fresh mushrooms at the time of harvest. We have yet to experiment with that option, mainly due to the logistics and better options. Shiitake mushrooms have around a 75% water content, which is lower than most mushroom varieties. This means that you should get a denser mushroom with more flavor impact per pound, and have less loss if deciding to dry and package.
CHOOSING A BEER STYLE
When we get to brew with a unique ingredient, we brewers can’t help but to think of fun styles to apply it to. When given the chance, it is best to try a sample of the mushroom variety as the descriptions for them are good and close, but there are small nuances that will make the beer shine and might have been missed. With that said, know your mushroom variety and typical character profile and let your imagination run wild.
Some fun examples of mushroom and beer styles include:
• Lion’s mane (crab-like): Kölsch, lager
• Shiitake (white chocolate, buttery): Golden Belgian strong ale, barleywine or big beer, saison, IPA
• Oyster (anise, woody): Brown ale, saison
• Portobello (earthy, meaty): Porter, stout, imperial stout
• Button mushroom (meaty, light and delicate umami flavor): Light American lager, cream ale, IPA
• Turkey Tail (earthy, bitter): ESB, Scottish ale, Irish stout, Baltic porter, pale ale, IPA.
For our collaboration using shiitake mushrooms we decided to brew a saison as we felt the saison yeast character would play off the mushrooms.
HOW TO USE THE MUSHROOMS
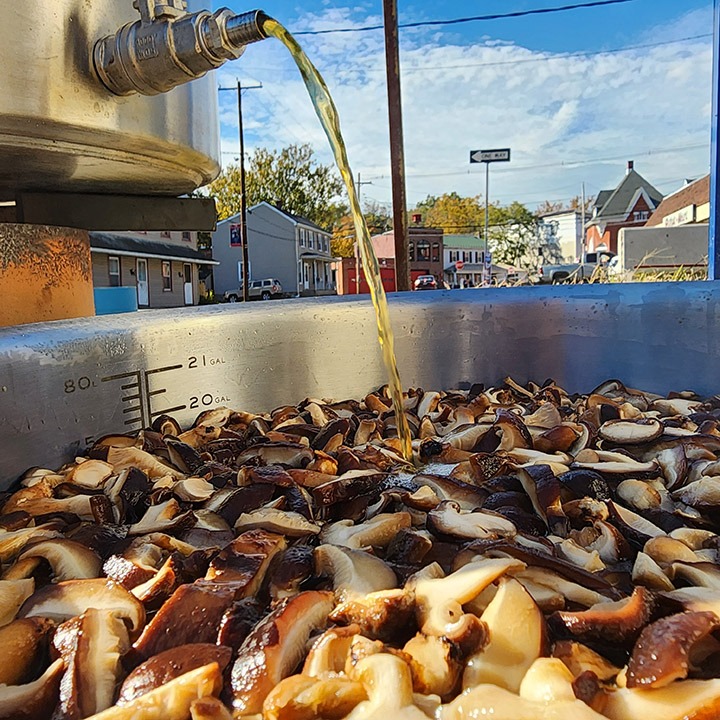
By doing this collaboration we are able to purchase a large portion of Narrow Gauge’s yearly shiitake harvest. With that being the case, we can only brew this beer once a year and need to maximize our usage of the mushrooms while keeping the delicate flavors intact. We thinly sliced each mushroom to maximize surface area then placed them in an emptied mash tun. This acted as an extended whirlpool/hopback style “mushroomback.” At such a large dosing rate, we felt that using a nylon bag or cheesecloth would be too problematic and that using the mash tun was the best choice to maximize our ingredient extraction, as well as the ease of brewing logistics and taking clear wort from kettle and off the trub for ideal mushroom wort interaction. As an added benefit, this also allowed us to easily reclaim the mushrooms for later use than had we added them to the kettle or used a bag. We feel the mash tun/whirlpool is the best choice of when to add the mushrooms, however feel free to do what works best for you, your equipment, and your recipe.
Just like asking a hop head where to add hops in an IPA, you can add mushrooms at any point in your process to achieve different results. You can use them whole, sliced, blended for boil/whirlpool/fermenter additions, or any other inventive way you can imagine at any point of the brewing process to impart the character you are looking for. Just understand the reasoning on why you have chosen the form of mushroom and where you add it.
HOW MUCH MUSHROOMS TO USE
If you are growing mushrooms then I would suggest using as much as you can harvest. If purchasing from a store, where costs can add up quick, then I would recommend using 1-3 lbs. per gallon post-boil (120–360 g/L). Mushrooms have a unique character that will be imparted on your beer, so the key is to balance it with a compatible beer style and its supporting ingredients to let the mushroom character shine through. In the end, it is up to the brewer to decide on variety, type, when, how, and how much mushrooms to add to their recipe.
OUR SAISON COLLABORATION
We have brewed two saison collaborations on a small scale. Our first version was a 6.1% ABV beer that used 2.5 lbs. of sliced shiitakes per gallon (300 g/L). Our second version was also a saison but with a much higher 11% ABV in which we used 1.15 pounds of sliced shiitakes per gallon (140 g/L). The reason for the lower dosing rate in this second batch was due to a larger batch volume dictated by new brewery equipment and a lower harvest yield. Both were delicious, however I believe we were all in agreement that the 6.1% version with the higher mushroom addition rate had the best character, flavor, and drinkability. As such, it’s the recipe provided below.
A NOTE TO FORAGERS
This article has been a story of our brewing collaboration with professionals that know their mushrooms. While we enjoy foraging, it is advised against unless you are 100% certain of the mushrooms you are harvesting and what its possible lookalikes are. Consuming the wrong mushroom can make you extremely ill, hospitalized, or even cause death in some cases.
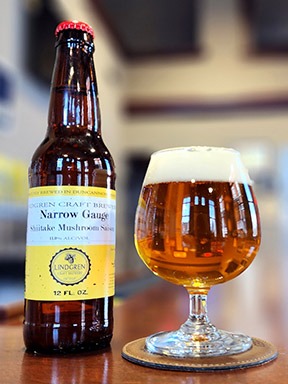
Lindgren Craft Brewery’s Narrow Gauge Shiitake Mushroom Saison clone
(5 gallons/19 L, all-grain)
OG = 1.053 FG = 1.006
IBU = 25 SRM = 3 ABV = 6.1%
This beer features what you would expect in a saison in regards to the malt and hops balance and the fruity esters and phenols derived from the saison yeast. The shiitake mushrooms provide a notable sweet white chocolate flavor and aroma that pairs very well with the yeast to create a beer like no other.
Fun fact: September is known as National Mushroom Month so if you plan your September harvest and brew just right you should be ready to enjoy your mushroom creation on October 15, which is National Mushroom Day.
Ingredients
9.4 lbs. (4.3 kg) Dingemans Pilsner malt
1.3 lbs. (0.6 kg) Weyermann Spelt malt
1.25 oz. (36 g) aged Spalt hops (first wort hop)
1 Whirlfloc tablet (15 min.)
2 g yeast nutrient (15 min.)
15 lbs. (6.8 kg) fresh shiitake mushrooms (sliced)
2 packs SafAle BE-134 or your favorite saison strain
Step by step
Slice the mushrooms as thin as you can to maximize surface area. You can choose to do a single infusion mash anywhere around 151 °F (66 °C), however we did a single decoction mash: Mash in at a beta amylase temperature of 140—145 °F (60–63 °C) and rest for 20 minutes. Pull roughly one quart (1 L) of thin mash and bring it over to a small kettle where it is slowly brought to a boil and allowed to simmer for 15 minutes. Be sure to continually stir the boiling mash to prevent scorching. Pour the boiled mash back to the main mash and stir well. The new mash temperature should be close to 152 °F (67 °C). Rest at this temperature for 30 minutes before proceeding to vorlauf.
Sparge with 172 °F (78 °C) water and lauter wort, collecting until you reach 7.5 gallons (28 L) in the kettle on top of the aged hops. Bring to a boil and boil 90 minutes, adding whirlfloc and yeast nutrients with 15 minutes remaining.
After the boil is complete, transfer the wort to the mash tun filled with the sliced mushrooms. Once full, allow the wort to rest for at least 30 minutes for a respectable flavor and aroma character. You can rest for longer, but it is recommended not to go below 160 °F (71 °C) in fear of wild infections.
Chill to 74 °F (23 °C) into a fermenter and pitch yeast (we used LalBrew Belle Saison, though it is no longer available in homebrew quantities). Ferment at 74 °F (23 °C) until final gravity has been reached before cold crashing the fermenter to 30 °F (-1 °C). Keg and force carbonate or bottle condition as usual.
Spent Mushrooms
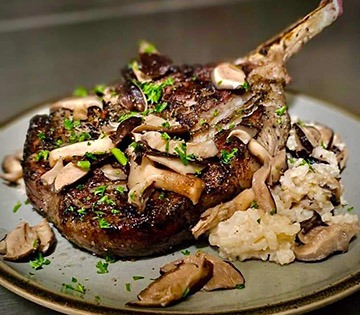
By using the mash tun to soak the mushrooms you are able to get nice clear wort and leave behind all the hot break and trub. This clean sugary wort soaks into the mushrooms, exchanging flavors as they marinate. After knockout you are left with these spent sliced mushrooms that are coated in delicious sugary wort, making for a great culinary opportunity. They can be used immediately or scooped into a freezer bag and frozen. The world of culinary ideas for the use of these wort-soaked mushrooms can be enormous and is up to the creativity of the chef. We were able to partner with our friends at Old Trail Tavern & Steak and sell them our spent mushrooms at a reduced price to reclaim some of the production costs. The idea to reuse these unique spent mushrooms in different cuisines went over very well and really should be a focus of topic for any brewer brewing with mushrooms.
Recipe notes:
We had access to 14-year-old unopened and well-stored Spalt hops. We used the given 5.3% alpha acids in recipe calculations, though actual alpha acids may have been lower due to aging. Feel free to sub in any aged, or even fresher hops that you like for saisons.
Extract option:
Replace the Pilsner and spelt malts with 6.5 lbs. (2.9 kg) Pilsner liquid malt extract and 11 oz. (315 g) wheat dried malt extract. Heat 5.5 gallons (21 L) of water to a boil and then remove from heat to stir in both malt extracts. Return to heat and boil for 60 minutes, following the remainder of the all-grain recipe instructions.