Growing Hops
If you already make your own beer, why not start growing your own hops? Not only will you create a ready supply of your favorite varieties, the beers brewed from your own hops will also be a little more homemade.
Where To Grow
While certain parts of the world like Germany’s Hallertau region or the Yakima and Willamette valleys of Washington and Oregon are famous for growing hops, the vines (known as bines) are quite hardy and can be grown in many kinds of soil conditions. All you need is an area with lots of sun (at least 6 to 8 hours per day), lots of vertical space (vines can grow more than 30 feet high), good drainage and plenty of ventilation to prevent disease. Hops like soil that is in a pH range of about 6 to 7.5, so testing and adjusting your soil isn’t a bad idea if you want the best yield. They will grow in most soil conditions, however, as long as you maintain a lot of airflow in the soil by turning it over before planting and incorporate lots of compost or manure to fertilize.
How To Plant
Hops grow from woody, root-like cuttings called rhizomes, which are usually around a foot (0.3 m) long. There are both male and female rhizomes, but only female plants produce the cones used in brewing beer. You can buy rhizomes from most homebrewing retailers (either online or local) in early spring and plant them as soon as your soil is dry enough for tilling.
For planting, find a location with a lot of vertical space and plenty of sun. An easy method for growing hops at home is planting against a south-facing wall of a two-story (or more) house or building, running a trellis line from a stake in the ground near the rhizome to a staple on the second story. You can also plant like commercial growers by using a central pole (like a flagpole) with trellis lines from the ground to the top of the pole. Keep in mind that your trellis lines need to be strong enough to support full-grown vines, which can weigh more than 20 pounds.

To achieve the best drainage, plant your rhizomes around 4 inches (10 cm) deep in a mound of soil around a foot (0.3 m) high. The rhizome needs to be planted so that the root is facing down and the green bumps are facing up. If there are already shoots, allow them to poke out of the soil. Cover the mound with straw or hay mulch to keep the weeds at bay and preserve more water in the soil. Water your hops well on a regular basis and fertilize often.
Once the vines start to grow, you should choose three or four strong shoots from each plant and prune the rest. You may need to train the shoots to the trellis at first by twisting them around the trellis every day until they start to do it on their own. The vines will follow the sun and grow from east to west, so twist accordingly. Also, look for stray shoots, especially if you’re growing more than one variety next to another. Prune any of these extra shoots so that they don’t get mixed up with other varieties.
What To Plant
Joe and Dennis Fisher, authors of “The Homebrewer’s Garden,” recommend that you plant three or four different varieties to start. To choose the best hops for your local climate, ask people in your area who may know what is best to grow, such as faculty at a local university extension, regional homebrew suppliers or other brewers who grow hops. You can also use trial and error: if a certain variety isn’t right for where you live, you will know within a year or so by how well the vines grow and produce cones.
Harvesting
If you planted your rhizomes in the early spring, your hops should be ready to harvest toward the end of the summer if you live in an area with a moderate growing season. If you live in an area with a longer growing season, look for slowing vine growth and cones appearing. Check your cones daily to determine if it’s time to harvest. A mature cone will smell aromatic, feel dry (drier than a green cone) and springy and will leave traces of yellow lupulin powder on your fingers. If you think the cones are ready but you’re not sure, pick one and pull it open. The lupulin powder should be thick and yellow-gold in color.
When the cones are ready, you can start picking them from the vines. If want to pick all your hops at one time, cut your trellis line down and lay it on the ground to pick the flowers. This may mean that you will have a few unripe cones in your batch, however. Instead of picking all at once, you can also leave the vine intact and pick the cones from a ladder. You might consider inviting some friends to help you harvest, as it can be labor intensive. Pick your varieties one at a time and label the containers well to prevent mixing them up.
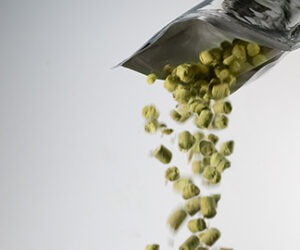
After the cones are off the vine, they need to be taken out of direct sunlight and dried as soon as possible to preserve the essential oils. Your harvests will likely be small enough that you can dry your cones in small batches in a warm, dry spot in your house, such as the attic. Place the cones in paper bags, or on a clean screen with the hops covered with a sheet, and shake the hops around every few days to keep them aerated. After a week or so, they should be well dried. Store the dried hops away from oxygen and light in a sealed plastic zipper bag with as much air removed as possible or vacuum pack if possible. If you don’t plan to use all your hops right away, store the bags in the freezer for up to a year.
Post Season
After you’ve harvested, cut the vines back to only a few feet (or a meter) from the ground and let them die off. When the first hard frost hits (if that’s the case in your area) or when you close up your garden for the season, cut the remaining vines to a few inches (~5 cm) from the ground, cover them with compost or manure and re-mulch.
The following spring, pull back the mulch and soil and cut around the rhizome with a spade or knife so that it is around a foot (0.3 m) long. Remove any root pieces you cut off. This is called root pruning, which should be done before your new shoots are 6 inches (5 cm) tall. It prevents hops from taking over your garden or intermingling with other varieties. With proper maintainence, you should have a sustainable supply of hops for years to come.