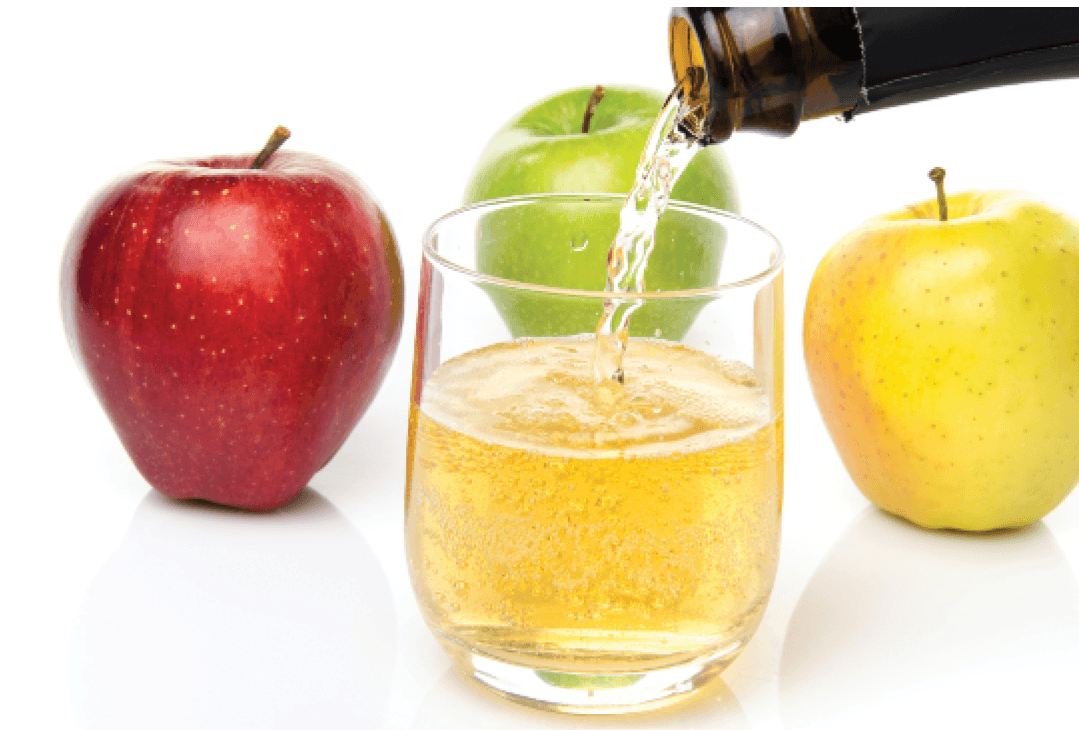
Hop Water
I recently took my 45th trip around the sun and like many my age, I’m trying to be a little healthier as I get older. One of the ways I’ve done this is by trying to cut back on my beer intake; I know, blasphemy right? Especially for someone who works at a company called MoreBeer! But just because I’m drinking a little less, doesn’t mean I need to stop crafting my own delicious beverages. In fact, I have brewed more batches of cold, carbonated, hoppy goodness the last few months than I did this same time last year. The difference is, none of these batches had any sugar that got converted into alcohol. Well technically that’s not true, but let’s not get ahead of ourselves yet.
I’ve been brewing a lot of hop water lately and it’s led me to learn how to make a mighty fine one at that. Like learning about making most anything new, it started with inspiration coming from trying a fine example. For me that was Hoppy Refresher from Lagunitas Brewing Co. in Petaluma, California. If you haven’t tried one, I would recommend it. I am not going to say hop water is a beer replacement; it’s definitely not. But if you enjoy hops and sparkling water, chances are you will like hop water.
For me, crafting something myself is just as fun and rewarding as enjoying the finished product. I assume you agree with me, you’re reading a magazine called Brew Your Own, right? Sure we can find excellent beer in every city across this fine nation and beyond, and companies like Lagunitas and others make excellent hop water found in most local grocery stores. But we homebrewers of the world choose to learn, experiment, and ultimately brew our own! It’s my hop, I mean hope (Freudian slip), that this article will help you make amazing hop water at home and inspire you to experiment like I did.
Before we jump in, I do want to thank the crew at Lagunitas, specifically their brewing R&D team for letting me brew a batch of hop water with them and teaching me some of the steps that go into making their delicious Hoppy Refresher. We (MoreBeer!) have a video interview called “HOP WATER and INNOVATION in the Beer Industry with LAGUNITAS Brewing Company,” you can check out if you want to hear more about that experience, found at https://youtu.be/JBh5yhDNdc0

Let’s Talk Water
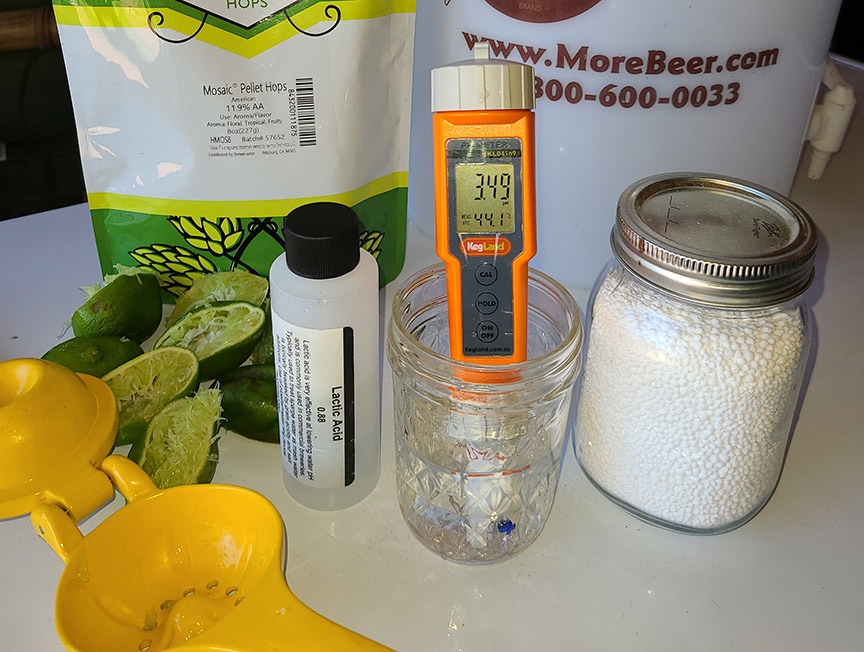
Just like with beer, water makes up a majority of the finished product in hop waters; in fact even more so with hop water. So it’s important to take your water source into consideration. Ideally, use water you like drinking yourself and that is relatively low in total dissolved solids (TDS) and run it through a good carbon filter to remove any chlorine. The next step is to acidify the water prior to boiling and adding any hops.
When I brewed the batch with Lagunitas we used lactic acid, but there are other food-grade acids worth considering to play with the flavor. I have since experimented with citric acid as well and found blending both lactic and citric 50/50 is my favorite flavor profile. Bottom line, you want to get the water into the 3.2–3.6 pH range. This helps with the flavor, but more importantly we’re trying to make our hop water completely safe from any bacteria since there is little to no alcohol in hop water. As for amounts of acid to use it ultimately depends on the starting pH of your water. But in my home experiments with a starting point of around 8 pH tap water I found 5–6 mL of 88% lactic acid or 3–5 grams of powder form citric acid got 5 gallons (19 L) of water into the 3.4 pH range. Again your mileage may vary depending on alkalinity of your water, etc.
You could also use the juice from lemons or limes in place of citric acid. I found this option to make great hop water as well and add some extra citrus flavor. Keep in mind these fruits will add a little sugar, but let’s hold that discussion for later when we get into the hops and biotransformation.
Lastly on water additions, the team at Lagunitas recommended adding some calcium chloride to the tune of 2:1 or even 3:1 chloride-to-sulfate ratio. The thought process here was to help soften the bitterness and not accentuate it with a higher sulfate ratio. If you’re familiar with brewing IPAs this is a common concept. If not, don’t worry. Simply adding 2–4 grams of calcium chloride to a 5-gallon (19-L) batch should get you in that range.
The most important thing to remember regarding water is the pH. Having a good pH meter will help you dial that in. Once your water pH is in the correct range the next thing to do is bring it to a boil. We’re doing this for two reasons — to isomerize some alpha acids from hops and to de-aerate the water. This will help prolong the shelf life of your hop water and have it tasting good from start to finish of the keg. Since we’re not working with any malt sugar, etc. you only need to boil for 10 minutes or so to de-aerate the water and hit your target IBU.

Putting the Hops in Hop Water
It’s time to talk about the star of the hop water show — the hops! I won’t spend a ton of time going into the best hops or combinations to use, as I feel this is really a preference thing and ultimately your place to get creative and experiment. Some of my favorites are the same ones I love in IPAs like Citra®, Mosaic®, Simcoe®, El Dorado®, Strata®, Idaho 7®, and Nectaron®. But again, this is a personal preference and honestly hop water is a good way to really explore a hop’s taste and aroma contribution as you’re essentially just boiling some hops in acidified water for a short time and possibly dry hopping as well.
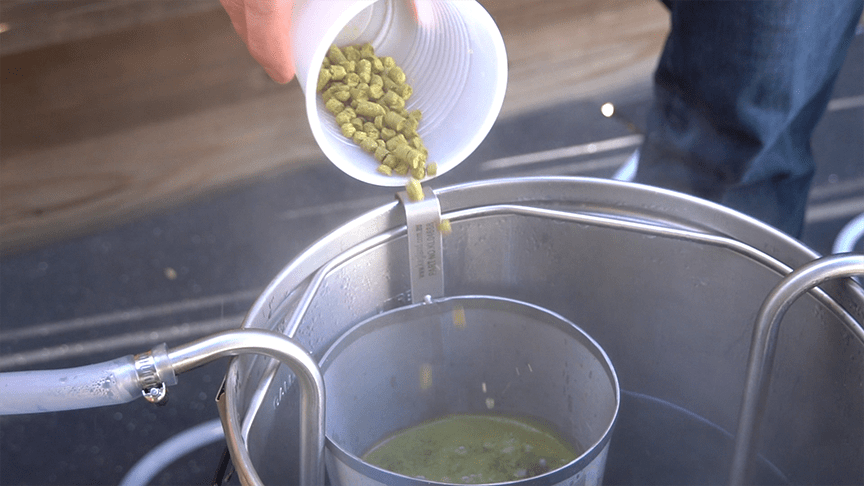
But let’s not get ahead of ourselves yet and start with the hot-side hop additions. Hop water does not have any real amounts of residual sugar or alcohol to help balance the bitterness. So you want to keep your IBUs low, say in the range of 8-12 IBUs. This will add a slight hop bitterness that’s not out of balance as well as hop flavor.
Worth mentioning at this point is how to calculate your IBUs. Most software out there does not have a problem calculating hops in just boiling water. I did, however, experience some issues with certain applications and the fix was to add a small amount of grain to the recipe in order for the app to give me a valid IBU estimate. Since hop water is all about flavor and aroma, I recommend getting most if not all of your IBUs from a whirlpool addition. Keep in mind that the high isomerization range is above 185 °F (85 °C). So you should calculate that time accordingly. For instance if you whirlpool for 15 minutes and rest for 15 and you did not chill that wort during that rest period, that amount of (X) alpha acid hop spent 30 minutes isomerizing. Most software out there allows adding those variables, but do keep it in mind when working out a recipe.
Enough about bittering and whirlpool hops, now it’s time to get into the real secret of why Hoppy Refresher tastes so good. Before brewing a batch of hop water with Lagunitas, I had made several of my own that I thought were good, but theirs was just so much more refined and crushable. My previous technique included acidification as that was pretty common knowledge. But I would just acidify, boil, whirlpool for flavor and aroma, then cool, keg, and force carbonate it. This led to some good hop water, but it had dank, grassy notes that only serious hopheads seemed to enjoy. It lacked those rounded, subtle fruity notes that Hoppy Refresher seemed to have.
In brewing with the team at Lagunitas they told me they actually pitch yeast in order to get some biotransformation flavors and aromas.
Wait . . . pitch yeast into something without any sugar?
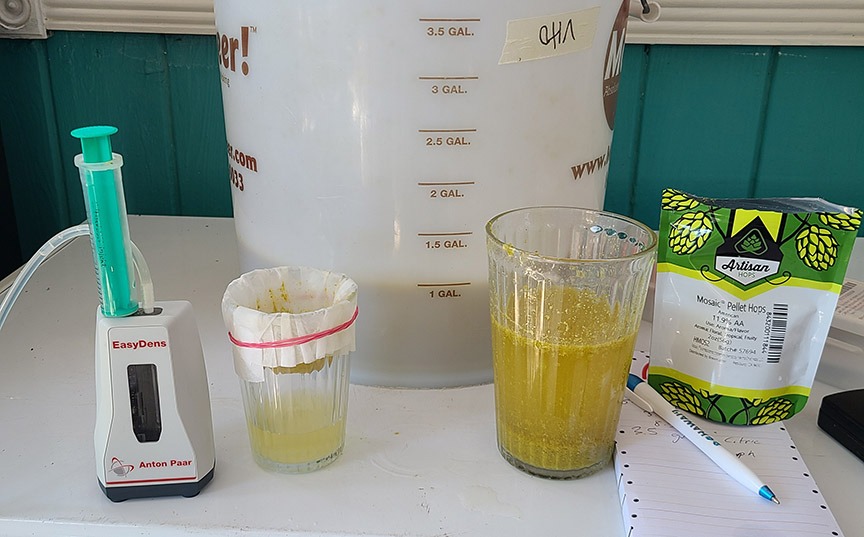
You read that right. In fact; if you are the curious type who reads product labels, you would notice on their packaging it says it contains brewer’s yeast on the ingredient list. Worth mentioning, hops do in fact have small amounts of sugar in them. I won’t go deep into this, but if you’re interested in learning more I’d recommend The New IPA by Scott Janish, which goes deeper into the subject. I did, however, perform a small experiment for this article and added around 8 oz. of hops to 1 gallon (3.8 L) of water, and sure enough it registered on my Anton Paar EasyDens. Extrapolating those readings out to a 5-gallon (19-L) batch we’re talking about 1.001 or so. So well below the 0.5 percent ABV limit of the FDA, but enough to have the yeast metabolize and biotransform those delicious hop compounds.
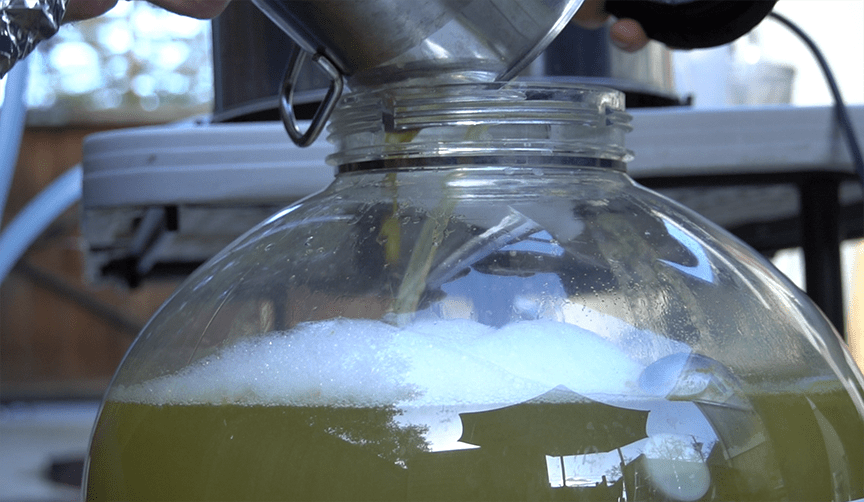
In my opinion, biotransformation is the key to making a great hop water. The downside is, you have to move the water into a fermentation vessel and pitch yeast. Having done several batches both ways, I believe it’s worth the effort. Doing this does allow you to effectively dry hop the hop water and add even more hop aroma & flavor. Since we’re shooting for the biotransformation, add those dry hops at the same time as you pitch your yeast.
In regards to yeast, I’ve always used White Labs WLP001 (California Ale). Even at Lagunitas that’s what we used as well. You could play around with this, especially with options like Omega Yeast’s thiolized strains, which in theory should lead to even more fruity, tropical aromas you expect from biotransformation. It should be noted that while biotransformation is taking place inside of the fermenter, there are no physical signs of fermentation so don’t be looking for a kräusen or even a bubbling airlock during this time.
Speaking of tips and tricks I learned from brewing with the Lagunitas folks, another technique they did that was new to me was dip hopping. I won’t go deep into dip hopping as BYO ran a story on the subject (available online at https://byo.com/article/dip-hopping/). But essentially you hot steep your dry hop addition at around 170 °F (77 °C) (below the isomerization point) prior to adding it to the fermenter. The theory behind this is that it helps drive off myrcene, i.e. the dank, grassy notes. So depending on what you’re shooting for this is a way to balance it more towards a fruit-forward hop aroma. More information about this process is in the video linked earlier.
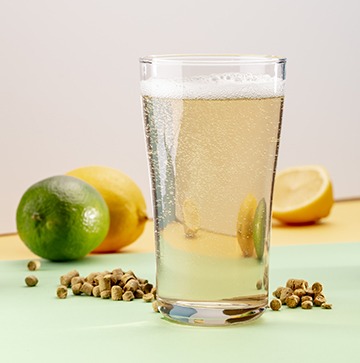
It Doesn’t Mean a Thing if it Ain’t Got that Zing
Last but certainly not least is the carbonation and serving of hop water. One of the reasons I love having hop water on tap is because I just love a beverage that has fizz in it. Be it beer, seltzer, or soda, you can’t beat that carbonic bite.
Like I mentioned before though, the good thing about hop water is that it has little to no alcohol or sugar content. That really comes into play when you go to carbonate it as well. I’ve tried carbonating hop water in the typical ale range of 2.2–2.5 volumes of CO2 and it’s meh. You really want it in the 3–4 volumes range to taste like what you get in a can of Hoppy Refresher. So you will need to not only bump that regulator up in the 30+ PSI range to carbonate it, you will need to keep it in that range even while serving as well. Reason being is something called Henry’s Law — essentially the amount of dissolved gas in a liquid is directly proportional to its partial pressure above the liquid. So even if you force carbonate it to 3+ volumes of CO2, if you’re serving at 12 PSI it will start to taste flat over time. So it’s important to have a separate regulator for your hop water to keep it pouring fizzy glass after glass.
Of course, at 30 PSI it’s going to be coming out of the tap pretty darn fast. There are two easy options to slow it down, the first is to utilize a flow-regulated tap, which will dial the speed back at the pouring point. The other is to have a dedicated draft line that is balanced to this pressure (which can also be utilized for seltzer and sparkling wine . . . also typically set at this pressure). For example, 3⁄16-inch ID vinyl line would require roughly 12 ft. (3.7 m) of tubing to provide sufficient resistance for a proper pour at this pressure. Either way will get the job done.
Hop Water Recipe
Batch Size: 5.5 gallons (21 L)
Ingredients
4–8 oz. (113–227 g) of your favorite hops*
2–4 g calcium chloride (optional)
5–6 mL 88% lactic acid or 3–5 g citric acid
Brewer’s yeast (1 packet of dry or liquid yeast)
* Note on hops: The key is to keep your calculated IBUs in that 8-12 range as to not make the final hop water too bitter and out of balance.
Step by step
1. Collect 5.5 gallons (21 L) water and acidify to 3.2–3.6 pH range. (Optional: Adjust water profile chloride level to be 2:1 chloride-to-sulfate).
2. (If dip hopping): Start heating water. Once temperature reaches 170 °F (77 °C) pull 16 oz. into a small kettle and add half (2-4 oz./57–113 g) of your hops. Cover and set aside. This is the dip hop step we will add back later.
3. Bring water to a boil and to boil for 10 minutes.
4. Turn off heat source and add half (2-4 oz./57–113 g) of hops. (Target 8–12 IBU depending on your hops’ alpha acids.)
5. Whirlpool hops for 10 minutes and then chill hop water to yeast-pitching temperature.
6. Move hop water into a fermenter and pitch yeast along with the second half of your hops or the dip hop slurry.
7. Ferment for about four days, allowing yeast to biotransform hops. Some diacetyl may be produced during this phase but after 3–4 days that should be cleaned up.
8. Cold crash at 38–40 °F (3–4 °C) for 2–3 days and rack into a clean and sanitized keg.
9. Force carbonate to 3-4 volumes of CO2.
10. Serve and enjoy!