How Nanos can Benefit from Test Results
Having a quality control program in your brewery is an excellent way to ensure you’re meeting the needs and expectations of your customers. The more you know about your beer, the more you can control — flavor, ingredients, scheduling, even sales. You can use the information you collect to make better decisions about your beer, prioritize your actions, and keep the beer flowing.

This is much easier when things are running smoothly, but what happens when you start getting weird results? How do you determine if there’s something wrong with your beer or your equipment? How do you rate the severity of the issue? How do you troubleshoot your test results?
For those of you who don’t have a quality program, see my previous column “Vetting Your Brew” (www.byo.com/article/vetting-your-brew-starting-a-quality-control-program).
Before collecting data, make sure you can trust your results. Make sure equipment is working properly by reading all instructions, performing routine maintenance and cleaning, performing calibrations, and using control samples.
When you’re ready to start taking measurements, keep documents and data organized and easy to read and reference. This sets the foundation of your quality program. Tracking data and looking at trends lets you know if your beer is within a desired specification range, or if you need to make some tweaks on the next batch.
Next we’ll run through the steps to ensure your tests are accurate, using some common equipment every nano should have on hand as examples.
Calibration
Check manufacturer guidelines to find out how, and how often, your lab equipment needs to be calibrated. Keep a log or set an alert in your calendar to keep track. It’s easy to forget when something that doesn’t need frequent calibration was last done, such as quarterly calibrations on a dissolved oxygen meter.
One often overlooked item in need of calibration is a hydrometer. The easiest way to calibrate a hydrometer is in distilled water at the proper temperature (which varies by hydrometer, so make sure to read instructions that come with your specific hydrometer). The reading in distilled water should be specific gravity 0.000. It’s a good idea to have at least two hydrometers in case one breaks. Be sure to record if either reads different than 0.000 — I’ve seen hydrometers from the same company be off by a factor of 0.4 °Plato (nearly two specific gravity points) when measuring the same sample. Document when you performed these calibrations and what your results were. If one breaks and you know the second one needs a correction factor, you simply correct for the difference in hydrometers.
Other equipment, such as pH meters, need frequent calibration — most manufacturers recommend recalibrating each day a pH meter is used.
Equipment Use
Once you know your equipment is calibrated, make sure it’s being used consistently and correctly by everyone.
Chemical standards with known concentrations can be purchased from lab suppliers to test equipment and proficiency. If you don’t have a good control sample, testing the same sample but with different instruments can give you a good idea if you’re close to where you should be. You can even partner up with another brewery or work with a third-party lab to check samples against each other and make sure you’re getting the same results on different instruments. The American Society of Brewing Chemists (ASBC) also offers a Laboratory Proficiency Program (www.asbcnet.org/lab/lpp/pages/default.aspx) to ensure accuracy when testing.
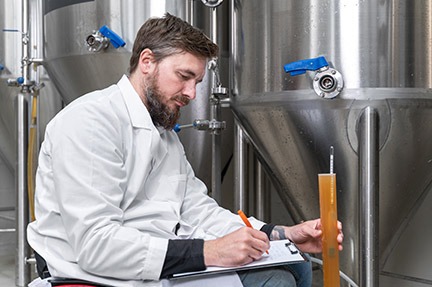
Since you use a hydrometer so often in the brewery, take care to ensure proper use. Samples should be taken with liquid that is not carbonated and on an even surface with the hydrometer in the center of the sample, not touching a side of the sample tube. Be sure to measure samples at the recommended temperature for the hydrometer also as measuring very hot or very cold samples can lead to inaccurate results. Density changes based on temperature, and most hydrometers are calibrated to be read at 68° F (20 °C). Some hydrometers come with a thermometer build in to adjust for different temperatures so you’ll want to calibrate that portion as well using another thermometer.
When taking pH measurements, make sure your probe is fully submerged in the sample with adequate mixing and check the expiration date of your pH solutions and probe. Most probes on a benchtop meter will last about two years, after which point you only need to replace the probe and not the whole meter. Once opened, pH buffers last roughly two months. Write the date on the bottle when you open it.
Repeatability, Accuracy, and Precision
Repeatability is the variation between multiple measurements of the same sample. Accuracy is how close the measurement is to the actual value, and precision is how close the measurements are to each other. You can’t be more accurate than your equipment or testing method is capable of. Learn the limitations of what you’re measuring, the equipment you’re using, and how you’re measuring it.
When in doubt, double check questionable results. Sometimes testing mistakes happen or you don’t get a representative sample. Before dumping a batch of beer or taking drastic measures, double check your results, either yourself or confirming with another brewery or lab, to give you more confidence in your decision on what to do next.
Specifications
Now that you are confident in your equipment, testing method, procedure, and results, how do you know there’s a problem with the value you just collected?
Setting minimum and maximum limits on attributes you’re able to measure in your brewery allows you to monitor brewing and fermentation consistency. Some specifications are based on regulations, such as ABV. Check with the current TTB regulation on the acceptable range of ABV listed on the package. Your state might have specific tax or labeling regulations based on the ABV as well. Fill levels are also required to be within a specified range of what’s stated on the label.
When you’re first making a new beer, base the expected values off calculations, or where you anticipate the beer to fall based on previous experiments with your brewing system. If you’ve brewed a similar style or used the same yeast strain you might have a better idea of where the new one will finish. For the first few you might give a wide range of acceptable values until you’re able to dial in the beer and get it right where you want it flavor-wise. The more you brew it, the more data points you collect. Update and adjust this value as you go. As you improve your recipe or invest in new brewing equipment your specifications might change. It doesn’t need to be set in stone.
Customers expect a similar flavor profile every time they buy a particular beer. A lot of that consistency has to do with how consistently you brew that beer, how close you are to your measured values such as temperature, volume, pH, starting and final gravity, yeast pitch rates, and more.
As you become more experienced, you’ll notice less variation in your data and you’ll be more likely to hit your expected values when making a new beer. You might even find more efficient ways to get the same values. You might also notice changing your mash temperature gives your beer a more rounded finish. If that change improves the flavor of your beer, you as the brewer are allowed to make that change. Consistency is important in craft beer, but not to the detriment of the beer! Quality is consistently meeting or exceeding your customers’ needs and expectations. If you decide to alter the starting gravity of one of your beers, improve process or flavor, or make another change that meets or exceeds your customers’ expectations, you’re still getting it right.
Take time to review results, look for trends and make sure the specifications you’re brewing towards are realistic. Be firm with your specifications once you set them. Something that falls outside of your specifications shouldn’t be released into the marketplace as it is. You might have a range of red, yellow, and green values where green is the ideal range, yellow is still acceptable, but it may trigger an investigation. If something is starting to trend out of spec, you want to catch it before it gets into the red range.
Anything in the red range goes on hold to either be adjusted, if possible, or dumped.
Rate the Severity
Not all out of spec scenarios are detrimental. Take time to evaluate the risk and decide how quickly this needs to be dealt with. Is there a health issue associated? Health risk factors include things like potential caustic or cleaning solution in beer, exploding cans or bottles, packaging defects, and undeclared allergens. With low- or non-alcoholic beverage you need to closely monitor for potential pathogens.
Is the problem isolated to one batch or is there a potential for others to be affected? Do you need to test other batches to confirm? If you have positive micro hits in a bright tank or a fermenter, you’ll want to look at other tanks or packaging lines that beer came in contact with. In this case moving beer could potentially spread contamination, so put tanks on hold until you’ve found the source or the extent of the problem.
Flavor issues aren’t always apparent right away and you might not know if you’re going to have issues later on or not. If you distribute your beer (which may not be the case for many nanos), then keeping a beer library, where you store beer until the best-by date is reached allows you to monitor beer that’s out in the marketplace. There might be additional testing you need before making decisions on what to do with the beer. Third-party labs can help with testing you’re not able to do yourself.
You might have to dump a batch if the flavor is off or there’s something you can’t fix. Remember that every beer you put out might be someone’s first experience with your brand, and you don’t want to risk someone having a bad experience and not coming back.
Root Cause Analysis
Whether you salvaged your beer or dumped it, you’ll want to fill out a root cause analysis form (here’s a free download: www.shorturl.at/pvyHT) and figure out what happened.
It might be obvious, maybe a mistake was made somewhere along the way, or you might never find the cause. Keep detailed brewing and fermentation notes that you can look through to see what may have happened. Come up with a plan of how you will prevent it from happening again. Maybe there are additional checks and stop points that need to be added to the process.
Troubleshooting
Here is a very brief look at what troubleshooting might look like. These are not the only causes and effects and by no means an exhaustive list:
Quality assurance gives us confidence that our quality requirements will be fulfilled and our equipment is providing us with accurate results. Testing or inspection of desired conditions is our quality control. We can react differently based on what our results are and make changes if needed.
Sometimes troubleshooting involves a brewing problem, and sometimes it’s equipment or instruments. This process runs more smoothly when you have confidence in your equipment, process, document control, and testing results as it gives you a better understanding of where to look and how to fix the problem, saving time, energy and money.


