Let Them Eat Beer!
As devoted readers of Brew Your Own, you probably already know that beer is one of the world’s oldest and most beloved beverages. Beer is a pretty special drink in that it is both delicious and refreshing, but it has for centuries also brought families, neighborhoods, and communities together.
Beer is also a lot of fun to brew at home. If you’re reading this magazine, then, like me, you’ve taken your love of beer to the next level by diving deep into the world of homebrewing — creating your favorite styles and experimenting with new brews from the comfort of your home or garage.
Beyond being something to enjoy at the end of a long day at the office or amongst friends while cheering on your favorite team, there’s another place where we can harness the power and flavor of beer — in the kitchen. Not only can we pair our favorite foods with our favorite brews, but there are also many ways to incorporate beer during the cooking process to add depth, aroma, flavor, and a unique character to a wide variety of dishes from sweet to savory.
With so many diverse styles and flavor profiles, beer is a highly versatile ingredient in the culinary world. To think about how to use beer when cooking, it’s helpful to think about what beer is at its most basic level, which is a flavorful liquid. There are many times when a recipe will call for the addition of a flavorful liquid — for example, the addition of beef stock to a beef stew. In my opinion, there’s no reason why some, or even all, of this liquid can’t be beer. Something to consider is that different beers are going to have different flavor properties. While both lagers and ales can be malty and/or hoppy, lagers will generally be lighter and drier while ales can be fuller-flavored and bodied and have stronger fruity or earthy notes. I recommend taking notes of the characteristics of some of your favorite beers before considering how they may be used in culinary applications.

Let’s next review a few different culinary techniques in which beer can easily be incorporated.
Steaming
Replace some or all of the cooking liquid with beer. Light lagers pair really well with mussels, clams, or shrimp in this application.
Poaching / Simmering / Boiling
Same with steaming, some of the cooking liquid in any of these options can be replaced with beer. I love to poach sausage in beer before finishing on the grill or sautéing. Almost any kind of seafood or shellfish can also be cooked in this way.
Stewing / Braising
Adding beer to the cooking liquid is a great way to add new flavors to your dishes, especially if you use a style that is malty or dark. This works really well for chili and soup. The natural acidity of beer will help tenderize meat, which is why I’m a huge fan of using it when I make beef stew and short ribs. Think of beer here as a complement to whatever type of cooking stock your dish calls for.
Marinating
Because it can help tenderize meat, beer is a great addition to a marinade. And if you’re going to marinate something, then you might as well think about applying more beer through the next technique too.
Grilling / Roasting
Beer can be used here as a basting liquid in addition to a marinade.
Smoking / BBQ
I’ve often used beer as an ingredient when I baste, or “wet-mop,” ribs, chicken, or pork, and my favorite BBQ sauce recipe of all-time features a healthy addition of one of my all-time favorite beers, Anchor Steam (I’m still in mourning . . . guess I know what needs to be brewed in time for barbecue season).
Baking
That’s right, beer most definitely has a place in baked goods, especially darker beers like stouts and porters, which can lend all kinds of roasty, chocolatey, and rich notes to desserts and breads.
Beer-Inspired Food Recipes
Let’s get into some actual recipes to demonstrate how you can make use of this amazing elixir in your own kitchen. As we’re closing in on that time of year, I thought it’d be fun to build a menu showcasing a wide variety of beer with a number of different cooking techniques all in a loosely holiday-themed four-course meal with a happy-hour drink to kick things off. Add the ingredients to your shopping list, invite some guests over, and be ready to impress them.
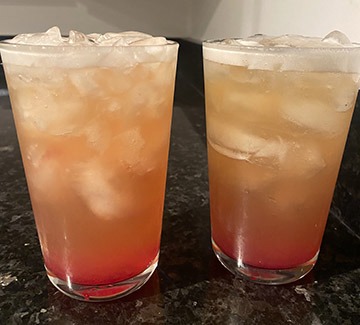
Cranberry Orange Ginger Shandy
Makes ~8 cocktails
Let’s kick off this loose holiday-themed menu with a beer cocktail. Hopefully you aren’t all cranberried-out after Thanksgiving because we’re going to use them to make a slightly tart, vibrant simple syrup that will give this cocktail a healthy dose of seasonal cheer. The cranberry/orange/ginger combination plays perfectly with a hefeweizen/wheat beer, especially one that swings more towards the fruity, as opposed to the banana/clove side, though that will work as well.
Ingredients
2 cups fresh or frozen cranberries
1 cup granulated sugar
1 cup water
1⁄4 cup fresh-squeezed orange juice
Peel of one orange (no pith)
Pinch of salt
16 oz. (475 mL) ginger beer
(6) 12-oz. (355-mL) hefeweizen or wheat beers
Ice cubes
Syrup-making directions (pre-make this)
The bulk of the prep here is in making the cranberry orange simple syrup, which can easily be made a day in advance. Combine all ingredients (except for the ginger beer, hefeweizen, and ice cubes) in a medium saucepan. Stir ingredients well, bring to a boil, then reduce the heat to low and simmer for about 15 minutes, stirring occasionally.
Place a fine-mesh strainer over a bowl and pour the cooked mixture through it. Discard the solids and transfer the syrup to an airtight container. Cool the mixture for at least three hours, or even overnight, before use.
Final drink assembly
Ensure all components (both beers and the cranberry orange syrup) are cold. Fill a pint glass with ice and add 2 oz. (60 mL) ginger beer and 2 tablespoons cranberry orange syrup to the glass. Fill the remainder of the glass with your hefeweizen or other wheat beer. Stir everything well to combine.
When the bubbles subside, fill to the top with additional wheat beer and enjoy.
Note: This recipe will yield about a cup’s worth of simple syrup. If stored in an airtight container and kept refrigerated, it will keep for a few weeks and can be used as a flavoring for other cocktails and mocktails, and is also great served over vanilla ice cream or pancakes.
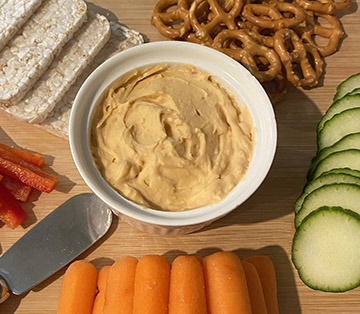
Kentucky Beer Cheese
Makes 2 cups
If you’re anything like me, you’ll want something to munch on while indulging in pre-dinner festivities and I’ve got something that’ll go perfectly with the Cranberry Orange Ginger Shandys — Kentucky Beer Cheese. It’s reminiscent of a Pimento cheese spread, just with a slightly different ingredient list and one key addition — beer! Beer cheese, which as the name suggests was popularized in Kentucky, is salty and savory, great for dipping crunchy things like pretzel sticks, hearty crackers, veggie slices, or even thick-cut salami pieces; however, I must warn you, it’s quite addictive. Like the cranberry orange simple syrup, it’s got a relatively short list of ingredients and can also be made a day or two in advance. I recommend using a food processor here to do the dirty work. In lieu of that, a blender will suffice.
Ingredients
8 oz. (225 g) extra-sharp cheddar cheese, cut into roughly 1-inch (2.5-cm) cubes, at room temperature
2 oz. (56 g) cream cheese (full-fat), at room temperature
1 oz. (28 g) unsalted butter, at room temperature
1⁄4 cup white or yellow onion, roughly chopped
2 tsp. Worcestershire sauce
1 tsp. Dijon mustard
1⁄8 tsp. cayenne pepper (optional)
4 oz. (118 mL) of a “full-flavored” beer (think brown ale, porter, etc.) at room temperature
Salt, to taste
Directions
Put the cheddar cheese, cream cheese, and butter into a food processor or blender and mix until combined — about 60 to 90 seconds. Add onion, Worcestershire sauce, Dijon mustard, and cayenne pepper to the cheese and butter mix. Process until combined, about another 30 seconds. Scrape down the sides of the food processor bowl if needed. Omit the cayenne pepper if a little heat is not your thing. While the food processor is running, slowly add the beer and process until the mixture is completely smooth and there’s no visible beer remaining. This should take 30 to 60 seconds. Season with salt.
This can be served immediately or prepared a day or two in advance. Prior to serving, let the dip come up to room temperature to bring out its flavor and make it easier to spread. Serve in a bowl alongside your favorite accompaniments, such as pretzel sticks, crackers, assorted veggies, and hard salami.
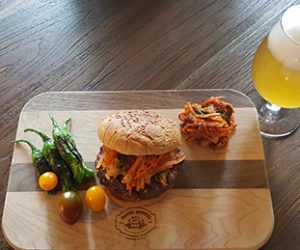
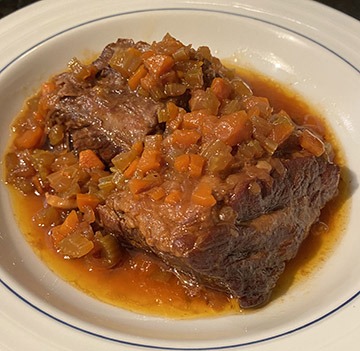
Short Ribs
Makes 4 servings
To me, there are few things more satisfying on a cold and dark winter’s evening than short ribs. Hearty and full of flavor, short ribs are a cut that require a long and slow cooking time to fully cook and tenderize the meat. This is best done using a heavy Dutch oven (with a lid) placed in an oven at a relatively low temperature. I prefer to use bone-in short ribs here as I believe that adds some extra flavor to the finished dish. Don’t skip the step of browning the short ribs either as that will also add a real depth of flavor to the dish. The finished dish will be reminiscent of beef stew but so much more luxurious.
Ingredients
4 lbs. (1.8 kg) bone-in short ribs (boneless will also work if preferred)
2 Tbsp. canola oil
2 medium onions, diced finely
4 carrots, diced finely
4 celery ribs, diced finely
4 garlic cloves, crushed
2 Tbsp. tomato paste
2 cups beef stock, low- or no-sodium
12–16 oz. (350–475 mL) beer (Anything dark or malty and not super hoppy works well here. I’m particularly fond of a Mexican dark lager in this dish.)
4 whole bay leaves
Kosher salt, to taste
Directions
Season the short ribs liberally with Kosher salt on all sides. Heat up a Dutch oven or heavy-bottom pot over medium-low heat. Add the oil to pan and then slowly brown the short ribs on all sides. Keep a close eye on your stove as you want the meat to brown evenly without burning. You also may need to do this over a few batches to not crowd the short ribs in the pan as that will impede browning. Once the meat has finished browning, set it aside for later.
Pour off a little of the excess fat and oil, then add the onions to the pot. Stir well, making sure to scrape up any brown bits from the bottom of the pot. Cook about 10 minutes until the onions start to appear translucent and take on a slight brown color. Add the carrots and celery to the onions and cook for 10 minutes, stirring frequently. Add the crushed garlic, stir, and cook 3 minutes.
At this point, preheat your oven to 250 °F (121 °C).
Add the tomato paste to the vegetables and stir thoroughly to combine. Cook 2 minutes, stirring frequently so the tomato paste doesn’t burn. Add the beef stock and stir to combine, once again scraping any brown bits off the bottom of the pot. Add the beer and bay leaves and stir to combine. Then place the short ribs and any meat juice that has collected into the pot. Bring the contents of the pot up to a simmer, then cover with a piece of aluminum foil, pressing it down onto the surface of the meat and liquid.
Cover the pot with a lid and place it into the preheated oven. Cook the short ribs covered in the oven until they are tender — about 4 hours or so.
Remove the short ribs from the pot and place them into a container or bowl and cover. Place the pot onto a burner set to medium-high. Reduce the liquid volume in the pot by about a third to thicken and concentrate its flavor, then remove the bay leaves.
Once reduced to a volume you are happy with, season with salt to taste. Set the heat to low and place the short ribs back into the pot, turning them to cover them with sauce. Cover and keep warm until you’re ready to serve.
These pair well with mashed or roasted potatoes, grits, wild rice, or polenta.
Roasted Beer and Bacon
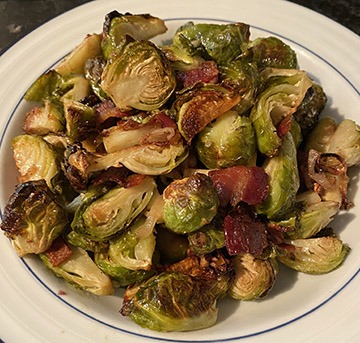
Makes 4 servings
Brussels sprouts used to have a bad reputation. I think that’s before people realized that rather than boiling the heck out of them and serving them when they are all bland and mushy, that they can be roasted until brown and crispy in an oven. The beer will add a slight amount of bitterness and brightness to the Brussels sprouts, which I find helps to round out their flavor nicely.
Ingredients
8 oz. (235 mL) beer (pale ale or IPA works well here)
1⁄4 cup beef or chicken stock
2 Tbsp. apple cider vinegar
1 Tbsp. brown sugar
2 lbs. (0.9 kg) Brussels sprouts, root-end trimmed, quartered or halved depending on size
2 shallots, peeled, halved, and sliced thinly
4 slices of bacon, preferably thick-cut
2 Tbsp. olive oil
Salt and freshly-ground black pepper, to taste
Directions
Add the beer, stock, apple cider vinegar, brown sugar, and a pinch of salt to a small saucepan. Stir well and cook over medium heat until the mixture reduces to about 3 Tbsp. in volume. Remove from the heat and set aside to cool.
At this point, preheat the oven to 425 °F (218 °C).
Line a baking sheet or cookie pan with aluminum foil and set aside.
Trim off the bottom of the Brussels sprouts. Depending on the size of your Brussels sprouts, you’ll either want to halve or quarter them. Place the cut Brussels sprouts into a large bowl.
Cook the bacon in a sauté pan over medium-low heat until rendered and crispy. Remove the bacon from the pan, roughly chop it into bits, then add it to the bowl with the Brussels sprouts. Pour the rendered bacon fat over the Brussels sprouts.
Peel, halve, and thinly slice the shallots. Add them to the bowl with the Brussels sprouts along with the olive oil and reduced beer mixture, and toss well to combine. Pour out onto the prepared baking sheet and spread into an even layer.
Bake 25–30 minutes, until the Brussels sprouts are tender and brown in color. Increase the heat to 450 °F (232 °C) and further cook the Brussels sprouts until crispy. This will happen quickly so keep a close eye on the sprouts.
Once browned to your liking, remove the Brussels sprouts from the oven and serve immediately.
Stout Gingerbread Cookies
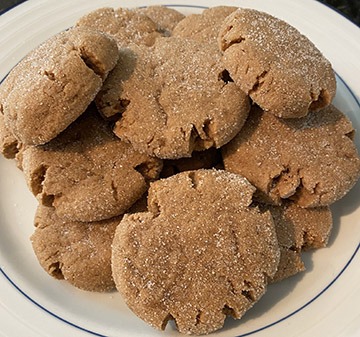
Makes ~28 cookies
Gingerbread cookies are not only seasonally appropriate, they’re also quite a tasty dessert to cap off this meal. I’ve got a way that you can really level up the flavor of these holiday stalwarts — naturally, by adding beer to the dough! But not just any beer — you’re going to want to break out the heavy hitter here by grabbing one of your favorite full-bodied stouts. Any stout. A flavor-packed pastry stout, a nice dry Irish stout, a huge Russian imperial stout. Any of these will nicely complement the molasses and spices and will help provide these cookies with another flavor dimension that will make you ask why you haven’t been adding beer to your cookies all along. To further intensify the beer flavor, I like to reduce the beer before using it in the cookie dough.
Ingredients
6 oz. (175 mL) stout beer
275 g (13⁄4 cups) all-purpose flour
155 grams (1 cup) whole wheat flour
11⁄2 tsp. ground cinnamon
1 tsp. ground ginger
1⁄2 tsp. baking soda
1⁄4 tsp. ground nutmeg
1⁄4 tsp. salt
1⁄8 tsp. ground cloves
1⁄2 cup unsalted butter, room temperature
1 cup dark brown sugar, packed
1⁄2 cup granulated sugar, divided
1 large egg, room temperature
1⁄3 cup molasses
Directions
The first step here is to reduce the beer by about 2⁄3 of its volume. You’ll want to do this an hour or so in advance to allow the beer time to cool before adding it to the cookie dough mixture. Pour the beer into a small pot, turn the heat up to medium-high and cook until it has reduced to about 1⁄4 cup (2 oz./60 mL). Once it has reached that volume, turn off the heat and set aside for later.
In a medium bowl, whisk to combine the flours, ginger, cinnamon, baking soda, nutmeg, salt, and cloves. Set this aside for later.
Add butter, brown sugar, and a 1⁄4 cup of granulated sugar to a stand-mixer bowl and beat on high speed with the paddle attachment for about 60 seconds until the mixture is light brown in color and has a smooth texture. In lieu of a stand-mixer, you can use a large bowl with a hand-held electric mixer.
Reduce mixer speed to medium, add the egg, and mix for about 30 seconds until all ingredients are thoroughly combined. Repeat this same procedure with the molasses, then the reduced and cooled stout beer.
Add the mixed dry ingredients to the wet ingredients and mix at low speed just until everything is combined and there are no streaks of flour remaining. Cover the dough with plastic wrap and chill in the refrigerator for 60 minutes.
After 60 minutes, pre-heat oven to 325 °F (163 °C) and line two baking sheets with parchment paper.
Take the 1⁄4 cup of granulated sugar and pour it into a small bowl. Using your hands, form dough roughly into the size and shape of a golf-ball. Once formed, roll each cookie dough ball into the sugar, then place onto the prepared baking sheet. Press the dough balls gently with the palm of your hand — this will help to ensure even cooking. Don’t crowd the cookies onto the pan as they will spread out some while cooking — keep about 2 inches (5 cm) of space between each cookie dough ball.
Bake at 325 °F (163 °C) for roughly 12 minutes, rotating and switching the pans halfway through.
Remove the cookies from the oven and transfer the cookies to a wire rack to allow them to cool. Repeat with remaining dough, sugar, and prepared pans.
Let cool at least 10 minutes before eating. Any extra cookies, once they’ve completely cooled, can be placed into a plastic freezer bag and stored in your freezer to be enjoyed at a later date.