Open Fermentations: Circling back to fermenters of yesteryear
Brewers worry during fermentation. It’s that period when we as brewers must walk away and wonder what alchemical transfiguration our precious wort is experiencing. Will it be delicious gold or ponderous dull lead? Without much to do, brewers endlessly fret — how do I improve my fermentation environment? How do I prevent my beer from going deliriously squirrelly? Is it infected?
From a modern perspective, one of the biggest things we do to prevent contamination is to lock our wort away from anything potentially non-sanitary. With the rise of monoculture brewing, the advent of the closed conical vessel meant brewers could reliably keep the yeast they intended working alone, but it comes at a cost.
To give some perspective on this, think about your own brewing or your favorite brewery. As you grow and change equipment — say a new fancy brew rig — we know that recipes take some adaptation. Drew will never forget the changes to the beers that occurred when Stone Brewing Co. moved from their medium-sized (2nd?) brewhouse to the grand campus they occupy today. The brewhouse changed drastically to a complex and radically different setup. It took about six months of brewing to dial in the recipes and make Stone IPA taste like Stone IPA again.
And that’s with today’s understanding of what makes brewing work. Back in the pre-WWI period when Leopold Nathan developed the forerunner to the modern cylindroconical vessel (CCV), brewing was primarily dominated by tradition and handed down lore/knowledge. The radical change proposed by this crazy Swiss was dangerous.

To make a beer via open fermentation, you need to have full faith and trust in your cleaning and sanitation regimen.
The important thing to realize is that from say ~10,000 BCE–1920 CE, fermentation, especially ale ferments were mainly done in vats open to the universe (barring a roof or two). That also means our friendly neighborhood yeast cells were primarily adapted to low-pressure environments. Lager brewers around the world were used to closed fermentation environments (with exceptions like Pilsner Urquell), after all, keeping long stored “clean” beer safe from contamination proved to be easier in a closed environment.
Convincing ale producers with their long lineage back through time to convert, was a bit more arduous. Ale cultures would have been selected on how reliably they turned small beers around with good character as well as made fantastic keeping beers with their mixed cultures of Brettanomyces.
It’s on that first part — the fast turn around of small beers for fresh consumption — that was paramount for brewers. Then, as today, brewers didn’t want an excessive outlay for beers that sat in tanks for extended periods (porter aside). Beer that was knocked out quickly meant extra profits.
Having found yeast cultures that gave them both the speed they desired and the taste the customers loved, brewers were naturally hesitant to adapt the lager-centric idea of closing everything to the sky. Guinness and other ale brewers ran many trials to understand the impact of a closed conical on their beers. Soon, after tweaks, many breweries began jumping on board. From a monetary sense it seems natural to pursue less spoiled beer.
But there was a cost — yeast performance changes when you change the environment. Yeast under pressure and in closed environments will express less character; less fruit, less this or that. If the yeast makes beer in a quick enough time without additional brewer intervention, then off we go, but if it requires help, then it needs replacing with a more performant strain at the expense of its unique profile.
Open fermentation hasn’t completely died away. If you tour through Belgium today you’ll still see some open fermentation happening, like the loose-lidded tanks at Fantome Brewing (incidentally, the same tanks are at St. Somewhere Brewing in Tarpon Springs, Florida) or the open squares at Dupont (or the De Halve Maan museum tanks of enameled cast iron).
Even here in the states where CCVs are by far and away the norm, we still have some practitioners of the open fermentation voodoo that aren’t Belgian. Anchor Brewing, San Francisco’s real treat, has used open shallow pans for its Steam beer and deeper squares for its ales like their Porter, Liberty, etc.
SIERRA STORIES
About 20 years ago, Denny tried to open ferment a couple batches. Of course, he had no idea what he was doing or how to do it and the resulting beer proved that all too well! He simply left the lid off the fermenter from the time the yeast went in until he was ready to bottle. (Yeah, not too bright in my opinion.) That may have been his first (but not last) batch to get dumped.
In 2011, Denny had the opportunity to spend three days at Sierra Nevada Brewing Co. in Chico, California as part of their Beer Camp program. Besides getting to brew an altbier on their pilot system, he got to see how they do what they do. He saw some of the biggest CCV fermenters he’d ever seen. But he also got to see something that he had no idea he’d see . . . their open fermentation vats.
Sierra Nevada ferments both their hefeweizen and Bigfoot barleywine in open fermenters. But they don’t just leave them open. They use a positive pressure room with HEPA filters. That means that the pressure in the room is always higher than the pressure outside, which discourages infiltration by all the stuff you don’t want in your beer. The idea is that open fermentation relieves the pressure on the yeast and allows it to express itself and perform better than it would in a sealed fermenter. I think their results speak for themselves!

But here’s the good news — you don’t need fancy positive pressure environments to make open fermentation work for you — all you need is some foil and a willingness to pay attention to your ferment. (Although let’s be frank, who wouldn’t want some of the fancy gear?)
To make a beer via open fermentation, you need to have full faith and trust in your cleaning and sanitation regimen. If there’s any doubt, you’re adding risk to your brew day. Where older brewers had to use leather hoses and other questionable implements, we benefit from a cleaner starting point. Keep the cold side scrupulously sanitary!
Have your yeast raring to go. We both use the “Shaken Not Stirred” starter method to generate plenty of vital yeast. (See the July-August 2019 issue or online at https://byo.com/article/yeast-mechanics/) And though neither of us puts much stock in minimizing lag time, for open fermentations the faster you’re going the better!
Chill your wort and transfer into your vessel of choice – pitch your yeast and cover where you’d normally put an airlock with sanitized foil. Walk away and wait patiently for the yeast to do their thing.
Where Anchor and Sierra Nevada Brewing Companies can build safe rooms for their beers, we use foil and it works. Why? To put it simply — bacteria can’t walk and they can’t fly, except on bits of dust and dirt. During an active, open fermentation in a covered vessel the outbound rush of carbon dioxide helps push motes away from the vessel while the foil prevents any stray stuff falling into the fermenting wort.
You must keep an eye on your beer! Be prepared to transfer/seal it as primary fermentation begins to slow. This is no time for forgetting the spare carboy in the back of the closet!
The easiest way to tell is to watch your kräusen. When it begins to collapse, seal the vessel. Take gravity readings and when you approach a few points away from your supposed (or learned) terminal gravity, bung it up! From that moment on — treat it like any other beer you make.
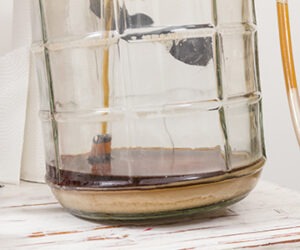
By the way, it doesn’t have to be foil, that’s just cheap and easy (Denny’s favorite). You can open ferment in a pot, with just the lid top. Want to replicate the shallower squares of a traditional ale fermentation? Use a deep hotel pan. (A full-size, 8-in./20-cm deep pan has capacity for a 5-gallon/19-L batch.)
The how is easy enough, the why is another matter. Yeast expression and performance vary from strain to strain. Split a ferment with a strain like Wyeast’s 1275 (Thames Valley) or White Labs WLP023 (Burton Ale). The closed fermentation beer will be noticeably sharper with less fruit, where the open ferment will be softer and more estery.
Drew has written extensively on his preference for fermenting saisons openly — largely driven by performance factors. No saison stall!
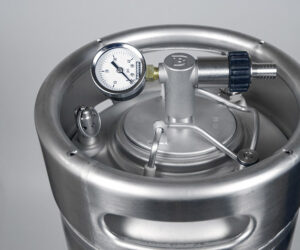
But for years, Drew has open fermented in a set of 10-gallon (38-L) kegs just by popping the pressure relief valve and covering the lid with foil. There were very few beers that didn’t respond in interesting ways to the treatment. About the only things he’s skipped open fermentation for are IPAs and German styles. Everything else has been through the freedom of no airlock brewing.
Now, you might be wondering — really an airlock or a blow off tube makes that much difference? Yes, the incremental pressure impact of an airlock is negligible, but an airlock prevents gas mixing – e.g. a low level of oxygen to remain in the head space and a small amount of ingress via the “open” top. Such a small change can have massive impacts on yeast performance. (See the currently proposed suppression of STA-1 expression in low oxygen environments and possible impact on saison/Belgian yeast performance.)
If you try it nowhere else, give an English style a try! Drew’s Mild sings best when allowed to breathe!
Drew’s Open Fermentation Experimental Mild
(6 gallons/23 L, all-grain)
OG = 1.038 FG = 1.008
IBU = 21 SRM = 8 ABV = 3.3%
Ingredients
6 lbs. (2.7 kg) Maris Otter pale ale malt
2.25 lbs. (1 kg) Pilsner malt
1.5 oz. (43 g) black patent malt
0.75 lb. (0.34 kg) invert syrup #1 (~15 °L) (60 min.)
6.3 AAU Magnum hops (60 min.) (0.5 oz./14 g at 12.6% alpha acids)
Wyeast 1275 (Thames Valley), White Labs WLP023 (Burton Ale), or Lallemand Windsor yeast
½ cup corn sugar (if priming)
Step by Step
Mash in at roughly 1.5 qts./lb. (3.1 L/kg) targeting a mash temperature of 152 °F (67 °C). Hold at this temperature for 60 minutes. Begin recirculation and sparge with no more than 3 gallons (11 L). Top up with water to begin the boil at about 7 gallons (26.5 L). Boil for a total of 60 minutes adding the hops and invert sugar at the beginning of the boil.
After the boil is finished cool the wort to 66 °F (19 °C), transfer to a fermenter large enough to allow the kräusen room to expand, then pitch your yeast starter (if using a liquid strain). Do not seal your fermenter with an airlock or other device, simply place a loose lid as a covering. When fermentation slows, transfer to a closed vessel or replace the loose lid with an airlock or other device to enclose the fermenter.
After fermentation is complete, allow the beer a few days to condition, then package the beer using priming sugar if bottling.
Drew’s Open Fermentation Experimental Mild
(6 gallons/23 L, extract with grains)
OG = 1.038 FG = 1.008
IBU = 21 SRM = 8 ABV = 3.3%
Ingredients
6.6 lbs. (2.7 kg) Maris Otter liquid malt extract
1.5 oz. (43 g) black patent malt
0.75 lb. (0.34 kg) invert syrup #1 (~15 °L) (60 min.)
6.3 AAU Magnum hops (60 min.) (0.5 oz./14 g at 12.6% alpha acids)
Wyeast 1275 (Thames Valley), White Labs WLP023 (Burton Ale), or Lallemand Windsor yeast
½ cup corn sugar (if priming)
Step by Step
Start with 3 gallons (11 L) water in your brew pot. Place crushed malt in a mesh bag and steep as the water heats up to 168 °F (76 °C). Remove grain bag and off heat, add the liquid malt extract. Stir until all has dissolved, then resume heating. Once the wort begins boiling, add the hops and invert sugar. Boil for 60 minutes.
After the boil is finished cool the wort to 66 °F (19 °C), transfer to a fermenter and follow the remaining fermentation and packaging instructions from the all-grain recipe.