Simplify Your Brewing
Like tinkerers endlessly attempting to build a better mousetrap, homebrewers are on a boundless quest to brew better beer. Not just to brew better beer, mind you, but to brew that beer quicker, easier and cheaper. Borrowing a page from the Olympics, whose official motto exhorts athletes’ efforts to achieve “Citius, Altius, Fortius” (swifter, higher, stronger), I am proposing a new motto that homebrewers can adopt as their own: “Rapidius, Facilius, Frugalius.”
This article is designed to provide tips and ideas and to suggest gadgets and methods to help brewers save time — and a little bit of money. These goals can’t always be accomplished simultaneously; you often have to find a happy medium. Sometimes it takes time and effort to save money and sometimes it takes money to save time and effort. Each individual brewer has to decide which of these takes a higher priority.
In my experience, homebrewers tend to be a thrifty lot. Some may be this way out of fiscal necessity, but an equal number seem to enjoy the sheer joy of frugality. Who hasn’t experienced the “thrill of the hunt” when browsing for useful brewing items at garage sales or thrift shops?
Likewise, homebrewers tend to be an inventive lot. I know many brewers who have become electricians, welders, mechanical engineers — even microbiologists — in their unceasing quest for better beer. An untold number of erstwhile garages and basements have been converted to workshops and laboratories in this same pursuit. Numerous Rube Goldbergian contraptions have been cobbled together to convert that last bit of starch and extract that last bit of maltose, to decrease lag times, to heat the wort up fast and cool it down faster.

The commonsensical approach seems to be to follow the typical sequential steps required to brew a beer, so let’s start at the beginning.
Sanitize, Sanitize, Sanitize
There is no single effort in brewing good beer that is more important than proper cleaning and sanitizing of your brewing equipment. Anything that comes in contact with your beer must be free of contaminants, both seen and unseen. The “seen” contaminants (dust, dirt, grease, organic matter) are removed by cleaning the equipment; the “unseen” or bacterial contaminants must be killed off during sanitizing procedures. These are two separate activities; cleaning usually requires the application of a little cleansing agent and a lot of elbow grease. Sanitizing is usually accomplished with a simple soak in water and the anti-bacterial agent of your choice.
Hints and Tips:
- A lot of the pre-brewing cleaning effort can be minimized or negated by good hot water rinses and sanitizing soaks immediately following the use of each piece of equipment. After the equipment is dry, cover items in large plastic garbage bags and seal them completely. This will keep most, if not all, visible contaminants away from your equipment — but this will not free you from following sanitizing procedures before brewing your next batch.
- With regards to sanitizing, the two most important data points are dilution rates and contact times. Dilution rates change depending on which sanitizer is being used and contact times vary greatly. There are a number of effective sanitizers on the market; always read directions for proper use. If saving time is your goal, I’d go with a “no-rinse” sanitizer like One-Step.
- Having a short length (4 to 5 feet) of old garden hose hooked up to my utility sink faucet is a real plus. You might even want to attach a threaded female end to the hose and add a lawn and garden type spray gun to control water flow and pressure.
- If you don’t already own a jet-spray bottle washer or carboy washer, I highly recommend getting one. These gizmos are automatically activated when a bottle presses down onto the unit, sending a high-powered stream of water blasting against the glass. If you want to maximize your rinsing efforts and minimize the time it takes you to do this, get one now!
Just Buy It
Before you can brew a beer, you need to get the ingredients needed to brew the beer. While this may sound obvious, you’d be surprised how many brewers have had to make second trips to the store to grab that lousy two-dollar item they forgot to pick up.
Another common mistake made among new brewers is the unthinking use of old and outdated product. We all know that liquid yeast has a limited shelf life, but so do hops, grains and even malt extracts. These are all organic materials and they are all subject to eventual decomposition. If you don’t brew often, only buy what you need at the time. If it’s more economical to buy in bulk, be sure whatever it is you buy is properly stored.
Hints and Tips:
- Before trudging off to your local homebrew supply shop or browsing your favorite homebrew supply Web site, consider taking inventory of what you have and writing down those things you need. Don’t just focus on the primary consumable ingredients — the sanitizer, acidifier, clarifier, nutrient, priming sugar or bottle caps may not be listed in the recipe, but they may be just as important to the finished product. Create an all-inclusive checklist and make copies of it for routine use.
- Give your beer a fighting chance at greatness. If your extract is beyond its freshness date, dump it! If your grain looks, smells or tastes moldy, toss it! If your hops are brown, wilted or smell like cheese, get rid of ‘em! When it comes to ingredients, brewing good beer is little different than preparing good meals — freshness counts. A bad batch of beer, brewed from old ingredients, is the biggest possible waste of your brewing time.
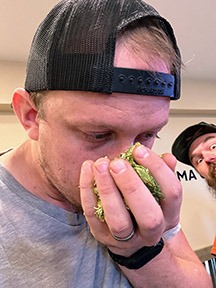
For extract brewers
Beer kits — which include a can of prehopped extract and a packet of dried yeast — offer a great way to master basic brewing techniques. But once you’re comfortable with your skills, experiment with some new ingredients. Start with the palest unhopped malt extract available. Whatever color and grain flavor is required by the beer style can be derived from specialty grains such as crystal malt, chocolate malt and roasted barley.
Hints and Tips:
- Consider using dry malt extract (DME) instead of liquid malt extract (LME). Unlike LME, DME can usually be purchased by the pound and in any quantity and it has a longer shelf life.
- Your beer’s hop character — bitterness, flavor and aroma — can be tightly controlled by the use of appropriate hop varieties and quantities added in stages to the brew. Did you know that there are three different ways to increase or decrease hop bitterness in your beer? Try using a greater or lesser quantity of the specified hop variety called for in a recipe, switch to a different hop variety with a higher or lower alpha acid content, or simply adjust the timing of the hop additions to the wort.
- If you are not particularly knowledgeable on the subject of beer styles or need some help in recipe formulation, consider buying one of the recipe formulator software programs. These program offer a quick way to expand your skills and get comfortable with recipe formulation.
Just Brew It
So now it’s brew day … your equipment is clean and sanitized, your ingredients are at hand. What’s the best course of action? Regardless of whether you are an extract or an all-grain brewer, you need to get some water boiling on the double. Extract-only brewers need little more than a good rolling boil in their brewpot, while extract and specialty grain brewers need a pre-boil steeping temperature of about 150° F for their specialty grain. All-grain brewers should be working towards strike temperature.
Hints for extract brewers:
- Always use the largest-volume brewpot available, preferably one made of stainless steel or (chip-free) enamel-coated metal. The goal here is to boil as much of your wort as possible. Full 60-minute boils are recommended to cause precipitation of the proteins and resins in the wort (called “hot break”) as well as to more fully dissolve the hop alpha acids (called “isomerization”) that bitter your beer.
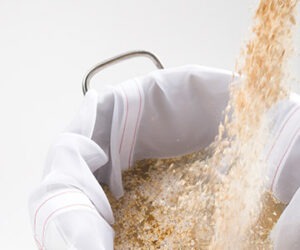
- Save time by steeping all of your specialty grains in a separate, smaller pot while the brewpot is brought to a full-out boil. And rather than steeping your specialty grain in a grain bag, consider steeping the grain loosely in a pot. This allows you to stir the grain, which increases water-grain contact that both hastens and maximizes the steeping and extraction process. Loose grain steeping requires the use of a large colander or mesh strainer in order to strain the specialty grain “juice” off into the brewpot.
- Extract and specialty grain brewers not quite ready to try all-grain brewing might want to consider partial-mash brewing. This means deriving a portion of your wort’s fermentable content from grain while still using malt extract as your beer’s base. This requires you to perform all the mashing procedures done by all-grain brewers, but in a much smaller, more manageable volume. Partial-mash brewing is typically done in grain quantities of two or three pounds.
- Start with a couple of pounds of two-row English pale malt.
- Do a simple, basic single-step infusion mash.
- Always keep track of the three most important mash variables: time, temperature and pH. Also, see tips for all-grain brewers below.
Hints for all-grain brewers:
- Assuming you already have the brewpot and/or mash tun necessary for mashing and boiling large quantities of grain and wort, consider increasing the BTU capacity of your heat source. This not only assures you of reaching strike temperature quickly, but it also provides you with a good, consistent rolling boil during the brewing phase.
- One of the most important objectives of mashing is achieving high efficiency levels. This simply means deriving the greatest amount of soluble sugars possible from your grain. Most homebrewers hit mash efficiencies of about 65-70%; efficiency levels of 80% and better are often envied. There are a number of things you can do to boost your mash efficiency.
- Mill grain properly. A properly milled grain is one whose husk is sufficiently cracked open to expose the inner starch, but is not reduced to sawdust by over-milling.
- Be attentive to mash variables. The three most important mash variables that will affect your efficiency are time, temperature and pH level of your mash (which should measure between 5.2 and 5.4). Precise mash temperature is important because enzymes needed to make the grain’s endosperm (where the maltose sugars are stored) soluble, perform differently at various temperatures. Proper timing is needed to break down and extract the maltose sugars during mashing, especially as it pertains to temperature.
- Proper sparging. Now that you’ve created sugary wort from the grain, you need to drain it away from the grain bed. In doing so, you want to leave behind as much of the particulate haze as possible and you want to capture as much of the wort as possible from the grain bed. Sometimes these procedures can be done in the same vessel the grain was mashed in and sometimes they require separate vessels — it all depends on your system.
- Since the grain bed itself is an effective filter, brewers can re-circulate the wort back through the grain bed as they drain it off. After several quarts have been re-circulated, the wort will begin to “run clear.” When the wort is no longer hazy or milky looking, you can begin to sparge, or draw off the wort. Some things that are important to remember here:
- Keep the sparge water and the grain bed at the proper temperature (sugar-laden liquid flows better at warmer temperatures).
- Don’t over-circulate the wort, as it can pick up an unpleasant “husky” astringency from the grain.
Occasionally, brewers experience the frustration of a stuck sparge. This means the grain bed compresses and compacts on itself and will not allow the sparge water to pass through it. This problem can be avoided or minimized by employing a number of time-tested methods.
- Always sparge at a steady rate; add fresh sparge water at the same rate that the wort is being drained.
- Never let the water “channel” down the sides of your sparge vessel.
- Always keep a shallow pool of sparge water at the top of the grain bed as well as an “underlet” or pool of water below or at the bottom of the grain bed.
- When brewing any style whose recipe calls for a large quantity of huskless grains such as wheat or rye, consider adding yeast hulls to the grist. These flavorless hulls work in the same manner as grain husks, keeping the grain bed more porous, and therefore, more permeable by the water.
Cool It
When the boiling phase is done, it’s time to start cooling down the wort quickly. You want to get your wort fermenting as soon as possible, but you shouldn’t pitch the yeast until the temperature of the wort is below 80° F; 70° F is even better.
- Sink baths. Carefully move your covered brewpot to a sink large enough to accommodate your pot. Stop up the sink drain and begin filling the sink with cold water — adding ice cubes to the water isn’t a bad idea. Make sure none of the water is allowed to seep into the brewpot. When the water around the brewpot gets warm, drain the sink and repeat the process as many times as is necessary.
- Wort chillers. Wort chillers can easily cut the wort cooling process in half. Wort chillers come in two types: simple immersion chillers, and the more complex counterflow chillers. Immersion chillers, made of coiled copper tube, are designed to be placed directly into the hot wort. Cold water flowing from a water source through the coil draws heat out of the wort (the resulting hot water flowing out the open end can either be collected for later use or directed down a drain).
- Immersion chillers should always be thoroughly rinsed before being placed into the brewpot. By placing the chiller in the hot wort in the last 5 minutes or so of the boil, it is automatically sanitized.
- Counterflow chillers, made in a variety of designs, force cold water past the hot wort, both liquids flowing in opposite directions. A counterflow chiller is used external to the brewpot, which requires that the beer be either siphoned or pumped through it.
Clarifying the Wort
If you are an all-grain brewer, you already started the clarifying process when you re-circulated your wort back through the grain bed just prior to sparging. The next three opportunities to clarify your wort are while it’s still in the brewpot, and the last one is while the beer is conditioning in the carboy.
- Add an ounce of Irish moss (also called carageenan) in the last 15 minutes of the boil. Once this flaky dried seaweed is re-hydrated it becomes a coagulant, which causes proteins and other organic solids to clump together. These clumps will readily fall out of suspension with the help of gravity.
- Whirlpool the wort. When the boil is done and the wort has been cooled, vigorously stir the wort in a circular pattern. The resulting whirlpool will cause any particulate matter in the brewpot to collect in the relative calm in the center of the pot. By gently siphoning the cooled wort from the brewpot into a fermentation vessel, you can leave most of the hot break and hop solids behind.
- Strain the wort. Remember the mesh strainer that I mentioned earlier? Here’s where it serves a dual purpose. Rather than siphon the wort from brewpot to fermenter, I prefer to pour the cooled wort through the strainer directly into the fermenter. By doing so, I accomplish two things — I am able to strain most of the hot break and hop solids out of the wort, while at the same time I am aerating the wort in preparation for fermentation.
- Add clarifier to wort in the carboy. Isinglass (in powdered and liquid form), gelatin, polyclar and bentonite can all be mixed with water and added directly to the carboy (liquid isinglass need not be hydrated). These finings are added after fermentation.
Pitching Yeast
After sanitizing, proper pitching of the yeast is perhaps the second most important thing you can do to make good beer. Regardless of how well you sanitize your equipment and how good your recipe is, if your beer doesn’t ferment quickly and cleanly, it may all be for naught.
Hints and Tips
- Quantity (volume). Of primary importance is the amount of yeast pitched. Suffice it to say, more is always better. Under-pitching of yeast can lead to a host of problems, starting with long lag times. If you currently use dry yeast, consider using those brands that are packaged in 11 gram packets as opposed to those in 7 or 8 gram packages — or use two of them. If you are using liquid yeast strains, pay close attention to expiration dates. According to the manufacturers, most ale yeast is considered good for 4 months after the package date; lager yeast for only 3 months. I always recommend building up the cell count by making a yeast starter (see BYO, March-April 2002).
- Don’t be afraid to use yeast nutrients and energizers, especially for last-minute yeast starter worts and high gravity beers — those above 1.060. These are chock full of vitamins and minerals that are like dietary supplements for yeast, designed to accelerate cell growth.
- Temperature. Next in order of importance is the temperature of the yeast and the wort. Dried yeast should be “proofed” or re-hydrated in warm water before pitching it into the warm wort. Make sure your liquid yeast also has been warmed to room temperature or warmer. You can easily avoid a fermentation delayed by temperature shock by closely matching the temperature of the yeast slurry and the wort.
- Aerate the wort. Absorbed oxygen in the cooled wort is a key to quick and healthy fermentations. As I mentioned above, a relatively painless way is to pour the cooled wort through a strainer or similar device. Another sure-fire way to aerate your wort — but not without some expense — is to buy a “beer stone” hooked up to a small oxygen cylinder or to a pump. Agitation is also important. Once your wort has been aerated and the yeast has been pitched it’s time to introduce the two to one another. A good vigorous shake or swirl of the closed fermenter is a good idea to get things started (avoid stirring the wort).
Hopefully you’ve noticed that I’ve repeatedly mentioned that the wort should be cool before it is aerated. This is because when air (oxygen) comes in contact with hot wort, the beer will more quickly oxidize and staling will be the eventual result. This is referred to as HSA, or hot-side aeration. Oxidized beer smells and tastes papery or cardboardy in the early stages and can become winey or sherry-like as the beer ages. If oxidation is prevalent in your beers or if you are sensitive to it, avoid HSA at all costs. Properly cool your beer before aerating or agitating it — besides, you should already be cooling it so you can pitch the yeast as soon as you can.
- If you have a high-gravity beer such as a barleywine in mind, and you want to get the fermentation off to an explosive start and a quick completion, consider the shotgun approach. Shotgun brewing involves making two batches of beer, back-to-back. Timing is essential. When the primary fermentation of the first beer is done, brew a second batch ASAP (preferably a higher-gravity beer). Rack the first beer over to a secondary fermentation vessel and pour the fresh-brewed wort right on top of the yeast bed in the primary fermenter. Three things to be mindful of:
- Both beers must be of similar styles as they’ll be sharing the same yeast strain.
- Make sure the first brew was successful and the remaining yeast is still clean before committing a second brew to it; smelling and tasting the beer is usually all the proof that is needed.
- Having the equipment necessary to ferment two beers simultaneously is a prerequisite to shotgun brewing.
Primary fermentation
Standard debates in this area usually have to do with the preference for either plastic vs. glass fermenters and airlocks vs. blow-off tubes. Personally, I consider this debate a tempest in a brewpot. The key to success (and to this debate) is in keeping all plastics free from scratching and pitting caused by rough treatment and repeated usage; simply buy new ones when the old ones get beat up. The second part of this key to success is to limit the amount of time the beer is left to sit in the plastic vessel. As soon as fermentation is complete, transfer the beer to glass for long-term aging. I find that plastic primary fermenters are much simpler to use and clean than glass carboys, and airlocks are safer and much easier to use than blow-off tubes.
Whether you ferment in plastic or glass, one important issue regarding primary fermentation is that of fermentation temperature. Unless you are brewing an estery and alcoholic Belgian Trappist or strong ale, primary fermentation temperature should never be allowed to rise above 70° F. Very warm fermentations are known to create a whole bunch of unwanted — and even unpleasant — aromas and flavors in beer. There is even an increased risk of bacterial contamination at higher temperatures. Esters, phenolics and diacetyl are legendary, but the demon known as fusel alcohol is infamous. Fusel alcohol is a class of “higher” alcohol produced at high fermentation temperatures. Its presence can be smelled, tasted and felt in the throat and it is often blamed for aggravated headaches and hangovers.
Keep in mind that fermentation itself is responsible for producing heat and can increase the beer’s temperature between 3 and 5 degrees depending on the type of fermentation vessel and its location.
Siphoning
One procedure that is necessary to homebrewing, yet seems to vex new brewers, is the siphoning procedure. The most natural method of getting liquid to flow through a tube is to suck it through, but this is unhealthy for your beer, and there are better ways.
- The best way I have found to get a siphon started is to let Mother Nature do most of the work. With your transfer tubing looped in a circle and both open ends pointed upward, fill the tube with water. Connect one end to the racking cane; by simply dropping the open end into the vessel into which the beer is to be transferred, gravity pulls the water out of the tubing followed obediently by the beer. The small volume of water added to your beer will have no effect on the finished product.
Two-Stage Fermentation
Another simple procedure that is very important to the outcome of your beer is two-stage fermentation, also known as secondary fermentation. Since the vast majority of fermentation took place in the primary vessel, secondary fermentation is somewhat of a misnomer. What takes place in this secondary vessel is more of a maturation process; the beer simply ages, mellows and clarifies. Because this process typically takes a minimum of two weeks, it should always be done in a glass or stainless steel vessel. For most ales, secondary fermentation temperature need not be any different from primary fermentation.
Where cooler, lager-type fermentation is called for, however, nothing beats a compressed gas refrigeration system. Where none exists, however, the brewer has to be inventive.
Hints and Tips
- Make a lagering vessel. One of the simplest and cheapest lagering set-ups starts with a medium-sized (30-gallon) rubber garbage can with a lid. Place your carboy inside the (clean) can and fill the can with water equal to the beer level in the carboy. After freezing eight 1-pound gel freeze packs, put half of them in the water. Every eight hours, replace the thawed gel packs with frozen ones from your freezer. If kept in a basement or crawl space and wrapped with a heavy insulating blanket (held in place with bungie cords) with the lid kept on, this lagering vessel should be able to maintain a water temperature in the high 40s with some minor fluctuation. Place a floating thermometer in the water or attach a non-floating thermometer to the neck of the carboy that dangles below the water line for constant and instantaneous temperature readings.
- Make a beer-friendly fridge. If you intend to employ a refrigerator in your home brewery, you might need to find a way to warm it up, as typical refrigerators — even on their warmest settings — may still be too cold for primary fermentations. Consider getting an external thermostat that allows you to set your fridge to temperatures higher than those pre-set in your fridge.
- Handling your carboy. Wort-filled carboys can weigh as much as 50 lbs. and they are eminently breakable. There are some handy carboy handles on the market, but old plastic milk crates also serve the purpose nicely.
Bottling and Packaging
Ultimately, when your beer is done fermenting and aging, you’ll need to decide on how to store it. The vast majority of homebrewers bottle their beer, but there are still a number of options to consider.
If you choose to join the crowd and bottle your beer, the first decision you confront is the choice of bottles. You can choose self-sealing or you can choose to cap them yourself. If you choose to buy those that require capping, you can choose from among 7 ounce, 12 ounce, 16 ounce, 22 ounce and quart-sized bottles (depending on your supplier). Obviously, the larger the bottle, the fewer you’ll need to buy, clean, fill and cap per batch. Whichever you choose, remember that you’ll need enough to contain 640 ounces of beer (for a 5-gallon batch).
If you choose the self-sealing type, alternately known as swing-top bottles or Grolsch bottles (after the Dutch brand that popularized them), consider two things: the rubber gaskets will require replacement with regular use, and homebrew competitions in the U.S. don’t accept self-sealing bottles.
Hints and Tips
- Bulk Priming. Before bottling your beer, don’t forget to add a measured amount of priming sugar, typically 3/4 cup dextrose or 1-1/4 cup dry malt extract per 5-gallon batch. Rather than measure out and add the sugar directly to the bottles, bulk prime your beer. This simple procedure can be done by boiling your priming sugar in a cup or two of water (the exact amount is inconsequential) and adding the cooled mixture to the beer. This ensures more consistent carbonation throughout the entire batch of beer.
- Yet a couple more options exist when it comes to priming your beer. First, you can use Primetabs, a unique product designed specifically for priming beer. These aspirin-sized tablets are made of pure dextrose and they can be added directly to the beer bottles. Since a single bottle typically requires two or more tablets, you can purposely vary the carbonation in your beer by adding more, or fewer, tablets. (I use four in a 12-ounce bottle.) Second, you can prime your beer and flavor it by adding a bottle of fruit flavored liqueur to it instead of priming sugar. One 750-ml bottle of liqueur contains just about enough sugar to prime a 5-gallon batch of beer (you might want to add another couple ounces of dextrose just to be sure).
- Kegging. A kegging system typically consists of a 5-gallon stainless steel soda-pop keg, a 5- to 10-pound CO2 tank, a regulator, keg connectors, hosing and a faucet/dispenser. By kegging your beer, you eliminate the need to prime your brew with sugar — though that is still an option. If you continue to prime your beer in the keg, you might want to cut the last inch or so of the “out” dip tube so you won’t suck up the layer of yeast created during the carbonation phase. Most brewers choose to carbonate their beer by forcing CO2 into the beer under high pressure. When doing this, make sure your beer is as cold as possible; absorbed carbon dioxide is retained better at cold temperatures.
Owning a CO2 kegging system also opens the door to other homebrewing options such as force carbonating, filtering, and counter-pressure bottling. Force carbonating frees you from having to prime your beer before transferring it into the keg; you literally force CO2 into the beer by turning up the CO2 pressure in the keg and agitate the beer over two or three days time. Filtering and counter-pressure bottle-filling really go hand-in-hand. If you filter your beer you are removing most, if not all of the yeast. Since yeast is necessary to bottle condition (carbonate) homebrew, you need to force carbonate your beer in the keg and bottle it under counter pressure. Get it?
Record Keeping
Of primary importance to all homebrewers is to make good beer. Of secondary interest to all homebrewers should be to make good beer consistently, batch after batch. This is where good record keeping comes in.
Having good notes and records of all your brews is worth its weight in amber. Not just your basic recipe, but all of the details surrounding the procedures and handling of your beer: quantities, types, dates, times and temperatures. It’s invaluable information that you’ve worked hard for, and it can be reviewed at your leisure and for your drinking pleasure in the future. Remember — this is all about “Rapidius, Facilius, Frugalius” — making better beer, faster, easier and cheaper.