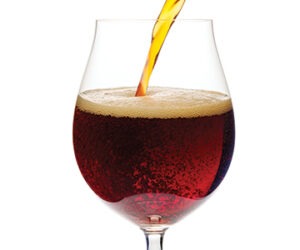
Small Batch Brewing Techniques
 I’ve always homebrewed on the “small” side. I don’t mean in terms of gravity (although that’s usually true, too), but rather in terms of volume. Five gallons (19 L) is considered to be the standard batch size for the hobby, but for a variety of reasons (heat source, equipment, storage space) it had never been practical for me to produce more than 4.5 gallons (17 L) per batch. When I moved into my palatial new garage brewery, I initially ordered all the equipment necessary to brew on a larger scale, and made my first “real” batch of beer: a 10-gallon (38 L) behemoth of a North German altbier. I hated it. Not the beer — the beer turned out fine — but the process and the “big”-ness of it all. Everything took longer, weighed more, and it took more work to correct something if the process went sideways. I returned the new equipment and went back to what I realized was simply my preferred batch size. The lesson I learned was this: We’re not all meant to be brewing the same volume of beer. Homebrewers (and their circumstances) are unique, and there’s no “right” amount of beer to produce. There’s nothing magical about 5 gallons (19 L) (other than fitting well in a 5-gallon/19-L soda keg), and in fact it’s perfectly common to see “short” meads and ciders that are produced in much smaller volumes — so why not beer?
Brewing small batches of homebrew can save time, takes less space, is cheaper on brew day, and for a lot of people it can be conducive to brewing better beer, brewing a wider variety of beers, and brewing more often. There is no shame (and a lot of advantages) in brewing small, so let’s talk about the pros and cons of brewing at the 1⁄31-barrel level (or 1 gallon/3.8 L, for those not up on their conversions).
Size Matters (But Not How You Think)
Brewing small means spending less money. Ingredient costs per batch are lower — proportionally lower, since you’re scaling down the recipe, but still lower! Many of the brewers I know would brew more often if cost weren’t a factor, and this is a way to maintain a steady brewing schedule on a budget. The benefit of small batches is not only a cheaper brew day, though; brewing more frequently usually results in a more proficient brewer, which means fewer blown batches down the drain (or, unpleasantly, down your throat). One-gallon (3.8-L) brewing also enhances a pre-existing advantage homebrewers have over commercial brewers: The ability to source and use exotic specialty ingredients that are cost-prohibitive for use at larger volumes. Black truffle ESB, anyone? (SO earthy. . .) You’re also saving on your most precious commodity: Time. Small-batch brewing is fast. For those who think an all-grain batch MUST take all day, smaller batches are your answer. A typical 1-gallon (3.8-L) all-grain batch takes around two hours to complete.
One-gallon (3.8-L) brewing also has process advantages. For one, small-batch brewing is perfectly suited to brew in a bag (BIAB) systems. With a smaller kettle and less grain, the process of steeping and draining your grains in a mesh bag becomes far more manageable — rather than mounting a motor-driven industrial winch into the ceiling, all you need is one arm (with hand attached) or a reasonably stout hook. Heating options open up, too; 5- to 10-gallon (19- to 23-L) batches require a lot of heat to get a proper boil (with propane burners, for example). Brewing small, though, means that nearly any heat source will do: Kitchen ranges, electric hot plates, induction elements (which are both very cost-effective and incredibly high-performing when it comes to boiling a gallon or two of wort — read my story on this subject at https://byo.com/2967).
One-gallon (3.8-L) brewing requires less space than is needed for larger batches, and the equipment is smaller and easier to store. Small batches also allow brewers to maintain a well-stocked and flexible warehouse of ingredients without requiring the construction of a space-devouring storage mechanism for huge bins of grain. When you’re working with a grain bill of only 2 or 3 pounds (0.9–1.3 kg), you only need a quarter ounce
(7 g) of hops, and a 2-L yeast starter can inoculate four or five batches. Because of these small demands you’re in a better position to brew on the fly. One medium-sized cabinet can house all the base and specialty grains you could need for an impromptu brew day, and a small collection of hops can give you options for any style you want to brew. No more hauling 14-pound (6.4-kg) bags of grist home and lamenting the fact that your significant other won’t let you turn the bedroom closet into your personal grain room — now you can brew what you want, when you want, and increase your recipe flexibility at the same time. Hit up your local shop and bring home a dozen bags of specialty grains you’d never use when you’re only brewing one massive batch per month, and have a field day!

Small batches also mean less weight, which makes life easier for those of us who are not routinely competing in the Caber Toss at the Highland Games. If your process requires 10 pounds (4.5 kg) of grain and a single-infusion mash, in the absence of a pump you’re very likely looking at the fun prospect of dumping more than 30 pounds (14 kg) of hot water into your mash and then disposing of 20 pounds (9 kg) of wet grain afterward. One of the great brewing mishaps I’ve ever seen (or even heard about) was when, at a group brewing event, a brewer had a handle snap off of a kettle holding 6 gallons (23 L) of 165 °F (74 °C) mash water. The thirteen folks in attendance spent the rest of the day sloshing around in wet shoes over semi-scalded feet (and the dog was never the same again).
Ultimately, small-batch brewing (particularly when we’re talking about 1- or 2-gallon/3.8- or 7.6-L batches) is fast, cheap, and creates real advantages in production flexibility, recipe and brewing skills development. You’ll be in a position to brew better and more-frequently, both of which will increase your enjoyment of the brewing process. Small-batch brewing is even safer than brewing larger batches.
Limitations
But . . . (there’s always a “but”) in the case for small-scale brewing, the primary limitation is obvious: You’re producing less beer to drink. I would argue that the smaller volume is worth the increased ease of production, but if you’re not swayed by that argument there are others that are worth considering. Then there’s the problem of recipe scaling — it isn’t always easy (or convenient) to scale down a larger-format recipe. But that problem, too, is manageable, and one that usually only needs to be fixed once.
For one thing, the “less beer” argument is illusory. Sure, you’re producing less beer per batch, but for most small-scale homebrewers they’re brewing on a more regular basis. If brewing is a hardship that requires you to sacrifice a full day to accomplish it, then you’re not going to brew all that frequently. If making a batch of homebrew is something you can accomplish while your significant other is out to lunch with a friend, you’ll be more likely to do it. I once had a friend who would stop by the local golf club on the way home from work to play just four holes. He was there for an hour, three or four times a week, and the club didn’t even charge him most days. His game got better, faster, and he was routinely taking his friends’ money on those Sundays when we’d all get out to play a full round. The same logic works with small-scale brewing, just without the hideous clothing. One gallon (3.8-L) of wort in the fermenter will produce ten 12-ounce bottles of homebrew, which is insufficient to cater your best friend’s wedding but more than sufficient to share with that friend on a quiet summer evening on the deck. Once you hit upon the world’s best porter recipe, you can break out the big kettle and produce a large batch of it!
Another reason the “less beer” argument doesn’t hold up quite as well lies in the ability to “stretch” the wort. A system that produces 2 gallons (7.6 L) of 1.050 OG Dortmunder export can produce twice as much if you simply brew your wort to 1.100 OG and dilute with cool water in the fermenter. You get all of the advantages of your small-batch brewing process (shorter time, less weight, flexible process) but twice the beer!
One of the biggest advantages of small batch, however, is that sometimes we don’t even want a big batch of beer taking up space in the fridge, whether in bottles or kegs — or if you live in a small space you might not even have the means to store a large batch of beer. If you’re someone who doesn’t have a lot of beer-drinking friends and family, you may be drinking most of what you make yourself. You may not need or want 5 or 10 gallons (19 or 38 L) of American barleywine. Brewing small means that you can maintain and enjoy a healthy variety of beers in your collection.
Recipe formulation can be another challenge. Most homebrew recipes you’ll find — whether in books, magazines, or online — are geared towards a finished 5 gallons (19 L), or somewhere around 7 gallons (26 L) boiling in the kettle, anticipating (and assuming) a specific amount of evaporation, equipment loss, and ingredient loss.
These always require small tweaks so the numbers “work” on our systems, but when scaling down by as much as 80% to 1 gallon (3.8 L), the challenge is more multifaceted. Tackle this by first doing simple linear scaling — multiply all the ingredients used by 0.2. You’ll then need to pump up your water volumes to account for a greater aggregate percentage of loss to evaporation, and make any necessary adjustments for hop utilization if you’re doing the double-wort-dilution trick (higher gravities mean lower utilization). You may also find that if you’re using the same equipment that you did when you were brewing big batches that your mash efficiency is affected significantly: I’ve always noticed a clear drop-off when making small batches, almost certainly related to the amount of “flow” through the grain on lautering and sparging. This is a problem you only need to fix once, and you have help. Brewing software will automatically scale down recipes for you, and once you know your new adjustments they should hold for every batch.
Making the Switch
Unlike scaling up, scaling down doesn’t require much of an investment in new equipment. Most systems will accommodate a scaled-down version of your beer with only recipe adjustments. However, there are some equipment changes that might make the transition a bit smoother, and will save space in the event that your volume reduction is the result of new living circumstances (congratulations on that new job in the city and your 540-square-foot-apartment!). Virtually every piece of brewing equipment that large-scale homebrewers use comes in a “small-batch” size, from the mash right through packaging.
For all-grain brewers (those who aren’t going with a BIAB process), the first place you want to look is to your mash tun. A 70-quart Coleman cooler is great if you’re making 7 gallons (26 L) of beer, but a 2-gallon (7.6-L) batch is going to get lost in it, and the lower grain weight and mash water volume is going to mean a lot more heat loss. The thermal mass is proportionally smaller, and as a result you could run into problems maintaining an appropriate temperature for saccharification. There are a number of 2- to 3-gallon (7.6- to 11-L) coolers on the market that can be converted into a mash tun with a simple weldless ball valve and a flexible mesh tailpiece. The smaller headspace will mean less heat loss, and smaller mash tuns are also a breeze to store.
For a boil kettle, you’ll want to mimic the dimensions of a larger-scale brew pot to keep evaporation under control. The single biggest factor affecting evaporation is the amount of energy (heat) delivered to the kettle (though intensity of the boil, humidity, and other factors also matter), so a wide-mouth boil kettle might be overdoing it. Good pot geometry to minimize evaporation is tall-and-thin (soup can) rather than wide-and-short (tuna can). A 4-gallon (15-L) pot should give you all the flexibility you need (right up to a 2.5- or 3-gallon/9.5- to 11-L “half” batch) while not being too voluminous for a 1-gallon (3.8-L) “short” batch.
Heating options are almost limitless at smaller volumes, but I like induction elements. They are fast, easy to control, have no open flame or hot element, and the smaller units are inexpensive. Of course, you can also simply use your kitchen range.
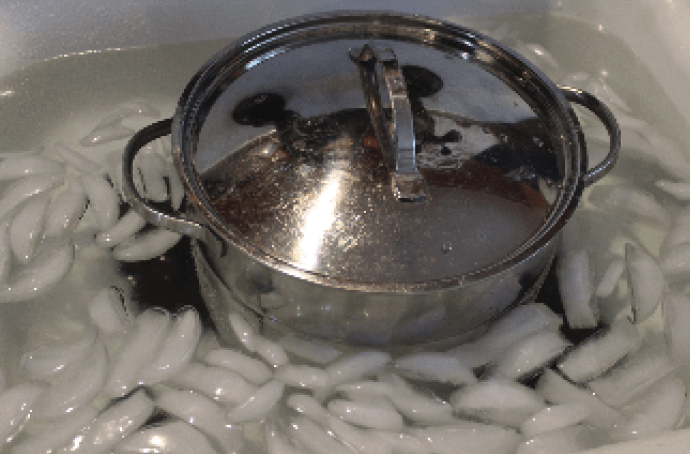
Chilling the wort can be done much more simply at smaller volumes with an old-fashioned ice bath in the sink, but you could also create a custom-sized immersion chiller using copper tubing and some pipe thread connections if you want.
Fermentation is the easy part. There is no shortage of options for vessels, and a 1-gallon (3.8-L) jug is a perennial favorite. Temperature control is also a breeze; pick up a dorm fridge from your local big box store or from Craigslist, attach a temperature controller, and you’ve got your own dedicated fermentation chamber in an appliance that can fit on a countertop, in any corner, or under a cabinet.
And when it comes time to package, there’s really no change at all, except that instead of cleaning and sanitizing 60 bottles over a two-hour session, you’re only prepping half a case. I find that a dozen 12-ounce bottles fit neatly in a bottling bucket of sanitizing solution, which kills two birds with one stone. Smaller kegs are also out there if you’d like to have a draft option, and a number of “mini-keg” systems with fill-able vessels are coming on the market.
Brewing Small
Brewing small can mean brewing more often, improving your skills, with less cost in time and money. It also allows you to experiment more without taking the risk of a big batch. And at the end of the day, the skill and quality of a brewer is not measured in gallons or barrels produced — if it was, the entire craft brewing movement would never have existed in the first place. What could be a better way to honor our roots than doing what the first microbreweries did: Don’t worry about how MUCH beer you’re making — just make it great.

One big advantage of small-batch brewing is that you can use a conventional stovetop or gas range to heat your grains and wort — no dedicated propane setup required.
Small batches of homebrew require less equipment. For example, chilling 1 gallon (3.8 L) of wort can be done with a simple ice bath rather than with an immersion chiller.
Amazon Old Ale
(1 gallon/3.8 L, all-grain)
OG = 1.086 FG = 1.020
IBU = 47 SRM = 24 ABV = 9.5%
Ingredients
2.8 lbs. (1.27 kg) Maris Otter pale ale malt
4 oz. (0.11 kg) Victory® malt (28 °L)
1.6 oz. (50 g) crystal malt (80 °L) (or medium English crystal)
1 pinch of black patent malt(~10–15 individual grains)
4 oz. (0.11 kg) blackstrap molasses or English treacle (first wort addition)
2.75 AAU Nugget hops (60 min.)
(0.25 oz./7 g at 11% alpha acids)
Wyeast 1028 (London Ale) or White Labs WLP013 (London Ale) yeast
0.7 oz. (20 g) priming sugar(if bottling)
Step by Step
This is a single infusion mash with a batch sparging of the grains. Add 1 gallon (3.8 L) of mash water, strike temp 165 °F (74 °C), for a mash temp of 153 °F (67 °C). Mash for 60 minutes, stirring twice at 20 minute intervals, vorlauf and run out. Batch sparge with 1 gallon (3.8 L) of water at 175 °F (79 °C). Let rest for 10 minutes, then vorlauf and run out. Before achieving a boil, add 4 oz. (0.11 kg) by weight (about 3 liquid oz./89 mL) of blackstrap/dark molasses or English treacle. Boil for 60 minutes adding hops at the beginning of the boil. After boil is complete, chill and pitch 1 package of yeast. Ferment at 64 °F (18 °C), slow-rising to 72 °F (22 °C) by the end of fermentation (over about ten days). Post-fermentation, bottle condition with 0.7 oz. (20 g) of priming sugar into 4 oz. (118 mL) water, or force carbonate to about 2.25 volumes of CO2.

Fermenting a small batch of beer takes the same amount of time as a large batch, but finding space in your house or apartment for a 1-gallon (3.8-L) carboy is a snap.