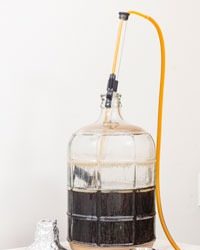
Stuck Fermentations
At some point every homebrewer faces the dilemma of a dreaded stuck fermentation, which is when the yeast ceases activity before all of the fermentable sugars are converted into alcohol. If you are careful and take steps to keep your yeast happy and healthy, however, you can avoid getting “stuck.”
Why Fermentations Stop
A stuck fermentation is often the result of one of three common conditions: improper fermentation temperature conditions, unhealthy yeast (or not enough healthy yeast cells) or a lack of oxygen.
Temperature
Yeast can be fickle under the wrong temperature conditions, and more specifically they don’t like to be too cold or too hot. Yeast suppliers provide temperature guidelines for each of their yeast strains, which are ranges that they have determined in their laboratories as the temperatures that the yeast are able to grow and thrive without going dormant or dying, while producing the best beer. When you’re brewing a batch of homebrew, be sure your fermenter is kept in an area that doesn’t get too cold, which is a common reason for a stuck fermentation. When brewing beer styles that need to be kept on the cooler side, such as lagers, keep a close eye on the temperature inside your fermenter. If your fermentation starts to slow or stop, you can try warming things up a few degrees by moving your fermenter to a warmer area or with an electric heat wrap around the fermenter to get things moving again.
Unhealthy Yeast
One of the most important steps for brewing any beer should always be pitching enough healthy yeast. Without enough healthy cells, the yeast can struggle and even decide to quit. If you are brewing anything with a higher-than-normal gravity, or anything that needs to ferment at a cool temperature, it’s a good idea to build up a healthy population of yeast a day ahead of pitching with a yeast starter, or at least pitch more liquid or dried yeast than the recipe might call for.
If you have experienced a stuck fermentation, depending on where you are in your fermentation (take measurements with your hydrometer), you can try repitching more yeast. If fermentation stops near the beginning or middle of fermentation, you can pitch another full dose of yeast. If the fermentation stops near the end, try pitching a smaller amount of yeast — about a pint of yeast as a starter. You can also try adding yeast nutrient to be sure the yeast is healthy. Another “trick” is to kräusen the beer by adding some beer that is in the high kräusen stage of fermentation (36-48 hours after pitching for most beers). The rule for kräusening is to add 10% of the fermenter volume, or 0.1 part kräusen to 1 part beer.
Oxygen
In addition to temperature constraints, liquid yeast need oxygen. Aerate your wort well before pitching liquid yeast, which many beginner brewers do by letting the wort splash when transferring it into the fermenter followed by vigorously shaking their fermenter. Or you can use dry yeast, which does not require aeration and can just be poured on top of your wort. A more failsafe method of aeration when using liquid yeast, however, is to invest in a simple aeration stone setup, which releases consistent oxygen throughout primary fermentation via an air pump and stainless steel stone with tiny perforations.


