Using Dry Yeast
It’s 1978 and I’m new to the USA. The only decent commercial beer I can get is Ballantine’s IPA and it is not always available. Fortunately in that year homebrewing was made legal federally, although many individual state laws still held it to be illegal. The fact that I arrived just as this happened is pure coincidence and I claim no credit for it! So I set to get back to my hobby of brewing at home. My first wort was pitched with a packet of dry yeast from a reputable manufacturer, but 24 hours later it had fermented right out and had an acrid odor and a persistent, lingering unpleasant bitterness. Down the drain it all went and I scrubbed and sanitized every last bit of my equipment. One day later it was déjà vu all over again, the next brew down the drain and back to the scrubbing and sanitizing regime again. Luckily, a third brew, pitched with a packet of dry yeast from another supplier fermented normally and the beer was good. But the whole business left me (literally) with a nasty taste in my mouth about dry yeasts.
Back then I had no choice, only dry yeasts were available from homebrew suppliers, so I solved my problem by collecting yeast strains from various breweries (mostly English) and making my own yeast cultures. Although my subsequent brews remained free from infection this was a somewhat laborious process, and I was always aware that the several steps in taking a culture up to a suitable level for pitching carried the risk of picking up infections and even wild yeasts along the way. So when liquid yeasts came on the market I was only too happy to use them, especially as the producers brought more and more strains onto the market. Many other homebrewers did the same, and like me, relegated dry yeasts to the back burner used only in desperation.
I stuck to using liquid yeasts for many years, but as always, prejudice like all forms of hate harms the hater as much as it does the hated. For I overlooked the fact that the dry yeast manufacturers have made great efforts to improve their processes and their quality control techniques so as to produce a reliable, clean product. Dry yeasts can now be safely used in homebrewing. Indeed, nowadays some craft brewers are using dry yeasts rather than the liquid version types — in fact we are currently using a dry yeast strain at BrüRm@BAR in New Haven, Connecticut, where I help with the brewing.
Manufacture
I won’t go into this in detail but it is instructive to consider the basics of how brewing yeast is produced. This is a general account and does not deal with any proprietary processes that may be used by the manufacturers. In fact, much of the process is the same for dry yeast as it is for liquid yeast, starting with strain selection then taking the culture up in stages of increasing volume until sufficient to go to a propagating stage. To this point the process is the same as a commercial brewer might use when preparing pitching yeast from a single culture. Generally, propagation is carried out in a clean room in order to avoid contamination. This is apparently done by using a batch system at first in which wort is added until a vigorous fermentation is under way. This is usually followed by a fed-batch system with another addition of wort (or sugars) with continuous aeration (using sterile air) of the yeast suspension. Under these latter conditions the yeast produces only biomass (that is grows) without alcohol production.

After propagation the yeast slurry is separated from the bulk of the liquid and readied for packaging. In the case of liquid yeast this may be done in a variety of ways, notably the Wyeast Activator smack-pack and the new PurePitch packaging used by White Labs. Needless to say this is done under as sterile conditions as possible so as to ensure the yeast is free of bacteria and wild yeasts when it arrives to the customer. In the case of dry yeast it is obvious that the slurry from the propagating stage must be further treated. This is achieved by the process known as fluidized bed drying, in which warm sterile air is blown through a moving bed of the yeast in such a way that the yeast does not behave as solid particles, but as a fluid suspended in air. This permits very gentle drying conditions so as not to reduce yeast viability. In fact, the sort of problems I referred to in the opening paragraph would, in the past, mostly occur at this drying stage. After drying, it is packaged in the familiar sachets for homebrewers or in larger packages for use by commercial brewers.
Manufacturers exert great efforts to ensure that their products are not contaminated in any way. Their rigorous quality controls start with selection of the primary cell culture and ensuring its genetic integrity before propagation and microscope evaluations at each of the stages to ensure cell counts are correct, and checks on viability (that is that a sufficiently high proportion of those cell counts is in fact active and capable of fermenting beer wort). Indeed, in the final stages batches may actually be discarded if they should fail any of these tests.
Preparation and pitching
Dry yeasts lose only some 10-20% of viability in a year, when properly stored in a refrigerator. What this means is that you can buy dry yeast even if you don’t have a brew date set and then use it right from the pack, even if it is as old as two years.
It therefore has much to offer the homebrewer, particularly to those of you who tend to brew on the spur of the moment, which makes it worth keeping a couple of packets in the refrigerator all the time.
It is said that the minimum number of cells for ale pitching is 6 million (106) per milliliter of wort, with lagers requiring twice that amount. That figure applies to worts with a specific gravity (SG) at ±1.050; higher gravities would need higher pitching rates. Now 5 gallons of wort is close to 19 L or 19 x 103 mL and for ale you would therefore require 6 x 19 x 106 x 103 cells = 114 x 109, or 114 billion cells. But many brewers consider the correct pitching rate to be equal to 106 x mL x °P; for a wort at 12 °P that works out at 227 billion cells.
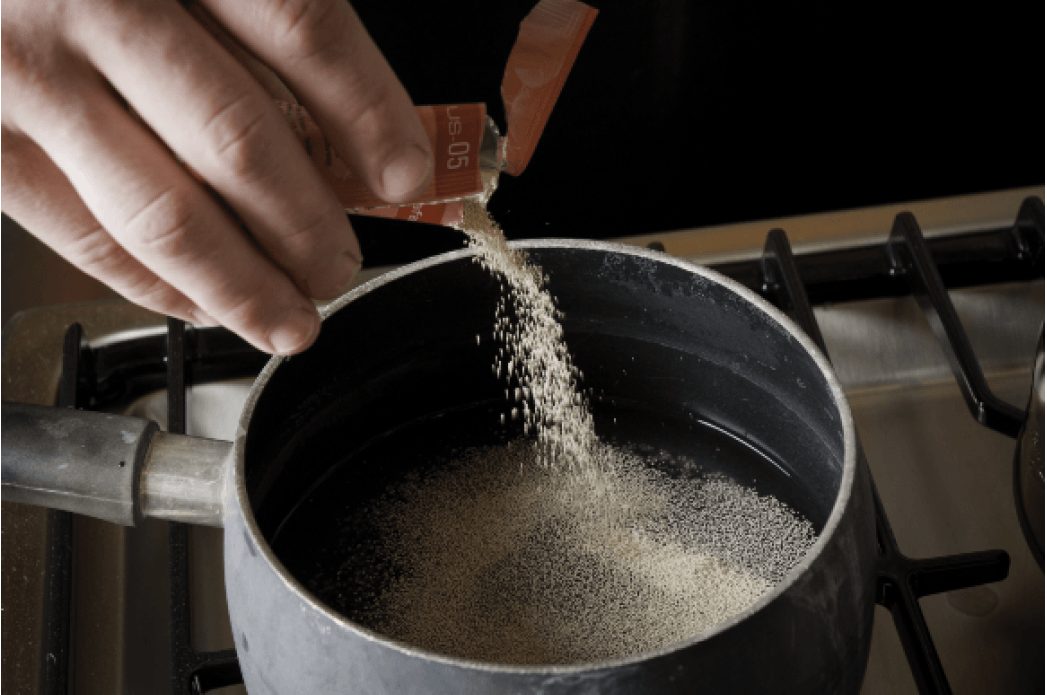
A single 11 g pack of dry yeast contains about 200 billion cells, which is more than enough to pitch 5 gallons (19 L) of ale and perhaps enough for 5 gallons (19 L) of lager (although two packets are generally advised). This is good as you do not want to make a starter since one of the great virtues of dry yeast is convenience in use. But do check our online yeast pitching table to make sure you are pitching a sufficient number of cells for your particular wort. Assuming you have enough yeast cells for the style you are brewing, all you need to do with your yeast is to re-hydrate it with some warm water before pitching in the wort. Some authorities suggest using lukewarm water (that is below 105 °F/41 °C); stirring the yeast into the water and letting it stand for 20 minutes before pitching. However, I am a great believer in reading the instructions first, rather than only when problems occur. Therefore I looked at those on the packet of the dry yeast we use a BrüRm@BAR, which is Safbrew WB-06 from Fermentis, and here are the instructions they give: “Sprinkle the dry yeast in a minimum of 10 times its weight of sterile water or wort at 27 °C (80.6 °F), leave to rest 30 minutes, gently stir for 30 minutes and pitch.”
Note that this suggests that you can use wort instead of water, suggesting that you could just add the yeast directly to your 5 gallons (19 L) of wort. However, the common wisdom is that this is not a wise maneuver since that will cause the yeast cells to undergo osmotic shock, which may result in damage to the cells. Therefore I recommend that you stick to re-hydrating with water rather than wort.
Remember that yeast is the great workhorse in our brewing and is responsible for flavor effects in beer as well as for alcohol production. Therefore, careful selection of the right strain and type, using a sufficient amount with proper preparation, and treatment is vital to producing quality beer.
Why Rehydrate Yeast?
The basic reason behind this practice is that cell membranes serve a variety of important functions for the cell and these functions all require membranes that are fluid. And when dried yeast cells are hydrated in a liquid other than water, like brewer’s wort, there is a short timeframe when compounds that ordinarily do not pass across the cell wall do indeed cross the cell wall. This leads to a reduction in cell viability in comparison to yeast that has been hydrated in warm water. While the optimum rehydration temperature seems to be strain-dependent, the range cited is usually 95–105 °F (35–41 °C). As the rehydration temperature decreases, viability following rehydration also decreases; rehydrating in water warmer than 105 °F (41 °C) also decreases viability.
— Ashton Lewis