Thinking Brew-In-A-Bag: Helpful tips for this style of brewing

Over the centuries, mashing, and more importantly, lautering techniques have changed fundamentally. Dive into brewing history and you’ll see endless ways of draining liquid from the mash. It’s a simple problem and thus many choices. For homebrewers this choice has become even easier thanks to the now fairly ubiquitous brew-in-a-bag (BIAB) style of lautering.
When we both first started brewing, every brew shop was filled with endless variations on the idea of a false bottom or slotted pipes meant to sit at the bottom of the mash tun to collect all that sweet wort. After all, if it looks and feels like a professional brew system, it’s better right?
Later, others, like Denny, began to promote using a simple stainless-steel braid to do the separation. Where other brewers fretted over proper distancing of pipes and slots from mash tun walls, the braid brewers let the water flow — fluid dynamics be damned — it still worked like a charm. The howls of indignation were loud in those early internet days.
Those howls would be repeated with the rise of the brew-in-a-bag brewers. No cooler? No separate vessel? Depending on a souped-up hop bag to hold back the weighty onslaught of wet grain? Your efficiency will nose dive! Your beer will be cloudy! Your beer will taste husky and astringent. Fly sparge, you fools!
But now that the dust has settled and we have companies like The Brew Bag offering professionally made bags, even the most ardent hater must grudgingly admit it works. (Drew: The Brew Bag bags are amazingly tough. No matter how much grain I’ve thrown at them, they take it.) Even old pros at homebrewing like the two of us as well as John Palmer and Jamil Zainasheff — have taken up brew-in-a-bag. In some cases, literally with a bag or using an all-in-one style system (e.g. Grainfather, Brewzilla, Robo-Brew, Anvil Foundry, etc.). After all, what is a malt pipe, if not a stainless steel “bag.”
Before we tell you our tips about brew-in-a-bag, you may still have some skepticism in your heart. You see plenty of wood carved diagrams demonstrating older brewing processes with large mash tuns and using baskets to separate the wort and grain. (Drew: The major difference in the diagrams I’ve seen, brewers jammed baskets into the mash and ladled out the wort that ran into the basket. Almost as tedious as a decoction!) BIAB is a million times better than that as a process!
The Crush
Our usual rule of thumb about crushing malt is: Crush until you’re scared. Inevitably, every “hey, I missed my original gravity by X points!” comes down to the crush or overall beer volume. Assuming you’re not accidentally making an additional half gallon (2 L) of wort, it’s the crush. At least for values of X greater than, say, 0.08 gravity points. We’ve seen plenty of homebrewers freaking out about missing their target gravity by 0.02 points — say 1.050 instead of 1.052 – relax!
This is true regardless of mashing process, but for brew-in-a-bag, you can have more leeway to crush to your heart’s content. No, you can’t hammer mill your barley into flour and expect it to strain freely — for that you’d want a mash filter and if you can make one of those at the homebrew level, more power to you!
But with so many more “holes” and drainable surface area than your standard false bottom or other homebrew filtering rig, a bag is much more forgiving of a finer crush. Again, don’t be overzealous about it.
Our usual rule of thumb about crushing malt is: Crush until you’re scared.
And while many of our thoughts apply to “malt pipes,” you’ll need to be more crush judicious since a malt pipe system doesn’t convey the same overall filtering space as a bag. Having said that, still crush it like you mean it!
Denny: Like Drew implies, crush is pretty much dependent on the equipment you use. The grain and its size may have a large impact as well. The old “use a credit card to measure gap spacing” may be a good place to start, but it may not be the solution for everyone. Pay attention to how your mash reacts and adjust your crush according to that. I’m lucky in that all my systems can use the same crush and it is very fine. I run the gap on my JSP adjustable mill (2-roller) as tight as it will go for every brew.
Drew: Meanwhile I use a Monster Mill MM-3 with three rollers. You need to do something seriously weird to not get a fine crush from that piece of gear.
Go Small
The one problem with this “as according to Hoyle” game plan via brew-in-a-bag is right there in the name — it’s a big floppy bag that we’re going to fill with grain and water. Lifting a tulle fabric bag filled with hot porridge is heavy, risky, and asking for a burn or a bum shoulder.
To that end, when we brew with a bag it’s almost always a smaller batch. We both have small induction burner setups that allow us to quickly brew a 2.5-gal. (9.5-L) batch of beer. The smaller volume of grain and water make the whole thing more manageable. That’s where we think brew-in-a-bag shines. Small volumes, quick brews, and quick turnaround times.
Beside the advantage of less weight, smaller batches make it easy — from a time and financial perspective — to explore different ingredients, different hop combinations, different yeast strains, or really spectacularly wacky styles. It’s a whole lot easier to drink through 2 gal. (7.6 L) of Double Raspberry and Habanero Turkey Jerky Imperial Stout than a whopping 5 gal. (19 L).
Don’t Be a He-Man
Mash gets heavy in a hurry. For every pound (0.45 kg) of dry grain in the bag, you’ll end up with over 4 lbs. (1.8 kg) of sopping wet mash before it drains (2 lbs./0.9 kg once drained). In other words – for a 10-lb. (4.5-kg) mash aiming for a nominal gravity of 1.054-ish, your bag after the requisite mash rest time will be about 43 lbs. (20 kg).
Now, maybe you’ve been hitting the gym and love your shoulder rows and shrugs, but for most of us, a 40-lb. (18-kg) row is right at the limit of safety. If you’re planning on going bigger, we really suggest getting an inexpensive hoist in your ceiling. No ceiling? May we suggest adapting Alton Brown’s Turkey Fryer Derrick? (https://altonbrown.com/how-to-build-a-turkey-derrick/)
Disclaimer: This can be dicey. Be sure your ladder is sturdy and everything is well put together. We’re not responsible if your ladder collapses spewing hot wort everywhere!
By the way, this applies for the malt pipe systems as well. While many reasonably strong people can lift a 5-gal. (19-L) pipe the short distance you need to set it on the draining platform, the bigger systems (think 10 gal./38 L) recommend or come with built-in mechanisms to hoist the basket/pipe.
Have a Landing Pad
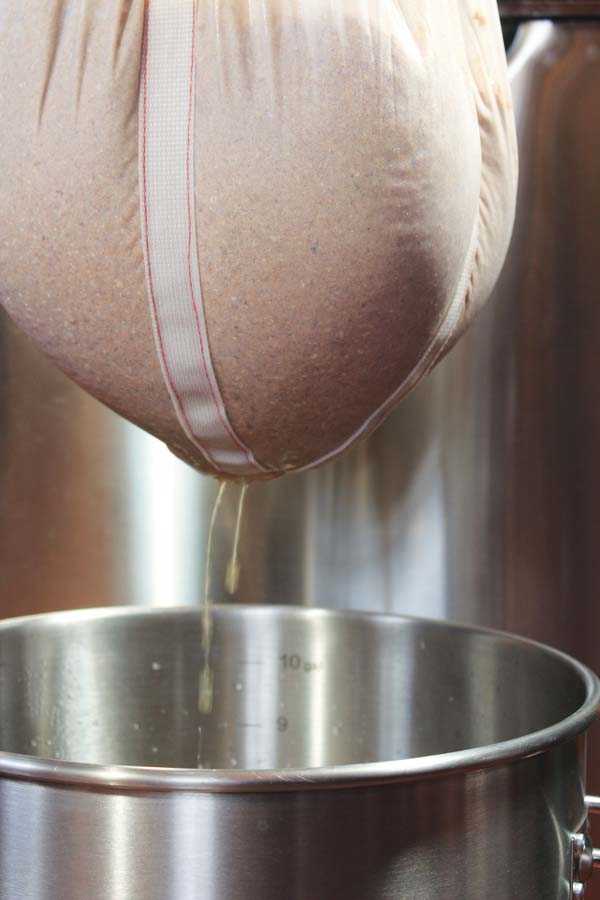
Stealing a tip from our pal Chip Walton of Chop & Brew – have a landing pad. There are many forms of landing pads such as a drip grate, a drain bucket, or a big colander. If you can’t suspend your bag, then at least rest it somewhere sturdy. When Chip came on our show to talk about BIAB, he used a clean BBQ grate over the top of his kettle and allowed it to drain without worry.
You could use a cleaned grate from your favorite Weber filled with memories of countless cookout hamburgers, but we really think your beer will be better with a new one without the extra beef grease.
Water Considerations
One of the great benefits of BIAB is the ability to fire and forget on your water volume calculations. Many BIAB brewers run their mashes at full volume (a.k.a. no sparge water), you really just need to figure out initial strike water. Kettle full = batch size + boil off + absorbed water. In regards to how much water will be absorbed by the grain (after draining) the rough rule of thumb is 0.5 quarts per pound (1 L/kg) of grain. For our hypothetical 10-lb. (4.5-kg) batch, that’s 5 quarts or 1.25 gallons or 4.7 L. With that extra water calculated, your kettle volume becomes your batch size plus boil off plus the water to be absorbed.
With great advantages, come great tradeoffs – OK, not really, but in the case of a full volume mash, you’ll need to be vigilant about your water chemistry. This is because of the very thin mash ratio you’re using in a full volume mash.
Where a standard mash uses ratios like 1.25 qts. per lb. of grain (2.6 L/kg), (3.13 gal./11.8 L for our 10-lb./4.5-kg batch), the full volume BIAB is around 3.1 qts. per lb. (6.5 L/kg). This matters because your pH can take longer to settle with the ratios this far skewed. You’ll want to check your pH and not just guess at what your water will do. Use your favorite water calculator or use our favorite – Bru’n Water. (brunwater.com)
Don’t Forget to Sparge or Dunk
If you’re not doing a full volume mash (our small countertop rigs can’t), then you’ll need to rig up a way to sparge your mash. For most of our brews, it’s a simple grab a pitcher and slowly pour it over the suspended bag. (Bonus points – open the bag slightly and pour directly into the grain. This is also a place where malt pipes beat a bag.)
But if you happen to have a second kettle running with exactly the right amount of sparge water, there’s no reason you can’t dunk the bag into the second kettle, let it sit for 10 minutes and then drain back into the sparge kettle. When everything is drip dry, combine the two kettles and away you go.
Oh and if you’re doing this, you can even start your boil early on your “first runnings” and get some extra concentration. This could prove useful for styles that you want to boost the malt character in.


