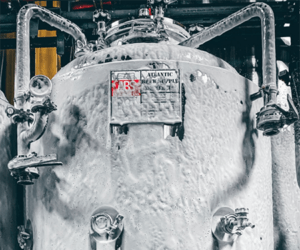
Wort Chilling
When the boil is all finished up, and the required post-boil hop additions have been made, the next step is to bring the wort down to yeast-pitching temperature. This is usually in the cellar- to room-temperature range of 50 to 75 °F (10 to 25 °C). There are many ways to achieve this goal, from plate or immersion chillers to submerging the boil kettle in an ice bath, to simply racking the wort off the trub and leaving the wort to chill overnight (no chill). As with many things in brewing, there is no right way of doing it, wort chilling is all about what technique works best for you. So let’s take a tour through the various concepts that are important during this step.
Cooling the wort rapidly once the boil is complete can have three main advantages: Reduced dimethyl sulfide (DMS) formation, increased cold break, and reduced risk of infection from wild organisms. I used the word ‘can’ in the previous sentence because all of these issues also can be avoided even with a slow cooling process but special care is required. No matter how you cool the wort from boiling to yeast pitching temperature, brewers must be confident that their wort temperature is correct before pitching the yeast.
Quick Chill vs. No Chill
DMS is a sulfur compound that can provide a creamed corn, sauerkraut, or cabbage aromas and can be detected by many people even at low levels. Some low to moderate levels of DMS is a signature of several beer styles such as many Czech and German lagers, but too much can overwhelm a beer. DMS arises from malt and is formed during the boil when a compound found in lightly kilned base malts, most notably Pilsner malt, decomposes to create DMS. DMS is volatile and can easily be boiled off. Rapidly chilling the wort can arrest this decomposition process, leaving brewers with very low levels of DMS. On the other hand, utilizing at least a one hour vigorous boil and using more highly kilned malts such a pale malt can help brewers drive off both the DMS and its precursor compound that was found in the malt.
Cold break can cause chill haze in the finished beer. It forms after the wort cooling process, when proteins, polyphenols, and carbohydrate that remained in suspension start to link together like magnets to form clumps. Rapidly chilling the wort can help induce this coagulation of the compounds. But slow-chilled wort can still create plenty of cold break, by chilling the wort down to cellar temperatures instead of room temperature. Leaving the wort overnight at 50 °F (10 °C) has been shown to precipitate more than enough cold break for brewers, as much as 85% of the cold break in fact. Many brewers like to remove some cold break, but we don’t want to remove all the cold break as yeast do require some nutrients found in this material. The addition of a kettle fining such as Irish moss or Whirlfloc near the end of the boil can also promote the coagulation of cold break material.

While the risk of wild infection of wort is real when slow-chilled, this is an easy one to avoid. If a proper sealing, overhanging lid is placed over the boil kettle at the end of the boil, then organisms have a difficult time getting in the wort. When the wort is fully cooled, with proper yeast pitching, then infection should not be an issue. Many no-chill brewers will transfer the wort into a separate, heat-tolerant container to allow the wort to cool while not sitting on the trub and hop material. But brewers always need to keep in mind that once the wort is below about 175 °F (80 °C), then infection risks start to increase and everything that the wort touches should be sanitized. Cotton plugs work quite well for filtering air as it enters containers like carboys.
Heat Exchange Systems
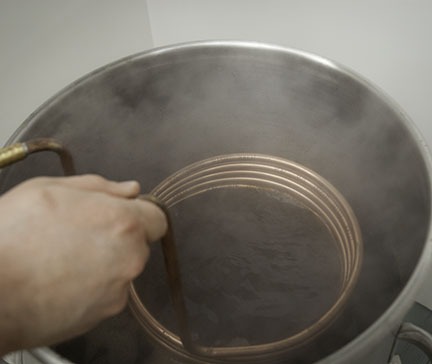
Professional brewers use heat exchangers to cool the wort via conduction, running cold water across a series of metal plates in the direction opposite of wort’s movement. Some homebrewers also use plate heat exchangers, some use tube-in-tube counterflow conduction coolers, and others use the simple, but least efficient, immersion cooler. If a homebrewer does not have one of these heat exchange devices, then homebrewers can simply utilize an ice bath to provide the conductive heat exchange. Finally there is the no-chill method, which uses ambient air as the heat exchange. Wet towels over the wort container and a fan can help promote the process via evaporative cooling. A fridge can help reduce the temperature further if needed.
One of the biggest challenges for brewers who utilize heat exchangers with warm tap water is getting the wort cool enough for yeast pitching. There are two common work arounds, but both begin with chilling the wort as cool as possible with tap water. Then you can either place the wort in a refrigerated environment to bring it all the way down to pitch temperature or with the help of a submersible pump and an ice bath, use a heat exchange system to bring the wort all the way down to pitch temperature.
Wort chilling can be as simple or as complicated as you want it to be. Just follow three basic principles. First, be patient. Second, make sure the wort’s temperature is correct before pitching the yeast. Finally, once the wort is below 175 °F (80 °C), everything that it touches should be sanitized.