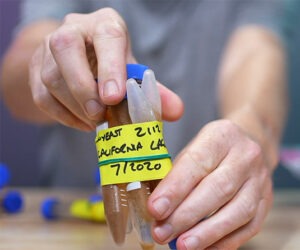
Yeast Handling
There are many variables involved in the brewing process, one of which being the ingredients used. Malt, hops and water are fairly static and will deliver consistent and desired results through manipulating the parameters of dosage, temperature and time. Yeast, however, is dynamic and poses additional constraints with process control and consistency. At times, yeast can appear unpredictable and make fermentations seem like a mystery.
Every brewer strives for a successful fermentation with each brew session. Successful fermentations can be defined as having a rapid onset of fermentation, rapid and complete reduction of fermentable carbohydrates, optimal production of desirable fermentation byproducts while minimizing the production of unwanted byproducts, and the rapid flocculation and sedimentation of yeast. When successful fermentation does not take place, the cause can usually be determined through an examination of the factors controlling the fermentation. This article will explore the typical parameters involved with controlling fermentation including yeast health, pitch rates, aeration, temperature and nutrition. The following information will hopefully take some of the mystery out of managing fermentation.
Tools and Tests
Most brewers have the necessary tools to solve most fermentation problems. Proactively using a hydrometer and thermometer as well as performing some quick tests can take the guesswork out of the fermentation.
It is important to use and calibrate your hydrometer frequently. It should read 1.000 in water at the specified calibration temperature. It is one of the most important tools you have as it provides insight on exactly how the fermentation is progressing. Do not rely on bubbles in the airlock or a set fermentation time.
Frequent calibration of your thermometers is also important. This can be done by measuring the temperature of ice water and boiling water (make sure to adjust for altitude). Identify critical temperature points to monitor including mash, wort, pitching yeast and fermentation temperature.
When fermentations do not reach the expected terminal gravity, the problem is either in the amount of fermentable extract available or the performance of the fermentation. A forced fermentation test is an easy and fast method for determining what the terminal gravity should be. This is especially helpful when experimenting with a new recipe or brewing high gravity beers. The test involves adding a large inoculum of yeast to a small volume of wort and agitating it warm for 24–36 hours. Once CO2 evolution ceases and the yeast settles, take a density reading. This reading will indicate the lowest potential terminal gravity of your main fermentation. I perform this test with every beer I brew.
Forced Ferment Test Protocol
Decant 1 cup (250 mL) of wort into a container (for example, a Mason Jar) with 50% head space. Add 15 mL (1 tablespoon) yeast slurry or 3 g (1 teaspoon) of dried yeast. [Note, if using slurry, the liquid added may result in a lower terminal gravity by 0.2–0.4 °Plato (0.001–0.002 SG).] Cover loosely with foil or lid. Incubate at 75 °F (24 °C) for 24–36 hours. Agitate frequently by swirling or shaking, or use a stir plate on low speed. Allow the yeast to settle and measure wort density with your hydrometer.
A forced fermentation test finishing with a high gravity indicates that there is a lack of fermentable sugar. This is either a result of incomplete saccharification in the mash or a high level of unfermentable carbohydrates in the grist. A forced fermentation that finishes lower than the main fermentation indicates a problem with the fermentation.
Yeast Health
It is important to consider that yeast is a perishable ingredient, and culture health can decline over time. This can be accelerated by any exposure to warm temperatures (>45 °F/7.2 °C). It is well worth having an online supplier include an ice pack when shipping any yeast order. High viability (% live cells) and vitality (how healthy the live cells are) of the pitching yeast is critical to the success of the fermentation. Inoculating with a poor quality or compromised culture may result in longer lag times and incomplete attenuation, as well as the increased production of undesirable byproducts, such as sulfur and diacetyl.
Assessing the health of the culture can pose difficulties for homebrewers. Brewers at home can perform a simple, yet still useful, viability/vitality testing by introducing small amounts of wort and monitoring culture metabolism. Wyeast packaging allows the brewer to monitor CO2 evolution after introducing a small amount of wort. A quick rate of package expansion or swelling (4–8 hours) is a good indicator of good yeast viability. This test can also be emulated in a sanitized PET water bottle. Add yeast and a small amount (50 mL) of sterile wort to a plastic bottle. Crush the center of the bottle to allow for expansion and cap. (Be gentle as creases can tear the plastic.) Incubate at 70 °F (21 °C) and monitor expansion. Be sure not to allow too much pressure to build as it can have detrimental affects on the culture. This is a technique modified from Michigan homebrewer Jeff Renner’s method of monitoring carbonation after bottling.
It is important to know that some strains are slower to start than others and to allow for additional time when using a new strain. If CO2 production is slow (>8 hr.) consider making a 2-qt. (2-L) starter with the culture and checking fermentation progress with density readings. Density should reach terminal in 18–24 hours (fermenting at 70 °F/21 °C). Knowledge of yeast health prior to inoculation allows the brewer to pitch yeast with confidence.
Pitch Rates
Another key to ensuring a successful fermentation is inoculating your wort with an appropriate quantity of yeast. Pitch rate is defined by the number of cells per milliliter of wort in the fermenter. Different beers and fermentation conditions require different amounts of yeast to reach attenuation. Inadequate pitch rates can lead to long lag times, stalling fermentations and incomplete attenuation. Pitch rates need to be increased as density increases or fermentation temperature decreases.
Pitching 1 million cells per mL per degree Plato is a standard rule of thumb used in commercial breweries. For example, a 14 °Plato wort is pitched with 14 million cells per mL. This generally applies to yeast being harvested and re-pitched from alcoholic fermentations. Yeast coming from a laboratory is in optimal condition and can be pitched at a lower rate. When using laboratory-grown yeast culture in standard ale fermentations (< 15 °P at 70 °F/21 °C), pitch rates of 6 million cells per mL are recommended. The chart on page 38 shows pitch rates required for laboratory grown cultures under different fermentation conditions.
Calculating pitch rates starts with knowing the cell density and the volume of the slurry you are working with. The cell density of laboratory-grown cultures should be available from your yeast supplier. At Wyeast, our Activators are packaged with 95 mL of yeast (+35 mL nutrient) at a cell concentration of 1.2 billion cells per mL. Once you have the volume and cell density of the slurry, you will need the volume of wort to be fermented.
The equation for calculating pitch rates is:
P = (Cs x Vs)/(Vw x 3785)
where
P = pitch rate (cells/mL)
Cs = cell density of slurry (cells/mL)
Vs = volume of slurry (mL)
Vw = volume of wort (gallon)
3785 = a conversion factor from gallons to milliliters
Higher pitch rates can be achieved either by simply inoculating with additional packages of yeast or by expanding the culture in a “starter” prior to inoculation. Expanding the culture involves growing the yeast in small amounts of aerated wort (10 °P/1.040 SG at 70 °F/21 °C) in one or more steps prior to brewing. Each propagation step will allow the culture to double a certain number of times. Because of the extremely high pitch rates used in starter cultures, the volume of wort is the limiting factor with growth. One Activator pitched into a 1-qt. (1-L) starter will result in 0.5 doubling of the culture while the same Activator into a 2-qt. (2-L) starter will result 1 full doubling. Starter volumes of less than 1 qt. (1 L) result in little growth and are not recommended. The starter should be complete in 12–24 hours depending on the volume of wort used.
The use of a stir plate will increase the number of doublings by 25–50%. This is mainly due to releasing growth inhibiting levels of CO2 through agitation. Calculators are available online to assist in tailoring the optimal propagation scheme for the specific beer being brewed.
http://www.wyeastlab.com/hb_pitchrate.cfm
http://www.mrmalty.com/calc/calc.html
Pitch rates also have a major affect on the production of fermentation byproducts. Increasing pitch rates will decrease higher alcohol and ester production. Manipulating the pitch rates can deliver the desired character for a specific beer. This is especially evident when fermenting with a German wheat yeast. The use of high pitch rates can eliminate the delicate ester character desired in Bavarian wheat beers. It is recommended to not exceed 10 million cells per mL with these fermentations. Alternatively, it may be beneficial to pitch a lager fermentation at a high rate (24 million cells per mL) to produce beer with a clean malty profile.
Temperature
Pitching and fermentation temperature have a large impact on fermentation. Yeast is sensitive to changes in temperature and rapid shifts in temperature encountered at pitching can shock the culture and create inconsistencies in fermentation. It is important to pitch the yeast slurry within 10 °F (5.5 °C) of the wort temperature. Following the onset of fermentation, temperature will control the rate of metabolism and subsequently the levels of fermentation byproducts. Higher temperatures increase fermentation rate and yeast growth and lead to increases in higher alcohols and esters. Likewise a reduction in temperature will reduce fermentation byproducts. Lager strains are tolerant to fermenting in cold conditions (46–60 °F) whereas ale strains are limited to warmer conditions (58–75 °F). Some ales strains including Belgian, German wheat, and a few English strains are highly sensitive to low temperature conditions and will fail to attenuate if temperatures drop below 65 °F (18 °C). Sulfur production (rotten eggs) is often an indication of low temperature stress on the culture. It is important to monitor temperature and take necessary action to keep fermentation temperature in the desired range.
Aeration
Inadequate wort aeration could be the most common cause of stalled and failed fermentations. Yeast requires oxygen for the synthesis of membrane sterols. When oxygen is available, sterols will be synthesized until reaching a maximum level in the cell membranes, around 1% by dry weight. Every time a mother cell buds, the sterol content of the membrane is reduced. Cells will cease to bud when sterol content is reduced to 0.1%. If aeration levels are insufficient, less growth will occur resulting in a possible stuck fermentation. Optimally, 10–15 ppm dissolved oxygen (DO) is recommended to insure adequate sterol synthesis. The chart on this page shows the maximum DO reached with each method as well as the time it takes to achieve it.
Nutrient Levels
Yeast requires certain levels of nitrogen, vitamins and minerals to maintain healthy fermentation. Generally zinc is the only nutrient that may not be present in an adequate level in standard, all-malt, wort. Zinc is an essential cofactor in many important metabolic enzymes and can be supplemented with the use of yeast nutrient. Some brewing conditions — including brewing high gravity wort and brewing wort with high levels of adjuncts — can bind up or dilute nutrients leaving the yeast without necessary levels. Once again the addition of yeast nutrient can help this.
With the proper tools and knowledge, homebrewers can repeatedly conduct orderly fermentations that will reach their expected terminal gravity in a reasonable amount of time and deliver the flavor and aroma profiles the brewer is seeking.


