Yes, Homebrewers Can
Depending on when you started your craft beer journey, you might have had a negative connotation with canned beer. For a good portion of time, the best craft beer was found in glass bottles, while the beer in cans was mostly macro-scale-multinational-corporate-product (MSMCP™). Over the last decade, however, we’ve seen a massive shift in the craft beer industry from glass bottles to aluminum cans. Having worked at a commercial brewery during this time, it was interesting to watch the packaging side fluctuate in terms of cans versus kegs being packaged for wholesale and retail. Obviously, the pandemic had a major impact on that, but the shift to aluminum started much earlier — and for good reason.
And it hasn’t just been on the commercial side of things where we’ve seen cans become popular. In the last couple of years quite a few single-canning systems have been made available that are priced right for homebrewers to get in on the craze.
Let’s start with a review of the pros of canning your homebrew. First and foremost is their portability. Cans are lighter and more durable. That means they’re cheaper to ship and less prone to breakage en route. This also translates down to the person drinking the beer. Throwing a few cans of beer in your backpack for hiking or golf bag for a day on the course is a lot lighter than a few bottles. Plus, you can easily crunch them down once finished, further reducing storage space needed. Let’s not forget their durability; drop a beer bottle poolside and watch out now! Drop a can and you’ll only be scowled at for alcohol abuse on the beer you wasted if any spills.
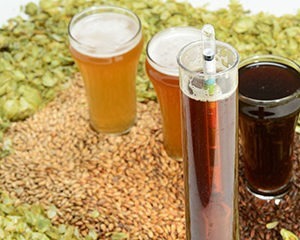
Secondly, I believe an aluminum can is superior to a glass bottle in terms of beer freshness. Let’s not even talk about the old green or clear glass bottles that will become lightstruck in no time. Although I honestly don’t recall having a skunked beer from dark brown bottles, it’s been said they can’t fully protect your beer from becoming light struck, whereas aluminum is 100% effective in stopping UV rays from skunking your delicious creation. We also have the amount of oxygen ingress you get from the closure to take into consideration. The plastic seal on crown caps, even with the oxygen-absorbing kind, still underperform compared to the seal you can get on a well-seamed can. Be it commercial brewer or homebrewer, you want your packaged beer to taste amazing when consumed, and aluminum cans are a great choice.

Canning at home
OK, enough about commercial canning and why cans are great, let’s talk about canning at home. Until recently, canning beer was out of reach for most homebrewers. Now there are several home can seamers on the market and the price tag is very reasonable. I will go over several of the different units available and a basic how-to in a moment.
But first, I think it’s worth telling a quick story for those who might be intimidated by canning beer at home. It was a few years ago at the National Homebrewers Conference while working at the MoreBeer! booth on club night. The Cannular had just come out and we had one for display along with a box of empty cans. We didn’t plan on using it that night and no one on the team had any prior experience with it. With all that cold beer on tap all around us, we thought it would be pretty cool to fill and seam a few cans on the spot. Long story short, we canned up 200+ homebrew souvenirs for homebrewers in attendance that evening. That’s how simple it was; having never used the device before, our team was able to figure it out on the fly during club night! Not saying you should have a beer in hand while operating one — in fact, my official stance on that is you should definitely not. The moral of the story is don’t be intimidated by canning — it’s a simple and easy process; just like bottling beer. Let’s go over the basic process and how to use a can seamer.

Step 1: Filling
First thing we need to do is fill the can with beer. On a commercial canning line this is done very quickly in sequence. Typically, first purging with CO2 and then capping/seaming carbonated beer on foam or can conditioning. Essentially all the same principles of bottling homebrew apply. This step is when you run the risk of picking up oxygen, so keep that in mind and do your best to mitigate it on a homebrew scale.
As for filling methods, if you can use it to fill a bottle, chances are it will fill a can. You have two major choices: Can conditioning or canning carbonated beer. If can conditioning, proceed the same way you would with bottles by calculating the amount of priming sugar per batch to reach your desired carbonation level or adding a carbonation tablet and then filling with a bottling wand.
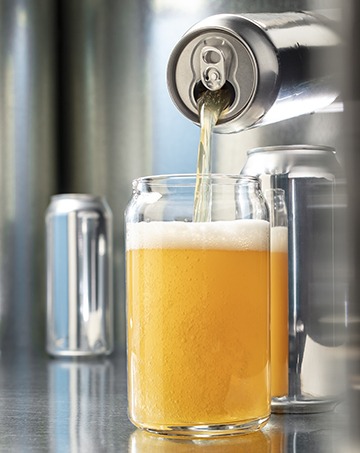
Or you can fill your can with carbonated beer (which is more common, particularly on a commercial scale). Force-carbonate your beer and transfer with a counter-pressure filler or attach a silicone tube from your kegerator faucet and slowly fill the can. Allow the foam to pour slightly above the top of the can and put the lid on to minimize oxygen in the can. Just work quickly and don’t be afraid to waste some beer via foam and you will keep your dissolved oxygen (DO) levels in check.
Step 2: Seaming
Once your beer is in the can, it’s time to close it up with the can seamer of your choice — right? Well, technically yes, but now we’re in the weeds of this article — can seamers! So, let’s slow down and go over a few basic things about homebrew can seamers. Below is a basic step-by-step seaming process followed by some color commentary about the individual parts involved in these processes.
Overview of Can Seaming Process:
Step 1. The filled can is placed onto the base plate (or table).
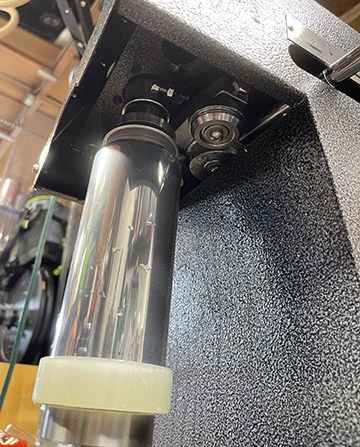
Step 2. The filled can is then lifted and clamped into place between the upper chuck and the base plate.
Step 3. The upper chuck is then engaged into the can end, allowing the chuck to spin the can.
Step 4. While the filled can is spinning, the first operation seaming roller is fed into the end flange to form the initial seam. The second operation roller then flattens and completes the seam.

OK now that we have an idea of the process let’s take a closer look at what some of these seamer parts you may not be familiar with actually are. We’ll start with the chuck as it’s doing most of the heavy lifting and sealing of the can. The chuck holds the can end as the can is raised into it and then rolls and provides a hard surface for the rollers to close the can seam as it rotates. All of the homebrew can seamers included in the chart below come with a standard 202 diameter chuck and typically don’t need much adjusting. There are many different can lid sizes on the market and within sizes there are three basic types or profiles; B64, CDL, and SuperEnds. But 202/B64 is the most common with 202 end cans being the typical tops to 12-oz., 16-oz., and 12-oz. sleek cans. The number represents the outer diameter, which is 2.02 inches. Then depending on the height of the can you have volumes of 12 oz. (355 mL), 16 oz. (473 mL), etc. Most can seamers allow you to swap out different chucks to seam larger diameter cans such as crowlers as well. The chuck is what the lid will fit up into while the manual or automatic seam rollers apply pressure and create the seam between the can and lid. As for the lids themselves, again there are numerous options available, but by far the most common is what they call a B64 style lid. Different lids can offer different size openings, such as standard, wide mouth, or full aperture. A can seamer is essentially just applying pressure to the can and lid to create a seam and seal your beer inside.
The seam is where the lid and the can itself come together to form an overlap. The amount of this overlap will determine how well the can lid will hold. Typically, we’re looking for over 0.025 and up to 0.035 of an inch (0.64–0.89 mm) overlap. You can measure this by cutting a small tab in the seamed can with a Dremel tool and measuring with a pair of calipers. Depending on the can size and lids you’re using, you may have to adjust your seamer up or down. The amount of this overlap can be adjusted by the next important part of a can seamer — the base plate or table. The table is what raises the can into the chuck for sealing. Now I know we just talked about thousandth-of-an-inch gaps, but remember my story from Homebrew Con? These devices are really simple and easy to use with a little bit of understanding. Most tables are easily adjustable and lock into place with a set screw once configured to your desired height. Oktober’s seamers come with a wave spring under the table that makes adjustment to the table height even less frequent.
The easiest way to dial in a can seamer is to fill a few cans with water and practice on those first. Essentially you want the table to put just a slight amount of pressure on the lid when it’s locked in place. Having liquid in the can replicates how firm the can will be when you go to seam with beer inside. After you run the seamer, an easy, low-bar test you can perform is simply turning the can upside down and squeezing it to see if you have a good seal or not (does it leak)? Rinse and repeat as needed until you get a good overlap. If it’s within the parameters stated earlier, it should hold up to 90 psi. Once you’ve adjusted the table height (base force) and are getting a good seal, simply lock it into place and you’re ready to start canning!
The next thing worth mentioning is power; that line from Back to the Future II comes to mind. “Hey, McFly, you bozo! Hoverboards don’t work on water . . . Unless you’ve got power.” Fortunately, you don’t need power (but it makes it easier), because some can seamers can be completely manual. Essentially two steps can be motorized — the spinning of the chuck and the application of the seam rollers. A roller is what presses against the lid and chuck to complete the seam and ensure the can is sealed and pressure can be maintained. Powering (automated) / mechanically automating (turning a geared lever) either of these steps will not only make canning easier, it can also ensure a consistent seam in the case of the seam rollers. Skill using manual seam rollers can be just as good to help with over seaming. But it is worth noting that when using manual seam rollers, if you apply too much pressure you can over seam the can and it will leak. As with anything, it all comes down to what you’re looking for and how
much you want to spend.
The last thing we’ll cover quickly is the cleanup. One piece that is available with many seamers is a splashguard, which is handy to contain the potential mess caused by quickly spinning cans with drops of foam overflowing (remember, you are putting the cap on top of foam when canning carbonated beer). After canning a batch of homebrew a quick wipe down with water or sanitizer is recommended and occasional greasing of parts makes maintenance simple.
Now let’s take a look at the widely available homebrew can seamers on the market. These are all (at the time of this writing) under $1,000 and work with standard aluminum cans that are readily available.

CAN I Even Find Them?
As many of us probably heard, during the pandemic there was a shortage of aluminum cans and some breweries couldn’t even get their hands on them. Having worked at a commercial brewery, I can personally attest to the prodigious dearth of cans at that time. Finding cans to package your beer has gotten a lot easier in 2022. I think it was a supply catching up with demand issue more than a resource thing at first. Think about it, a majority of breweries across the nation pivoted to packaged beer all at once in order to keep selling their product when customers weren’t allowed in their taprooms.
To dig a little deeper into the subject I reached out to a couple contacts in the industry. One owns a mobile canning line and the other is the purchaser for a major wholesale company. The sentiment was very similar in that the supply was the main issue back then. Both of them said they are contracted to handle the continued elevated usage levels, and a good amount of expected growth as well. That’s the good news — it doesn’t sound like commercial or homebrewers are going to have any problems finding cans and lids.
The bad news, however, is that both of them said their costs have increased. I believe to some extent this is coming from inbound shipping costs and tariffs, so there could be some relief on that end at some point (one would hope . . .). The pandemic and war in Ukraine certainly play a part as well. Those are conversations for economists not homebrewers. But I digress. You should have no problems finding cans and lids in the months and years to come, if you are OK paying more for them.