Always Question Your Instruments: II
TroubleShooting
Gordon Maxwell — London, Ontario asks,
I’ve noticed over the years that, for some time after my beer hits its terminal gravity, it continues to bubble away and generate foam. It’s not an occasional thing. I’m pretty sure it happens every time, or at least most of the time.
In my simplistic understanding of fermentation, yeast attacks the available sugars and turns them into alcohol and carbon dioxide. So why do I continue to see so much CO2 production after the yeast has ceased producing alcohol?
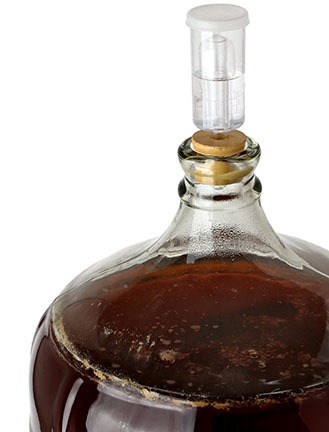
If fermentation is truly complete, what you are seeing in your airlock is most likely the signs of carbon dioxide in the beer equilibrating with the environmental conditions of temperature and pressure. While it may seem that freshly fermented beer should already be in equilibrium with the environment, it’s probably not because carbon dioxide is constantly produced during fermentation and leaves beer in a super-saturated state. The airlock activity is a visual indicator of gas leaving the beer. But this should not be producing foam because the movement of gas out of the beer into the environment is slow.
I tend to be a skeptic about observations that don’t seem to make sense. In this case, you are seeing foaming at the surface of your beer after fermentation is complete. If this was caused by degassing, one would expect beer in a glass to continually foam after a glass is filled. This does indeed occur for some time, but not for long because the rate of de-gassing slows as the carbon dioxide concentration in the glass drops. Beer in an atmospheric fermenter has much less dissolved gas than beer in a bottle, so it’s reasonable to conclude that the foam you see is probably not from simple de-gassing if the foaming persists for hours or days after terminal. Seems to me that the beer is still fermenting.

Hydrometers are great tools, but one of the limitations of their use, especially at home where beer volume is limited, is that relatively few data points are taken to track the course of fermentation. If your observation was limited to a few batches, I would suggest that you may not have enough data towards the end of fermentation to be confident that you have actually hit terminal gravity. For others reading this answer, however, I am suggesting that many brewers declare that terminal gravity has been reached before it actually has based on a couple of data points, or no data points and other metrics like fermentation duration and/or airlock activity. For the sake of discussion, I will assume that the hydrometer reading is relatively constant for a couple of days, but visual cues indicate otherwise.
The proper method for using hydrometers in beer begins with degassing the sample. An easy way to do this is to pull a sample that is a bit greater than the volume of the hydrometer tube, put the sample in a large container (a beer pitcher works great for this), and aggressively pour the sample into a second, clean, dry pitcher (don’t want to dilute the sample with water). This rough pouring process is repeated for another 9 pours. The idea is that 10 aggressive pours between pitchers results in flat beer that is equilibrated with the environment, and therefore cannot degas when a hydrometer is dropped into the sample.
I am going to assume that your samples have not been de-gassed before measuring. Carbon dioxide bubbles escaping from a sample can adhere to the surface of hydrometers and buoy the hydrometer in the sample, resulting in a measurement error that is greater than the actual sample density. Hmmm, this problem would actually make a fully attenuated beer appear to be fermenting as the gas levels drop over time and the buoying effect of carbon dioxide bubbles ceases to cause this error. That’s the opposite of what you are seeing!
Another explanation is that your samples are at different temperatures and you are not accounting for the change in temperature. Liquid density increases as temperature decreases towards its maximum density. Hydrometers with built-in thermometers make it very handy to measure density and temperature at the same time, and then correct the density measurement if the sample is at a different temperature from the hydrometer’s calibration temperature. Since this is normally the case, this style of hydrometer is very convenient.
The information above may or may not give some ideas that help you with your conundrum. The takeaway point is that questioning the basics is a key part of troubleshooting. When the basic indicators disagree, the problem is usually with one of the indicators. Instruments are invaluable tools, but they have a way of spawning red herrings!

