Decoction Flavors Without Decocting
Brewing is fun and we all get our jollies in different fashions. Brewing is tradition and traditions must be respected and rituals performed. And for those brewers who hew to the twin pillars of masochism as fun and tradition above all else, there is no sacrament as sacred and profound as decoction mashing.

True decoction believers claim profound impacts on flavor and benefits to beer quality that no simple mashing profile with modern ingredients could ever match. But as two very lazy people who enjoy brewing but not “BREWING,” we think they’re crazy. (That’s OK, we’re crazy as well, you’ve just gotta appreciate that everyone is crazy in their own special way and allow them their fun.)
Let’s break this situation down and figure out a happy meeting place with some portion of the benefits without all the extra tedium.
Decoction Mashing 101
Much modern brewing operates under delightfully straightforward techniques and with stunningly easy to use ingredients. But out of millenniums of brewing history, that’s only been the case for the century+ (modern science, instrumentation, engineering, and agronomics really changed the brew deck). Regardless, mashing is mashing — crack grains, make a big bowl of porridge at the right temperature to spring starches from the barley, and activate the enzymes necessary to transmute those starches into yeast fodder, aka sugar.

The legend of decoction mashing basically goes like this: Back before thermometers were a thing, you could only reliably tell the temperature of water when it came to a boil or was freezing — everything else was educated guesswork, so brewers used a mashing process that depended on observable phenomenon (aka “this stuff is boiling!”) and repeated trials to discover what steps made the best beer with the ingredients at hand. Malt is the other part of the story — older malt varieties grown with older, less managed growing practices produced crops that were less ideal for brewing. Malting techniques didn’t create full modification of the barley, which meant less enzymatically powerful malt, thus it needed more mechanical intervention to properly produce suitable wort.
In other words, “We have no practical thermometers, wooden mash tuns, and dodgy malt, so how do we make great beer?”
The answer, at the time, was, “We’ll boil the grain!”
The general process for homebrewers goes like this:
• Strike your mash at your desired starting temperature.
• Let the mash rest for a short period.
• Pull a “thick third” of the grain and liquid and bring it to a boil in a second kettle, stirring consistently for 15 minutes.
• Stir the boiling mash back into the main mash, bringing the temperature of the combined mash up.
• Repeat with thick or thin (more liquid) thirds as needed to run through your rests and convert the mash for lautering. (Usually, that last decoction to prepare for mash out is a “thin” portion to denature the enzymes, which flooded the liquid when mixed with the grain.)
Please recognize that under the umbrella of “decoction mashing,” every brewer probably has multiple versions of what a decoction mash looks like, so if this doesn’t look like how your Opa talked about brewing, don’t write us!
It should be clear that decoction is a hot, sticky, and laborious process. Scalding mash gets
slung around. There’s so much stirring and so much gooey, piping hot grain that when compared to a traditional single-infusion mash, decoction mashing feels desperately, showily “extra.”
So why do it? Proponents argue that decoction lends a certain je ne sais quoi to the final beer; an undefinable sense of deeper and richer sips. It allows for more efficient extraction of starches, and the resulting sugars (and malt proteins) get exposed to high heat for long periods, leading to the formation of those lovely “brown tasting” melanoidin compounds and extra color and destruction of clarity-
hindering proteins. Even negative aspects of decoction like oxidative damage or tannin extraction from the boiled grains have potential flavor impacts that are perceived as fundamental.
Does it Matter?
Now the tricky bit — so far, we’ve talked the process and the perception, but we know that the brain is a machine that lies to fit what we think we should be tasting. What does the science say? Turns out, it’s a mixed bag. There are plenty of studies showing perceivable impacts, and others showing none. There are even studies showing that, yes, it makes an impact — but tasters prefer the simpler mashed beer. One of Denny’s first experiments ever was a decoction experiment coordinated through the Home Brew Digest (there’s a blast from the past) and it showed no discerned difference. Drew was involved in another experiment that had Beer Judge Certification Program (BJCP) judges noticing a difference, but non-trained beer enthusiasts unable to decipher it.
In other words, decoction’s importance appears to be in the taste buds of the beer taster and in the enjoyment of the brewer. Neither of us feel the need in our brewing to endure the process.
Are There Other Options?
We’ve established that decoction mashing is a fair bit of extra labor, time, and expense (for commercial brewers, at least, as it requires more wages and more fuel costs!), so it shouldn’t be a surprise that a number of different techniques have been developed to replicate some portion of those fabled decoction results for a lot less hassle. To follow is a rundown of the alternatives, from easiest to hardest.
Ingredient Substitutions
The easiest and most oft claimed solution to the decoction question is, “well, you want melanoidins — just use that malt that’s called ‘melanoidin malt.’” And using it, or a similar highly toasted malt like aromatic, in restrained quantities (under 5% of the total grist) will give some extra “oomph” to your beer. Just add it into the mash with the rest of the grains and away you go.
Purists (and frankly, even we) would tell you that melanoidins are just one part of the “magic” of decoction, and thus using a special melanoidin malt will give an incomplete profile, but it is a cheap and easy way to boost your beer’s perceived maltiness and mouthfeel. Just watch the amounts as they are intense malts.
Boil Down
We’ve advocated for this next technique many times before when wanting to replicate the flavors of a long boil without the long boil. Pull the first gallon (3.8 L) of your runnings and bring them to a boil in a separate pot. While the main mass of the beer is getting to the boil, reduce the gallon (3.8 L) to around a quart (1 L) for concentrated sticky sweet flavors. Add the newly “enhanced” malt syrup to the boil and continue on. When doing this, just keep in mind the additional wort that will need to be collected to hit your final volume due to the higher-than-usual boil-off rate.
Again, this is an easy technique with an interesting impact, but it’s more caramel and lip smacking burnt sugar than it is the vaunted “deeply bready and toasty” flavors of a decocted mash.
Pressure Cooker Decoction
Let’s say you really want to decoct but just really hate the stirring aspect, what do you do? Take advantage of the pressure cooker revolution. If we’re to judge by the flood of “Instant Pot” cookbooks out there, then at this point there should be approximately 1.42 electric pressure cookers per American household. Why not revive an old technique of using a pressure cooker to decoct your mash?
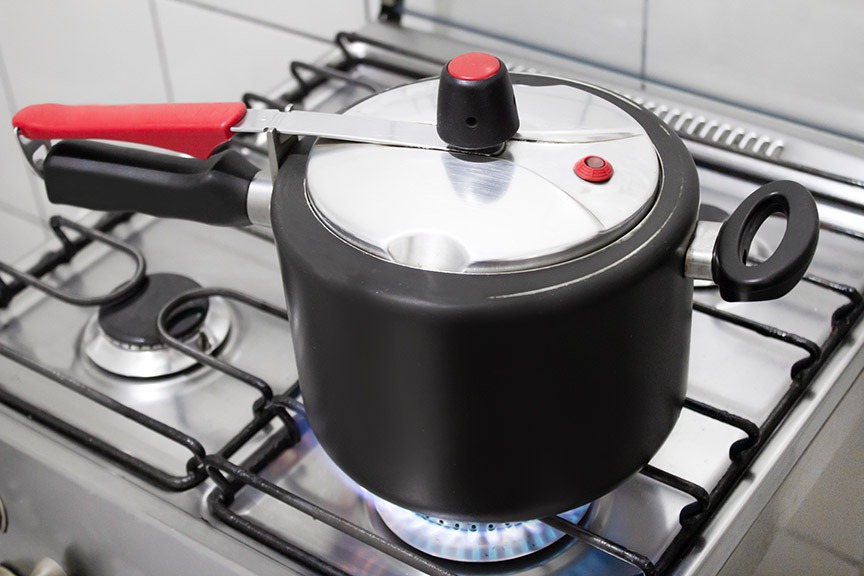
To pull this trick off (with a stove top model or electric), scoop a thick portion of the mash (say, one quart/liter) into a heat-proof vessel that will fit in your cooker. Place a trivet at the bottom of the cooker and a little water and then your mash vessel. Run your pressure cooker at high pressure (electric models tend to run between 11–12 PSI and stovetop models at 15 PSI) for 15 minutes. Allow the pressure cooker to release naturally and then stir the super-heated grain back into your main mash.
You may be saying, “Hey, isn’t that just a decoction with extra equipment?” Why, yes, it is. But the glorious part about it is you can walk away from the pressure cooker and not stress over constant stirring (as long as your pressure cooker’s safety devices work).
And even still, folks will tell you that it’s not quite the same because you don’t lose moisture during the pressure run, but those same folks won’t be pleased unless you only stir the mash with a mash paddle carved from a tree hewn from the forests of Bavaria (or Bohemia in a pinch).
Pseudo Decoction
One last alternative. What if we just “faked it?” There are a few different mashing schemes that attempt to replicate the impact of a decoction, minus the labor. There’s the Schmitz process that has you strike your mash like a regular infusion mash. Give it time to get incorporated and the malt hydrated (~15–20 minutes) and then pull as much enzyme-rich liquid as you can from the mash to somewhere safe and kept warm. Then, like a reckless adventurer of old, boil the grain, stirring vigorously for 15–30 minutes depending on your lack of sanity. Cool the mash back down to your mash temperature and stir the liquid back in and proceed like you haven’t just lost all reason.
A more reasonable variant of the whole thing comes from longtime beer experimenter, Kai Troester, whose blog braukaiser.com, while no longer updated, is a wealth of beery experimentation with an eye towards German brewing. Kai flips the equation on the Schmitz process and recommends creating a thick initial mash of half your grain and a little less of the water. Boil that initial mash for 20–30 minutes before mixing in the remaining water and malt to bring everything down in temperature and proceed with conversion.
If you follow Kai’s process, we recommend that you add the water first and then the remaining grain because you’re depending on the second half of your malt for enzymatic power to convert everything. To that point, you’ll want to make sure you have enough high-Lintner value malts in the second half (Pilsner, pale, etc.) to ensure that you can still convert. Generally, this would only be a concern with a malt bill heavy in adjuncts or toasted malts (e.g., a hefeweizen gets a bit tricky, and a completely Munich-driven malt bill is probably a no-go via this process).
One Last Reason to Understand Decoction
Having spent much of this column trying to convince you of the folly of spending your hard-won time on an old-fashioned mashing technique, there is one good practical reason to be comfortable with decoctions. Yes, practical, as in not just for the sake of knowledge and “I’ve done everything in brewing” ticking behavior.
For years, Drew was an apartment brewer with a woefully underpowered natural gas stove. Missing infusion temperatures took forever to correct and getting to mash out dragged. So, he borrowed a trick from a fellow homebrewer, Cullen Davis, and used a small decoction to add extra heat. Just drag a part of the mash to a small pot and run a small decoction step to heat up the main mash. Never forget, one of the greatest skills you can cultivate is flexibility and adaptability.