Propane vs. Electric: What are the considerations?

Many homebrewers have cut their teeth on a kitchen stove, running 2.5-gallon (9.5-L) batches in a stockpot. It’s a great way to learn the ins and outs of the craft. The advent of affordable brew-in-a-bag kits have made all-grain brewing accessible to the stovetop brewer. When the limitations on batch size and the easy cleanup starts to lose its luster, many brewers start looking to up the ante by moving to five-gallon (19-L) batches. Problematic for most home stoves, the move requires a substantial investment in bigger equipment. Along the upgrade path there are a lot of decisions, the first of which is your heat source: Gas or electric?
It’s a question that polarizes brewing forums, with dedicated adherents from both camps happy to chirp at each other until the din is tiresome. We’re going to take a look at the considerations without planting a flag for one heat source over the other.
Equipment
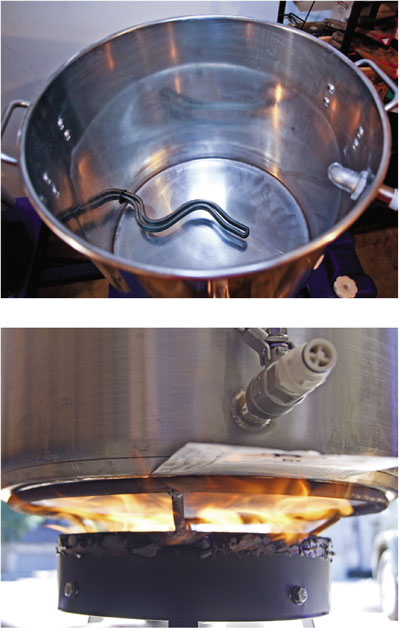
For discussion purposes, I’m going to stipulate that we’re going to look at building a two-vessel (mash tun and kettle), 5-gallon (19-L) batch, semi-automated brewhouse using 10-gallon (38-L) kettle(s). Let’s also assume that you are willing to spend a little more than the bare minimum in order to improve your overall product. With that in mind, we can now say that both rigs will have one electric pump, two temperature sensors, and a roughly comparable bill of hoses, connections, false bottoms, lids, etc. The kettles in an electric rig will require another hole for the heater elements, but each burner in a propane rig will require a solenoid valve and igniter. Let’s call that a wash in terms of costs. Finally, let’s also say that we are going to use a single-tier setup (kettles at the same height) to eliminate the risk of moving heavy kettles full of sugar water that’s going to wind up at boiling temperatures.
That gets us pretty close to a comparison of apples. At least close enough that we have a baseline common to both. Let’s take a look at where the equipment costs start to diverge.
Assuming the basic, common elements of both automated rigs are going to be about the same price, the difference will be in the control panel.
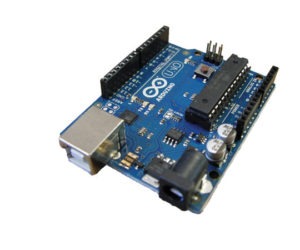
Both rigs will need a control box of some kind. The propane rig will need to monitor two temperatures and have two thermostats of some kind with a settable temperature and adjustable hysteresis band. Hysteresis means that the thermostat will turn the burner off when it reaches the set point but will allow the temperature to fall by a certain number of degrees before reigniting the burner. The narrower the hysteresis band, the more often the burner will cycle, and the closer the temperature will stay at the set point. There is, however, a minimum cycle time. Don’t expect to get much more than one cycle every ten seconds or so. The thermostat will also have to have a set of output contacts that can trigger the solenoid valve and igniter. Cheap luxuries would be an electronic timer and a switch to turn the pump on and off. There will be some 120VAC wiring, a DC power supply of some kind, and some overcurrent protection devices like a fuse or a breaker.
The electric rig will need a bit more and will be more expensive than what’s needed for the propane setup. Two controllers are required. One, a PID controller, will control the hot liquor/mash tun element. The other, a duty-cycle controller, will control the boil kettle element. The controllers will also need solid-state relays (SSR), a big aluminum heat sink, several breakers and fuses, and a means to prevent both elements from coming on at the same time. There is a lot more wiring needed in the enclosure, and it introduces high voltage, high current power into the equation, so safety concerns are also a key component of the system design.
SAFETY NOTE: Household 120/240VAC current can kill you. Do not attempt to build your own system without a thorough understanding of the safety precautions that will keep you from getting hurt or worse. Consult an electrician if this is beyond your skill set.
More on the controllers: PID stands for Proportional, Integral, and Derivative. That describes the math used to compare the current temperature against the target temperature and the rate at which the two are converging. PID controllers, coupled with an SSR, can cycle power to the element many times per second, far faster than a propane controller can. Brewers just need to know that it’s a device that ramps up temperature as quickly as possible without overshooting the target temperature. A duty-cycle controller turns on the element for an adjustable percentage of the time. In other words, it can be set to operate for 1.5 seconds out of every 2 (75%). Duty-cycle controllers are used in the boil kettle. Typically, they are set to 100% until the boil is reached, then cut back to somewhere between 50–60%, or to whatever percentage maintains a nice, gentle boil.
Assuming the basic, common elements of both automated rigs are going to be about the same price, the difference will be in the control panel. For a DIY kit, expect to pay about $1,000–$2,000 (USD) for quality equipment and a proven design, and probably about 75% of that for an equivalent propane control panel. Naturally, the sky is the limit, depending on the features and automation you choose to build in, and you can always spend more by having someone else handle the assembly.
Heat Source
Propane
Pros:
- Can have faster ramp time with a good burner.
- Single-kettle plus cooler setup is the lowest price to build a 5-gallon (19-L) rig.
Cons:
- Must be used outdoors or in an open shed or garage due to the poisonous gases.
- More expensive per batch than electricity (about $7-$10 per 5-gallon/19-L batch if using a standard 20 lb. tank, vs. $1-$2 for electricity).
- Depending on your burner, only about 30-40% of the heat is actually applied to the liquid in the kettle.
- Heat deflectors or similar must be used to protect the hoses and temperature probe cables from the high heat from the burner under the kettles.
Electricity
Pros:
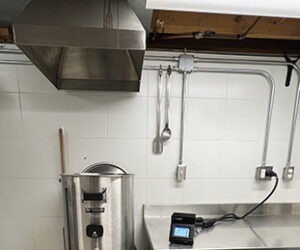
- Can be used indoors (with a vent or steam condenser).
- Cheaper per batch than propane.
- 100% of the energy goes to heating the liquid in the kettle.
- Easier to control temperature ramp-up without overshooting.
Cons:
- Increased risk of electric shock.
- Cleanup can be more difficult.
- Equipment costs and initial setup time is often higher.
- High-energy electric is required.
A note on induction burners: Some brewers are using induction burners as their heat source. For small batches, the 120VAC can work well, but stepping up in size to 240VAC is often recommended for 5-gal. (19-L)+ batches (kettles can be insulated to speed heating times). Also they operate by strictly manual control. An external thermostatic controller or PID controller would be impractical to use. Furthermore, once you go bigger than about a 2.5-gallon (9.5-L) batch, the price tag for a kettle that will work on an induction burner jumps significantly. Many large (10+-gallon/38+-L) kettles will not work on an induction burner.
Brew Day
Once you’ve taken a look at the equipment and cost involved, there are still a few things to consider before you finalize your decision and start spending. Moving from the kitchen cooktop to the basement, driveway, or workshop is going to mean a very different brew day. Bigger batches mean more weight. More liquid to heat means more time to the start of the boil, and assuming you start brewing all-grain recipes, more cleanup at the end of the day.
One challenge you will face as you become accustomed to your new setup is one of consistency and repeatability. It’s pretty easy to make sure you’re consistent when assembling the grist and hops, and a boil is pretty much a boil. The two biggest factors for repeatability and consistency are found in mashing and fermentation. Fermentation is a discussion for another day, so spending some time figuring out the best way to a consistent mash is time well spent.
Many homebrewers with pumps will utilize some sort of recirculating mash system to gain better control over their mash. The most common are direct-fired (DFRMS), heat exchange (HERMS), and recirculating infusion (RIMS). This will add a level of complexity to your rig (or brew day) no matter which you choose, but generally HERMS and DFRMS are considered the easier to implement while RIMS requires more technical elements to put into place. Direct-fire recirculating mash system uses a burner to provide heat to the bottom of the mash tun while recirculating wort back to the top of the mash. The problem is that using a propane burner throws a massive amount of heat at the bottom of the kettle you don’t want to scorch the wort. A HERMS set-up requires a heat exchanger placed within a hot liquor tank. The hot liquor tank’s temperature will be controlled and wort recirculates through the heat exchanger back to the top of the mash to raise the wort temperature. A PID-controlled electric element housed in a steel tube is the basis for a RIMS loop. Wort recirculates across the element heating the liquid to a set temperature. Each allows you to hit your target temperatures and keep them there every single time if properly implemented using calibrated temperature sensors. You can begin using multi-step mash recipes, and you can control mashout and sparging with precision. For pros and cons of recirculating mash systems, check out: www.theelectricbrewery.com/forum/viewtopic.php?t=28112
Electric brewstand proponents argue that the PID and duty-cycle control methods are instrumental in reducing boilovers. While any rig, from kitchen cooktop up to the largest non-calandria-heated professional systems, are subject to boilovers, there are some advanced systems that remove the need for absolute vigilance when approaching the boil and into the hot break. There are some automated systems that will monitor the temperature in a boil kettle and trigger an alarm when wort temperature gets just below boil to let the brewer know it’s time to put down the crossword puzzle and pay closer attention. This can be implemented with both electric and gas rigs. But the electric rig can be set up to automatically scale back the duty-cycle controller so that the start of the boil is far less violent than what is typical with a propane rig. An alarm can be triggered here too when the system starts ramping back the duty-cycle percentage.
The biggest brew day advantage for propane brewers is when the fermenters are full and it’s time to clean up. The relative simplicity of a propane rig as compared to an electric rig makes the chore slightly faster and easier. The brew kettle’s electric element needs to be cleaned after each brew and there are fewer holes in the kettles, meaning there is less stuff to disassemble and clean. That advantage may be short-lived, however. More and more electric brewers are asking for bottom-drain kettles, which will bring true clean-in-place (CIP) capability to the homebrewery. Most kettles are manufactured with a thick 3-ply bottom with a heavy aluminum sandwich in the middle, so as to allow the propane flame to hit the kettle directly, without fear of scorching the wort. That isn’t needed for an electric-only kettle and it’s possible to build a slight slope to a drain in the bottom of the kettle (a specially designed stand would be needed though).
Wrapping It All Up
Hopefully, some of the points raised here will prompt a well-researched decision on your rig. Whichever method you choose, the goal is to make your next brewhouse a pleasant leap in the direction of better, more consistent beer. It should also be something you can be happy with for several years (or until your wallet starts to itch). Spend some time on YouTube and in the various homebrewing forums to get the deep-dive detail on some of the subjects that were just introduced. Above all, make sure that whatever you build or buy is safe, and appropriate for the intended use. Consulting a professional is always a smart move if you have questions.


