Rolling Kegerator
To view the step-by-step pictures and full Parts List, click here for the pdf of the pages.
Like any homebrewer, I find it hard to wander through a department or hardware store without looking at items and wondering, “Could I ferment in that? Would that be good for storing grains? How many carboys could I fit in there?” It’s in a homebrewer’s nature to adapt everyday items into brewing equipment.
This summer, my wife’s parents were celebrating their 50th wedding anniversary. Apparently, the enormous amount of beer I’ve brewed and served the last two years has earned enough of a reputation that I was on the hook to bring 15 gallons (57 L) of beer for the party. With the party at their house, I couldn’t rely on my normal kegging system for serving and had to draw on my DIY skills to come up with some sort of portable keg dispensing system. This was going to be a large Irish family from the East Coast along with local friends and neighbors. I was excited about brewing three good beers that everyone would enjoy. I decided on an Irish red ale, a cream ale and a Belgian wit. All three of these recipes I’ve brewed before with great success and I knew they were crowd-pleasing beers.
My biggest concern was coming up with a serving system worthy of the event. After all, dropping a couple cornies in a bucket of ice with a picnic tap might be fine for a backyard BBQ or a frat party, but this event was going to be catered, bartender and all. I didn’t want Uncle Leo fiddling with a wet, sticky picnic tap and serving himself a cup-o-foam. No, I had to come up with something from scratch, without a lot of scratch.

One day I was walking through the local big box store when I passed by some of those rolling trash bins we all have in our garage. Initially I walked by without thought, then it struck me. I back pedaled, pulled one of the cans out into the aisle and peered inside. The homebrewer in me took over. Could it be? Would they fit? I walked over to the hardware section to find a tape measure and initial estimates looked promising. Confident in my measuring skills, I laid down the $19 for the new trash can and headed home.
When I got there, I rolled the rig into my basement brewshop and immediately grabbed three empty Corny kegs. As you can see from photo 1, they fit — even allowing for some insulation. This was going to work just fine. So now it was on with the particulars of designing and assembling the system. In my mind I broke down the project into three phases; portable CO2 system, insulated containment and tap setup.
Portable Carbon Dioxide System
Rather than breaking down one of my two CO2 rigs at home, I decided to pick up one of those Kobalt portable CO2 systems (seen in photo 6) used for pneumatic brad nailers and staple guns. Hey . . . it’s the kind of item I need around the house anyway. Plus, the Kobalt system comes with a regulator that is suitable for dispensing beer at a low pressure, although I should point out that the pressure gauge is not really designed to read accurately at the PSI values that beer is served at.
Set Up is a Gas
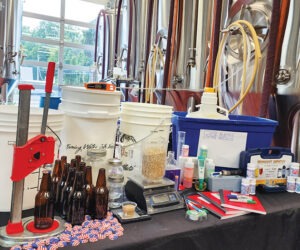
I also picked up a four-way splitter as well as a hose barb and an additional air-hose disconnect (as seen in photo 3). The first order of business was to assemble the gas lines, splitter and quick disconnect, and then adapt this system to my ball locks. In addition, I installed a check valve to insure we didn’t have any beer back-flow into the regulator. I cut three pieces of gas hose and picked up some spare gas disconnects. (These are shown in photos 3 and 4).
Once I had everything connected, I submerged the hoses into my shop sink and hooked up the CO2 system to check for leaks. Everything seemed air tight.
Next (as shown in photo 5), I hooked the rig up to one of my filled cornies that was conditioning in my brewshop, along with a picnic tap. Setting this system at 10 PSI was much too high and even using 7 feet of (3/16ths) beer line, the beer flowed too fast and foamed more than I wanted. It was obvious I would have to find the right “feel” for a good pour. I shut off the gas, released the excess pressure from the keg, dialed up the pressure only enough to hear the gas transfer to the keg until the needle came just off of the peg. I retried a sample draw and it worked perfect. (You can see a test pour in photo 7.)
Rig Ready
I now had a complete, portable CO2 system that didn’t require me to dismantle my home systems. This rig would come in handy at other events like tail gates and local club meetings where the “corny-in-a-tub” was adequate. And, the 9 oz. (255 g) or 20 oz. (566 g) cylinders hold a lot more CO2 than those little 12 gram CO2 cartridges. Any local sporting goods store that sells paint ball equipment will refill these canisters for anywhere between $2.50 to $6.00, depending on the size.
Insulate the Unit
With the CO2 system done, it was on to building out the containment system. For insulation, I returned to the big box store and picked up a 4 x 8 sheet of 1″ foam board insulation. Using the general outline of the trash can, I cut out sheets of the foam board that would form an interior liner. As shown in photo 8 below, I also lined the bottom of the rig with two sheets of the foam board to provide a more stable base for the kegs.
Put A Lid On It
Knowing that this rig would be sitting out in the hot sun part of the time, I wanted to make sure the top was well insulated and that the beer lines were not exposed to the hot “attic” of the container. I ended up using sheets of the foam board to build a lid, which can be seen in photos 9 and 10. Closed up, this unit should hold temperature very well. To make sure I didn’t have to deal with a zillion styrofoam beads the rest of my life, I used duct tape to wrap the edges. The extra 15 minutes was well worth it. Even with the insulation, the three cornies still fit nicely.
Now this garbage can was beginning to look more like a cooler. I planned to line the interior with two sheets of construction grade plastic bags as additional insulation and to keep my styrofoam from getting water logged. This can be seen in photo 11.
Down the Drain
To help with the breakdown after the party, I decided to install a cheap drain (shown in photo 12) at the bottom. This would also make life easier if I had to refresh the ice during the day.
Tap Setup
For mounting the taps I was going to take a basic approach. First I lined up and drilled three evenly spaced holes. To give the taps some reinforcement, I found a scrap section of 3″ wide trim wood laying around. I mounted the board temporarily with a clamp and drilled out the shank holes (seen in photo 13) and four smaller holes for mounting with machine bolts. This piece of wood (photo 14) was necessary because the thin walls of the garbage container would not allow the shanks to tighten down completely.
Drip Tray
I still had some wood left over so I decided to cut another piece to mount a drip tray. Using two 4″ L-Brackets (seen in photo 15) and some Velcro, the drip tray would add a nice finished look to the rig. I came across some leftover stain and decided to dress up these mounting boards a bit.
There was a nice visual contrast coming together now with a basic green garbage can, some nice mahogany stain and the inviting shine of three taps. No doubt, this rig was going to make people stop and look.
In photo 17, you can see the interior view of the shanks as well as the mounting bolts for the tap support.
Keeping the black plastic liner pushed over the shanks will insure they stay colder and minimize problems associated with warm taps.
One of the universal questions among homebrewers building a home kegerator system is whether to keep the CO2 unit inside or outside. I really had no choice because I could not risk a curious partygoer tinkering with my system. This unit had to be inside, hidden from view. The Kobalt system comes with a belt clip, so to keep things simple, I just took a piece of coat hanger and bent it a few times to form a hook and jabbed the prongs into the insulation wall. (This is shown in photo 19.) It was plenty rigid to hold the CO2 unit, and would prevent it from moving around or getting submerged in the ice water.
Test Run
This project was quickly coming to the end. My CO2 system was setup. I had a garbage can that should be insulated enough to rival any good cooler. And I had a three-tap setup complete with hardwood trim and drip tray. Just for grins (and because I didn’t want my first trial to be at the event), I decided to drop in a partial corny from my kegerator to do a test run. I gave the corny an hour to settle after moving to avoid foaming. I bled the excess pressure from the keg. I dialed up the CO2 unit until the needle came just off the peg. I pulled the tap into a cup to flush the lines. I grabbed a clean glass. Tipped it under the tap at 45 degrees. I gave the tap a pull . . . and (as seen in photo 20) there was beer!
Finishing Touches
Aside from a bit of cloudiness due to the yeast being kicked up, I had drawn a perfect pint. This unit was fully functional and ready to roll.
I decided to spruce up the rig with some bar-like adornments. After all, people were going to need to know what they were drinking. I printed off a couple generic labels and came up with a beer sign (as shown in photo 21).
There was no way people were going to pass by this rig without stopping and having a sample.
Roll Out the Kegerator, It’s Party Time
Early on the morning of the party I drove over to the in-law’s house with my new rig, four filled cornies (I decided to bring a second keg of the cream ale) and some assorted tools. This rig was going to be set outside in the back yard amongst the tables and chairs, beer garden style.
I decided to place it under a large shade tree to minimize exposure to the direct sun. To keep the tap handles at a more user-friendly height, I decided to go ahead and set the rig on top of two side-by-side milk crates, that were covered with a black plastic bag.
I placed the three cornies into the rig and iced them down. The fourth keg I left in the garage inside my 10-gallon cooler, packed in ice. To prevent any accidents, I decided not to hook up any gas or beer lines until the party started at 5:00 PM. With about 10-hours to rest, the kegs should run clear by the time the party started. I tossed a white sheet over everything, just to try and keep things a bit cooler until the party.
When I returned to the house just before five, the ice was only partially melted and the kegs were nice and cold. I screwed on the tap handles, hooked up the gas and beer lines, dialed up the CO2 unit and flushed the lines, and posted my beer signs. With fingers crossed, I moved from left to right, testing the flow and carbonation of each beer. The wit, the Irish red and the cream ale all poured smoothly, with the perfect head. Despite my confidence in the system, it was a huge relief to know everything was going as planned.
The garbage kegerator was the talk of the party. By the end of the party we had floated all three kegs and gone through half of the extra cream ale. I should note that replacing a keg half way through requires scooping out some of the ice, but the minimal amount of work was worth it.
Everyone enjoyed the beer. Even non-beer drinkers admired and appreciated the design. The anniversary couple was extremely grateful for such a unique idea. Oh…and Uncle Leo? Well, he is now a huge fan of homebrewed Irish red ale.
This project is easy if you have experience working with kegging equipment. It’s made mostly of items you probably already have and everything can be broken down after a party to be returned to its original purpose. You should understand the concept and your final product may vary, but that is what makes DIY projects like this uniquely yours.