Sparge Ho!: The many ways of rinsing grains (or not)
Sparge — what a strange word. Sparging — what a strange action! Fortunately the concept is pretty easy and the process itself is too. But never put it beyond the reach of humanity to complicate what, fundamentally, seems easy.
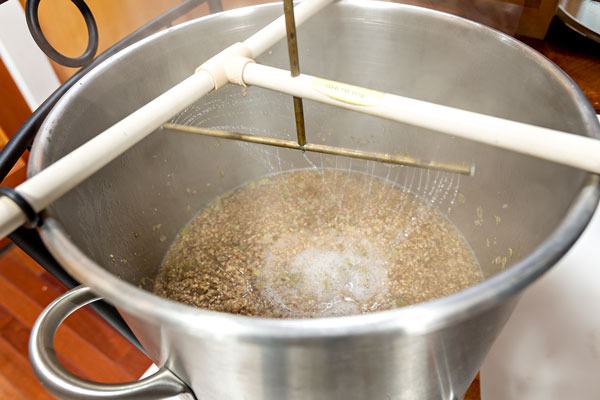
Simply put, sparging is rinsing your mashed grains in order to extract as much of the sugar in the grain as possible into your brew kettle. There are a number of ways you can sparge (or not sparge) your mash. Some of them may have more impact than others. None are necessarily the right or wrong way to do it . . . they’re simply different. And you get to choose what method is right for you and your brewing situation!
No-sparge
As far as anyone has been able to figure out, the original sparging method was not to sparge at all. Zero rinsing – what sugar your strike water brings is what you get.
Of course, that’s pretty much a guess since not even Denny is old enough to have been there! But based on what we know of the equipment and conditions thousands of years ago, it seems pretty unlikely. After all, it’s usually a safe bet to guess we used simple means before we did harder things. Remember, there was no science to tell people how brewing worked, so not only did they not know about the sugar, they didn’t know there was a way to get more of it if they had known about it. (They used a different system to extend the effect of the mash — wait for it.)
Another reason is that the very act of heating sparge water would require valuable fuel and a container to hold it as it heated, not to mention the extra time involved. All of those things could be in short supply for the average family brewer back then. No-sparge brewing is still a viable way to brew even in these times of plentiful fuel and equipment — time might be another aspect of interest for a lot people!
Let’s look at some of the things to consider when no-sparge brewing. First, your efficiency might be lower than it normally is. As always, the efficiency you get will vary with your system and practices, but assuming 65% is a good place to start. After you do a few brews, you’ll be able to calculate a number that more accurately reflects your efficiency. It may fall lower or higher. Lower efficiency is no surprise — improved extraction is why modern brewers sparge!
Simply put, sparging is rinsing your mashed grains in order to extract as much of the sugar in the grain as possible into your brew kettle.
The next thing to consider is the size of your mash tun. There are two ways to do no-sparge brewing . . . in one of them you use all the water you’ll need for the boil in your mash tun. Your tun needs to be big enough to hold the grain and all the water. If your mash tun isn’t big enough, you can use as much mash water as you can and then add more to the kettle or even post-boil — aka diluting the runoff after you’ve gone to kettle.
To figure out how much water you need, start with your boil volume and work backwards. Let’s say you need to start with 7 gallons (26.5 L) pre-boil in order to get 5.5 gallons (21 L) into your fermenter. For the ease of math (hey it’s a sample problem, not the actual homework), let’s assume you’ll be using 10 lbs. (4.5 kg) of grain. The grain will absorb water, but how much? In general, a pound of crushed grain will absorb about 0.12 gallons (0.45 L) of water. Another way to think of that is that 8 lbs. (3.6 kg) of grain will absorb about 1 gallon (3.8 L) of water. This will vary a bit depending on your system, so start there and measure your own absorption over the course of a few batches. That means we need to increase our mash water amount to compensate for that absorption loss. In our example, 10 lbs. (4.5 kg) of crushed grain in the mash means that we need to start with an extra 1.2 gallons (4.5 L) of water.
The next number you need to take into consideration is the volume of the grain and water. Why? Because you need to make sure your pot/cooler can hold the whole thing! When 1 quart (1 L) of water mixes with 1 pound (0.45 kg) of grain, the volume occupied by the mix is 1.32 quarts (1.25 L). In other words, one pound (0.45 kg) of grain will add 0.32 quarts (0.3 L) of volume when mixed fully mixed into water. For those that work in metrics, a simple formula is:
Mash volume(liters) = [Mash thickness(kg water:kg malt) + 0.7] x (kg malt)
So, here’s where we stand in our hypothetical no-sparge 10 lbs. (4.5 kg) batch: (Remember, we want 28 qts./26.5 L of wort in our kettle after grains are removed from the picture.)
Grains: 10 lbs. (4.5 kg)
Grain Absorption: 4.8 qts. (4.5 L)
Desired Pre-boil Wort: 28 qts. (26.5 L)
Total Mash Water Volume: 32.8 qts. (31 L)
Total Grain Volume: 3.2 qts. (3 L)
Minimum Mash Tun Volume: 36 qts. (34 L)
So our total mash water volume is 32.8 qts. (31 L) and our total mash tun capacity will need to be, at the very minimum, 36 qts. (34 L).
As you might guess, no-sparge is ideally suited for lower gravity beers using small-ish amounts of grain. If you’re making a huge honkin’ barleywine, you might want to consider another method . . .
Batch-sparge
Denny first wrote about batch-sparging for BYO many moons ago (January-February 2004 issue). At that time, it was an esoteric oddity that almost no one in the contemporary brewing world did. Denny was passionate about it and today there are thousands of dedicated batch spargers out there in the brewing world. In a different life, Denny could have been a cult leader, but here we are, thankfully.

To batch-sparge, you start by mashing with whatever water (in brewing it’s referred to as liquor) to grist (crushed grain) ratio you think is appropriate for you. Denny usually goes for the 1.5–1.75 qts./lb. (3.1–3.7 L/kg) range. After the mash is finished, you completely drain the wort into your kettle, then gently add and stir in enough additional water to hit your boil volume target. Then drain it into your brew kettle. You gain efficiency without quite reaching the fiddly heights of traditional continuous-sparging methods.
There are a couple ways to go about figuring out how much water to use. Keep in mind that the absolute best efficiency in batch-sparging is had when you get equal amounts of wort from both your mash and sparge. That doesn’t mean that you use equal amounts of water for each part — after all, the grain absorbs water during your mash. The mash can’t absorb water during the sparge since the grain is already saturated, so we subtract that absorption factor from the sparge water to equal our volumes. Here’s an example . . .
Once again that we use 10 lbs. (4.5 kg) of grain and we want a pre-boil volume of 7 gallons (26.5 L). Let’s say for this example, our calculations from several brews have put our grain absorption rate at 0.1 gal./lb. (0.84 L/kg) of grain. Yes, it’s different than we used before, but we like to mix things up . . . keep readers on their toes.
Grains: 10 lbs. (4.5 kg)
Mash Thickness: 1.5 qts./lb. (3.1 L/kg)
Mash Water: 15 qts. (14.2 L)
Grain Absorption: 4 qts. (3.8 L)
Mash Yield: 11 qts. (10.4 L)
Again, we’re shooting for a 7-gal./28-qts. (26.5-L) pre-boil volume, so this implies we need to add more water to get our desired 14-qt. (13.2-L) initial mash runoff. So in order to balance the sparge volume, after the mash is complete, add another 3 qts. (2.8 L) of water before performing your mash runoff. Once mash runoff is complete, gently add and stir in 3.5 gal./14 qts. (13.2 L) of sparge water to get both the mash and sparge runoffs to equal 14 qts. (13.2 L).
Catch all that? Are your eyes crossed and your mind spinning? Don’t worry, there’s a simple, more pragmatic way to do it that Denny has found after batch-sparging 500+ batches. It’s based on the fact that although equal runoff volumes may be the best “by the book,” it actually doesn’t make a world of difference as long as the runoffs are within about one gallon (4 L) or so of each other.
Start by mashing with whatever ratio suits your fancy. Again, we recommend somewhere in the 1.5–1.75 qts./lb. (3.1–3.7 L/kg) range. After you do your mash and run it off into your kettle, measure how much wort you have in the kettle. Subtract that volume from the amount you want to boil. The answer you get is the amount of sparge water to use. (Drew uses a ruler and a spreadsheet to calculate this, but we know he’s a weirdo.) Way easier, huh? This is pretty much the method Denny uses these days. You can get more info if you need from Denny’s webpage www.dennybrew.com.
“Dunk-” sparging is a variation of batch-sparging that Brew-In-A-Bag brewers sometimes use. After your bag of grain has gone through the mash, you dunk it in a pot of clean water a few times and add that rinse water to your main kettle. Neither of us has ever done it, so you’ll have to try it yourself and let us know how it works!
The older variation of batch-sparging is called parti-gyle. After the mash runoff, you still add more water, but instead of combining the two runoffs like you do in batch-sparging, you treat them each separately. That means you end up with two kettles full of wort and two beers from one mash. Parti-gyle works best if you’re making a high-gravity beer. That way you’ll have plenty of sugars left from the first mash to go into your second batch.
A couple things to keep in mind . . . as in batch-sparging, the grain is already saturated so there is no absorption to deal with. The amount of water that goes in is the amount that comes out. Also, the second batch can be a bit thin sometimes, so to boost the body/flavor we often “cap” the mash by adding some additional grains to it. You’ll either need to use grain like crystal that requires no conversion, or give diastatic grains enough time to convert. Usually 20–30 minutes is enough for that.
Remember above when we said that no-sparge was extended by older brewers? This was the way. These days parti-gyle is most often associated with British brewers and is still in use at breweries like Fuller’s where a single mash yields three different worts that are blended in different ratios to create Fuller’s ESB, London Pride and Chiswick Bitter. (If you’ve ever tried to clone Fuller’s ESB and missed, now you know why!)
Continuous-sparging (Fly-Sparging)
Continuous-sparging is often referred to as “fly-” sparging since you do it “on the fly” as it were. Many people think of fly-sparging as being the traditional way of doing things. As far as we can tell (remember, it’s beer history so who knows), continuous-sparging really emerged when commercial breweries started trying to maximize their profit. Most commercial mash tuns weren’t large enough to hold the amount of sparge water that would be required for batch-sparging, and simply leaving all that sugar behind isn’t a financially viable thing to do. So, they started adding sparge water as the mash was run off . . . on the fly.

The conventional wisdom about fly-sparging is that it yields better efficiency than the other types of sparging. Maybe, maybe not . . . it depends a lot on your brewing system. For fly-sparging to work at its best you need a well-designed lauter system that eliminates the possibility of “channeling” through the grain bed. Channeling is the tendency of the sparge water to take the path of least resistance — think a game of Plinko where the disc is constantly moving down the same path — and does not flow evenly throughout the grain bed. Draining the wort too quickly or using a poorly designed lauter tun is commonly the cause of channeling when fly-sparging. Batch-sparging eliminates the possibility of channeling since you add all the sparge water at once and stir it in. But if you come up with a well-engineered lauter system (it’s not as easy as you think it is!) and don’t rush through the process, fly-sparging will be more efficient. Trust us, there are a number of designs involving false bottoms, copper pipes, slots, holes, braids, etc. Every system works, but they each have some form of advantages/disadvantages.
The other thing to be aware of if you fly-sparge is that as you add sparge water, the buffering power of the grain is reduced and the pH will rise. Grain has a natural tendency to reduce pH and the darker the grain, the more pH reduction you’ll get. But as you slowly dilute your mash by adding sparge water, the ability of the grain to lower pH is reduced. For that reason, you need to know what’s in your water, especially alkalinity, and treat it appropriately before you begin sparging. The usual recommendation is to keep your sparge water pH below 6, especially on low-gravity beers.
Why don’t we personally fly-sparge? We find it to be tedious — a lot of watching and dialing in flows in order to maintain an optimal flow and height above the mash bed. This is done in order to prevent channeling and sticking. It’s a lot of noise that’s cosplaying at being a professional brewer without much advantage for our homebrewing situation.
Sparge Water Temperature
There is great debate about what the temperature of your sparge water should be and difference it makes. One school of thought says that if your sparge water temperature is over 170 °F (77 °C) you will extract tannins. But in the real world, the pH is what matters. Sparge water can be much hotter than that if your pH is acceptably low, below 6.
What about the other direction, using water that is cooler, like room temperature water? Many people think that by using warm sparge water you make the sugar less viscous and it “flows” better, resulting in higher efficiency. In truth, hotter water doesn’t matter until you reach the limit of solubility of maltose in water. Sugar solubility is not an issue. There is no solid sugar to be dissolved during the sparge, since the sugar is all in solution when it is created. The solubility of maltose in water at mash temperatures is about 66.7% by weight (2 lbs./0.91 kg of maltose will dissolve in 1 lb./0.45 kg of water) and this is equivalent to a specific gravity in excess of 1.300. (reference: https://chestofbooks.com/food/science/Experimental-Cookery/Solubility-Of-Maltose-In-Water-gillis.html)
So unless your mash is over 1.300 original gravity, using hotter water will gain you nothing in terms of dissolving more sugar. Some people do see an efficiency increase by using hotter sparge water, but that is mostly related to the fact that they haven’t already achieved full conversion of the mash. By using hotter water they get that last little bit of conversion and their gravity increases.
Remember, no matter what type of sparge (no/batch/dunk/fly/computer assisted/blind poured pitchers of water) you decide on, always remember that malted barley wants to become beer. Find a method that works for you, your equipment, and your situation and make some beer!


