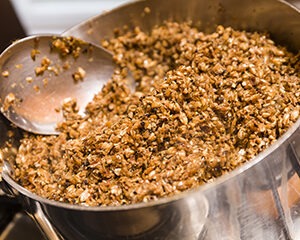
Step Mashing Techniques
A single infusion mash is a mash with only one rest, usually between 150–158 °F (65–70 °C), for the conversion of starches into sugar. A rest is simply a span of time during which the mash sits at a (relatively) constant temperature. Step mashing is a mash program in which you rest at multiple temperatures, starting at lower temperatures and moving higher. In step mashing, different enzymes are allowed to work at or near their maximum rate at each step. Doing multiple steps increases the complexity of the mashing process and causes the brew day to take longer. However, step mashing is a more traditional mash program for some styles of beer, for example American lagers. In addition, step mashing can influence mash and wort characteristics such as lauterability and fermentability.
Step mashing: step by step
Malt contains enzymes. If a barley grain was not malted and then mashed, these enzymes would catalyze reactions that would allow the barley grain to grow into a barley plant. (This assumes that environmental conditions were suitable and the barley grain was not from a sterile hybrid.) Different enzymes are most active within different temperatures and pH ranges. (It’s interesting to note in passing that the optimal temperatures for many of these enzymes occur in ranges far outside of the range that living barley ever encounters.) Enzymes also have a temperature at which they denature (“unravel” and stop working). The denaturing process is — for most proteins — permanent. Once the mash is heated beyond the denaturing point for a particular enzyme, cooling the mash will not re-activate that enzyme. That is why we step from the lowest temperature to the highest.
Over time, brewers have employed various rests in their mashes. (Incidentally, brewing texts differ on the exact upper and lower ranges of these rests. However, more importantly, enzymes don’t read brewing texts — some activity of these enzymes is found outside these ranges.) Here’s a quick rundown of different rests:
Forgotten phytase
A rest in the 95–104 °F (35–40 °C) temperature range is called an acid rest. Rests in this range can activate the enzyme phytase, if it is present. However, in many modern malts, it is destroyed during kilning. When present, phytase acts to slowly, produce acid and lower the pH of the mash. Unfortunately, it may take 2–3 hours to do so. These days, commercial breweries have mostly abandoned the acid rest in favor of direct addition of acids, including — in the case of Reinheitsgebot-observant breweries — acids derived from sour mashes.
Chewing on gums
A rest in the 104–122 °F (40–50 °C) range activates the enzyme beta-glucanase. Beta-glucanase breaks down the compounds (beta glucans) that can cause a mash to be gummy. So, a rest in this range is useful if you’re using malts that might gum up the mash or if you have encountered troubles during lautering. If resting in this range, brewers will usually rest for 15–30 minutes.
Protein rest in peace
Historically, rests in or around the beta-glucanase range were called the protein rest. The enzymes carboxypeptidase and endopeptidase were thought to be active in the mash within this range. Collectively, these enzymes were called proteases or proteolytic enzymes because they degrade proteins. These days, most commercial brewers do not believe significant protein degradation occurs in mashes held in this range. And, most modern malts have all the necessary protein modification accomplished during malting.
Amazing amylases
Two enzymes — alpha amylase and beta amylase — degrade the large starch molecules found in malted base grains into simpler sugars. Beta amylase’s optimal temperature range is 140–149 °F (60–65 °C). Beta amylase attacks the end of starch molecules. The primary product of beta amylase action on starch is maltose. Alpha amylase is most active at 154–162 °F (68–72 °C) and essentially chops large starch molecules into smaller starch molecules.
The usual temperature for a single infusion mash falls between the optimal ranges for beta-amylase and alpha-amylase. A rest in this range, which usually lasts 45–90 minutes, is often called a saccharification (“sugar making”) rest. These enzymes work over a broad range of temperatures and a rest between the optimum ranges of each will result in some activity for both. Since these are the enzymes that produce the sugar that is required for fermentation, a rest somewhere in the range of these two enzymes is the only one that is absolutely required.
A rest in the beta-amylase range encourages highly fermentable wort and a light-bodied, dry-tasting beer. Conversely, skipping the beta-amylase range and resting only in the alpha-amylase range results in less fermentable wort and a fuller-bodied beer. So, depending on the results you want, you can rest once somewhere within the range of both of the saccharification enzymes, or do separate steps for each of them.
Up and out
Finally, raising the temperature of the mash above the saccharification rest — commonly to 168 °F (76 °C) — stops enzyme activity and is called “mash-out.” This temperature may be maintained during lautering. A mash-out is not required, but it heats and thins the wort to make lautering easier. It also deactivates the saccharification enzymes so they won’t come back into play if the mash cools during lautering.
Get with the program
A mash program can be very simple. For example, a two step mash with a rest in the beta glucanase range followed by a rest in the saccharification range is fairly common. Alternately, brewers can rest at every step detailed earlier. (Some even mash in at around 104 °F (40 °C) and slowly ramp up to 158 °F (70 °C).) The benefits and drawbacks of the myriad of possibilities of step combinations is beyond the scope of this article.
Step by step
Once you decide on your mash schedule, the next question is how you accomplish the steps. One way is with a process known as a “decoction.” Decoction mashing involves boiling a portion of the mash (including the grist) and is complicated enough to need an article of its own (See, for example, “Double Dipping: A Double-Decoction Lesson,” February 2001). For that reason, we’ll focus on different methods of infusion mashing, in which you increase the temperature by applying direct heat to the mash tun or by adding hot liquor to the mash. (Liquor here means brewing water.)
Step mashing is easy if your mash tun can be heated directly — for instance, if it is a converted keg or metal kettle. These can be equipped with a false bottom or manifold to allow them to serve for both mashing and lautering. Alternately, you can mash in one container and then transfer the mash to a separate lauter tun. Some homebrewers mash in their kettle, then transfer the mash to their lauter tun. Thin mash can be slurry pumped or you can simply use the scoop and dump method.
Either way, directly heating the mash tun is as simple as setting it on the stove or propane burner, raising the temperature to a couple of degrees below your target then turning down the heat. The residual heat in the metal will continue to raise the temperature of the mash for a short time after turning off the heat.
Remember that enzymes are denatured if they get too hot and, once denatured, they cannot be reactivated. For that reason, be careful not to over-shoot your target temperatures. Raise the temperature slowly. Your rate of temperature increase should only be a few degrees per minute. Check the temperature frequently at different points in the mash to ensure even heating. Stirring constantly with a mash paddle or large, sturdy spoon will help keep your mash temperature uniform. Once you reach your target temperature, an insulating jacket for the mash tun can be helpful for maintaining that temperature. This can be as simple as a blanket tossed over the tun, or it could be a custom-fit insulating wrap. If your mash tun will fit in your kitchen oven, and if the oven temperature can be turned down low enough, setting the tun in the oven for the duration of the rest will also maintain its temperature.
RIMS/HERMS
Another method for step mashing using direct heating is to use a Recirculating Infusion Mash System (RIMS) or a Heat Exchange Recirculat-ing Mash System (HERMS). These
systems use a pump to circulate wort from the bottom of the mash tun (either from under a false bottom or through a manifold), past heating elements to raise or maintain the temperature and then back onto the top of the mash.
If your mash tun cannot be heated
If you mash in an insulated cooler, a plastic bucket or any container that can’t be directly heated, then stepping up the temperature requires you to add just the right amount of hot water to the mash to raise its temperature. A drawback to this method is that your mash becomes progressively thinner as you add more and more water.
Many of the software packages for brewing include calculators to help you determine what “just the right amount” is and the formulas can be easily put into a spreadsheet. First you need to determine the correct temperature for the strike water when doughing-in. This will establish the temperature of your first rest.
Once you’ve doughed-in the grains and stirred them well, check the temperature to make sure it is correct. The formula will get you close, but your mash may end up slightly hot or cold. It is a good idea to have some boiling water and some ice handy for quickly adjusting the temperature up or down.
To raise the mash temperature to the next step, you add a measured amount of boiling water and stir it in well. If you live at an altitude where water does not boil at 212 °F then you have to adjust that. For instance, I live near Denver at about 5,500 ft. of altitude (where water boils at 203 °F), so in my spreadsheet the final division is by 203-B1.
Also, this formula works for any step as long as you adjust all the variables. For instance, when stepping from your initial dough-in to the second rest, the volume of water in the mash (B4) will be whatever your strike water was. For the third rest, though, you have to add your initial strike water plus the volume of boiling water you added to get to your second rest, in order to determine your current volume of water. Likewise, you have to change the value in B2 for the current temperature as you step up. In general, you can assume that the mash will lose only one or two degrees during a rest when you’re mashing in an insulated cooler. You may lose another degree or two more if you mash in a plastic bucket. If you open the top to stir and check the temperature too frequently, though, you may lose more than that.
This brings up the question of how to add the boiling water — should you dump in all the water and stir quickly or add slowly, stirring as you go? The second method ends up in a more uniform temperature, but takes longer and risks losing more heat. My personal preference is to dump in all the water and stir quickly, but what’s important is what works for you.
As mentioned before, adding water progressively thins the mash. The thickness of the mash, especially at the saccharification stage, affects the fermentability of the wort. Generally speaking, a thinner mash yields more fermentable wort. Also, after several additions of boiling water, the mash tun may become over-filled.
Two solutions exist. Some brewers drain wort from the mash, boil that, and add it back to bring the mash up to the next temperature step. This is not decoction mashing, since you are only boiling liquid wort and not any of the grist. Doing this, however, requires you to subtract the volume of wort that you drain from the previous volume in order to determine how much you have in the mash, which determines how much you should add back and therefore how much you should drain. This is a circular calculation that may require some experimentation to get right. Another approach is to mash in a kettle that can be directly heated, but transfer to a separate lauter tun and raise the temperature with boiling water for mash-out.