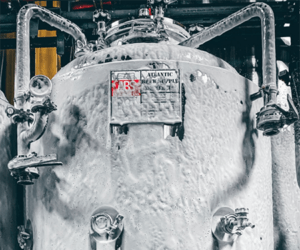
Three-Vessel Brewing Systems

In a traditional three-vessel brew system, homebrewers will have a hot liquor tank or HLT (note that brewers call water “liquor”), a mash/lauter tun or MLT, and finally their brew kettle or BK. Strike water (water used for the mash) is initially heated in the HLT up to a pre-determined temperature before being transferred into the MLT where the mash converts the starch in the grains to sugar. The liquid, now called wort, is drained from the MLT either through a screen, slotted manifold, or false bottom into the BK where boil and hopping takes place. The grains will be washed with more water from the HLT in a process referred to as sparging.
HLT and BK
These two roles can be filled by one large stock pot, but a third vessel, such as a cooler, will be needed to hold the sparge water while the first wort is drained, or run off, from the mash. But many three-vessel brewing systems will have two dedicated stockpots to serve these two distinct roles. In some brew systems, the hot liquor tank will serve not only as a place to heat water that gets directly added to the mash, but also a place for indirect heating of the mash through a heat-exchange system known as HERMS (Heat Exchange Recirculating Mash System). In this style of setup, a brew pump is utilized to send wort from the mash tun through copper or stainless tubing that is submerged in the hot liquor tank’s hot water. Step mashing (raising the mash temperature through a series of “rests”) or mashing out can be done with this setup.
The MLT
This is the backbone of a three-vessel brew system and where a lot of focus of the brewer’s attention lies. There are many iterations of homebrewing mash/lauter tuns — from a simple cooler retrofitted with a braided stainless steel hose to double-walled stainless steel tanks with slotted false bottoms and a bottom drain — what a homebrewer chooses must speak not only to their budget but the style of sparging they are looking to do. As an example, I’m going to spin through all my iterations of MLTs.
My first MLT was the classic Charlie Papazian-designed Zapap tun where two food-grade plastic buckets are nested together with lots of little 1⁄8-in. (3-mm) holes drilled into the bottom of the upper bucket. The mash sits in the upper bucket, which acts like a false bottom and wort drains out from the lower bucket. It worked well enough, but I found stuck mashes (when wort drains much slower than it should) was my arch nemesis.
So, I moved up to a 5-gallon (19-L) Igloo cooler with a stainless false bottom manufactured specifically for that size cooler. After a few years, I found the size too small as the ABV kept creeping up on my homebrewed beers. So, I purchased a 12-gallon (45-L) rectangular cooler to upgrade. I built a manifold drain system for it with ½-in. (12-mm) copper piping with slits cut into the bottom using a hacksaw. Between these two mash tuns I could brew any style of beer I wanted, and I happily brewed for years on them.
But when a nice 20-gallon (76-L) stainless steel mash tun designed specifically for homebrewing came up for sale, I couldn’t resist the temptation. While I considered a HERMS, I opted for a RIMS (Recirculating Infusion Mash System), which pumps wort over a heating element before it is returned to the MLT. The heating element is like what many would find in their home’s hot water tank, enclosed in piping, and controlled by an external device that will prevent the element from scorching the wort. This is just one of many potential downsides to an ill-designed RIMS tube. If you do go this route, we highly recommend you purchase one from a reputable manufacturer unless you are adept in electrical systems.
Sparging
Are you going to batch sparge or fly sparge? This is a question you will want to answer before you design your MLT. Fly sparging implies that as wort drains into the BK, sparge water is sprinkled on top of the mash bed. Fly sparging requires either a false bottom or purpose-built manifold for consistent drainage. Batch sparging implies that the brewer drains the wort entirely from the MLT and then fills it back up with sparge water. This can be done more than once. Batch sparging is more forgiving in the design. You can always batch sparge on a system designed for fly sparging, but it’s not recommended to fly sparge on a system designed for batch sparging. There are arguments for both and I will leave that up to your own research and desires, but I’ll note I’m a dedicated fly sparger (shhh, don’t tell Denny Conn).
When it comes to three-vessel brew systems, your budget will be one of the biggest factors that decides how you approach your design. They come in three styles: 3-tier, 2-tier, and single-tier. 3-tier systems for the most part utilize gravity for the sparging system. The HLT sits at the top of the system, which drains down to the MLT, and the BK sits at the bottom. 2-tier systems require a pump for fly sparging and there are different iterations of the 2-tier system, but I found that having the HLT and BK on the upper tier and the MLT on the lower tier worked best for me as the HLT drains in to the MLT via gravity (I have a float switch for sparging) and pump out of the MLT. Single-tier systems often require two pumps for fly sparging, but batch spargers can get away with just one.


