Why Dry? Cooking With Fresh Spent Grain
Save for the occasional extract batch, most of my homebrews are of the all-grain variety. Just like anyone else choosing this format for their brews, at the end of a brew day I’m left with a decent amount of spent grain and the lingering question of what to do with it. Depending on your batch size and brewing frequency, you may find yourself generating lots of this brewing byproduct. Many brewers simply dispose of their spent grain either in the trash or in some convenient dump site located on or near their property. For those looking to alternative methods of disposal, lots of brewers, especially those on the commercial side, partner with farmers to pick up and haul away spent grain to use as animal feed. Some homebrewers compost their spent grain while some save it for further processing into tasty treats for their canine companions. I’m here to present an additional outlet for spent grain, which is also my favorite way to utilize it, and that’s in the kitchen.
I’m so passionate about culinary uses of spent grain that this is my second contribution to BYO on the topic. A previous article “Cooking with Spent Grains” in the December 2022 issue focused on the usage of spent grain that is first dried to remove all residual water, then milled into a flour-like consistency and substituted for regular flour in recipes. For this article, my goal is to make it even easier to use spent grain in recipes by skipping the drying and milling steps altogether. It turns out that fresh (undried) spent grain makes for a wonderful addition to all kinds of recipes both sweet and savory.
What is Spent Grain?
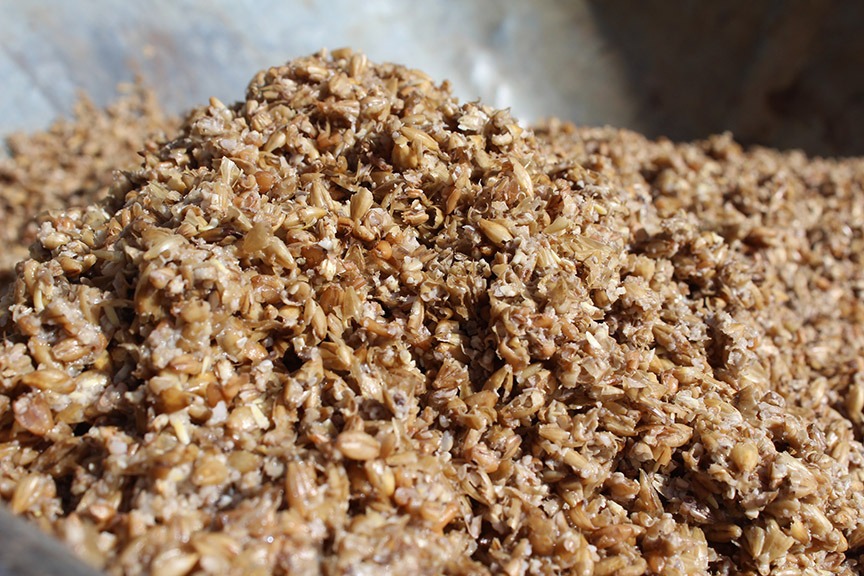
A little recap here before we go any further. When brewing beer, a base malt (or malts) serves as the main source of fermentable sugar in the wort that’s created during the mashing process. The primary ingredient in your base malt is almost always barley. “Specialty” malts can be used to provide color and deeper flavors to beer. Adjuncts (non-barley-based additions) can also be used for a variety of reasons (for example, body and/or flavor enhancement). These additions can take the form of oats, corn, or rice, to name a few. Spent grain is the solid matter left behind once you drain off the wort. Typically, it can’t be reused for beermaking because most all of its sugars have been extracted during mashing.
Options for handling spent grain typically fall into two categories: Disposal and reuse. A typical 5-gallon (19-L) batch will leave a homebrewer with 20+ pounds (9+ kg) of wet spent grain leftover at the end of mashing. As brewing is already a resource-intensive process, I try to reuse as much as possible during a brew day, even spent grain. While I may not be able to use a full batch’s volume of spent grain in the kitchen after every brew, I can surely use some of it. Many commercial brewers have realized this potential, saving some of their spent grain for use in the production of both human and dog treats to be resold at the very same brewery that generated the spent grain. Turning a waste-stream into cash — I love that!

Preparing fresh spent grain for cooking
In my previous article, I detailed the steps required to transform spent grain into a flour-like product that can be substituted into recipes in place of all-purpose flour. For this article, there isn’t any special preparation needed other than cooling. Once cooled, fresh spent grain can be immediately added or substituted into a recipe as needed or desired. If needed, fresh spent grain can be further broken down into smaller bits with a food processor. Fresh spent grain can be stored cold if there isn’t an immediate need to use it in a recipe. It will keep in the refrigerator for up to two weeks in a sealed container. For longer storage times, I’ve had success freezing fresh spent grain for up to three months with no detectable change of quality.
How to Approach Culinary Usage of Spent Grain
There isn’t a magic formula here, especially if you’re not afraid of a little trial and error, however, you should not attempt to replace 100% of the regular wheat flour with spent grain. Flour, when combined with water and mechanical action (kneading or mixing), will create gluten. Gluten is responsible for providing structure, elasticity, texture, and mouthfeel to baked goods. While barley does contain gluten, it doesn’t contain nearly as much as wheat does (and gluten proteins are denatured to some degree during normal mashing and sparing). If too much wheat flour is replaced by barley, then you run the risk of not having an adequate amount of gluten to achieve the intended result. For example, a pizza crust may be more cracker-like instead of stretchy. To mitigate this, one alternative would be to use bread flour or another flour that’s high in protein. This additional protein will be conducive to the creation of gluten, just note that this won’t be appropriate for all recipes. I don’t recommend using bread flour in recipes that require a more delicate “crumb,” or texture, i.e., cakes, cookies, cupcakes, muffins, or quick breads.
My general rule of thumb for substitutions is as follows:
For traditional yeast-leavened breads and pizza dough, I’d begin by swapping out 25% of the wheat flour with fresh spent grain.
For everything else, including cookies, brownies, cakes, quick breads (bread leavened with baking powder and/or baking soda) and muffins, pancakes, or waffles, I generally swap out 50% of the flour called for with fresh spent grain.
If you’re unsure how much spent grain to substitute, I recommend starting with 25% and increasing that amount if you are happy with the results.
Recipes will list ingredient quantities either by weight (for example, 8 oz./227 g) or by volume (for example, 1 cup) — I wouldn’t really get too caught up here as percentages can be applied in both scenarios. In other words, in any given recipe, you can exchange wheat flour for spent grain at a 1:1 ratio. The process is very similar to swapping out one type of flour in a recipe for another (i.e., replacing all-purpose flour with whole wheat flour). There are sometimes gluten tradeoffs to be made in those kinds of swaps as well, but that’s beyond the scope of this article.
The best advice I can offer is to not be afraid to experiment on your own to dial in your own swapping percentages. If you’re happy with a recipe’s result, then make no further changes, or feel free to experiment by increasing the amount of spent grain. And vice versa.
Many of my favorite cooking recipes use ingredients that are referred to as adjuncts in the brewing process. This was a good starting point in considering how to apply spent grain into recipes. Let me share a few examples:
My cornbread recipe contains a mix of flour and cornmeal. My Mexican lager, Kentucky common, and cream ale recipes all contain at least 10% flaked maize in their grain bills. Spent grain generated from those brew days makes a nice addition to cornbread, as well as pancakes and Johnny cakes.
I can’t make oatmeal raisin cookies without oats. Oats feature prominently in both my house New England IPA recipe as well as any oatmeal stout.
Some beers, like hefeweizens and witbiers, contain high proportions of wheat in their grain bills. Spent grain produced by those brews would be easy to swap in just about any recipe.
For recipe development, I like to look for common ingredients as well as common colors. For example, spent grains from almost any dark brew are great substitutions into chocolate brownies and chocolate chip cookies.
Using spent grains will impact a recipe’s flavor as well as texture, often for the better. All-purpose flour is highly refined and designed to not have any real discernible flavor. It’s in your baked goods to provide structure and that’s about it. Barley, along with whatever else is in your spent grain mix, will undoubtedly lend more depth of flavor to whatever items you prepare with it. An immediate flavor characteristic that I notice with most spent grain is a very subtle nuttiness. Depending on the beer brewed, its spent grain will impart other flavors as well. For example, when I brew a stout, some percentage of my grain bill will consist of darker roasted barley, which lends roasty, almost chocolate-like notes to food items like brownies or a molasses-based quick bread.
Recipes
I brew many different styles of beer at home and each style has its own unique grain bill — resulting in different combinations of spent grain that will impart their own flavor characteristics to the recipe made. The recipe examples I present here demonstrate applications of spent grain across a variety of different beer styles.
No-Knead Spent Grain Pizza Dough

My family always looks forward to homemade pizza night. It’s one of the ultimate comfort foods. There are many options available when choosing a dough to use for the pizza’s backbone. Many grocery stores and specialty markets stock frozen and fresh pizza dough as well as a myriad of gluten-free options. Making pizza dough at home is a great alternative to purchasing it. There’s not much that’s needed to make pizza dough beyond flour and yeast, and these ingredients are relatively inexpensive. I think the biggest barrier to entry is the kneading time, which for this recipe can be upwards of 10 minutes, whether performed by hand or with a stand mixer fitted with a dough hook. The long kneading time (this is the “mechanical action” step) is required to develop the proper consistency and elasticity that we’ve come to expect from pizza dough. I figured it would be more convenient to buy pre-made pizza dough until I stumbled across a wildly different and much faster way by employing a food processor to shorten total kneading time to about 2 minutes.
At first, I was skeptical, but once I prepared this recipe for the first time I was hooked. This is the real deal! I like this dough a lot better than any other pizza dough I’ve bought from the store. I won’t get into the science at work here but there are definitely a few things that make this recipe work. After the first round in the food processor, the dough rests for 10 minutes. In that time the flour has ample time to hydrate and that’s important because water is the last key ingredient required for gluten-formation. The dough also proofs in the refrigerator — I recommend at least 24 hours and no more than 72. Remove the dough from the refrigerator and allow it to reach room temperature prior to shaping it — this allows the dough to “relax,” and it will then be easier to form. If you don’t use the dough after 72 hours of refrigeration, wrap it in plastic wrap and freeze for use at another time. This dough can also be used to make killer focaccia too.
Ingredients
6.7 oz. (190 g) all-purpose flour
2.5 oz. (70 g) fresh spent grain (I recommend spent grain from a lighter beer)
2 tsp. canola oil
1 tsp. sugar
¼ tsp. active dry yeast
6 oz. (170 g) cold water
0.2 oz. (5 g) salt
Step by Step
In the bowl of a food processor fitted with a metal blade, combine flour, spent grain, oil, sugar, and yeast. Process these ingredients until combined, about 5–10 seconds.
With the food processor running, slowly pour the water into the food processor through the feed tube. After the water has been added, continue to process the dough until everything is combined and there’s no dry flour remaining, about 45–60 seconds. Turn off the food processor and let the dough sit undisturbed for 10 minutes.
After 10 minutes, sprinkle the salt on top of the dough and process for another 45–60 seconds or until the dough forms a satiny, sticky ball that no longer sticks to the sides of the food processor.
Remove the dough and form it into a ball with your hands. Place the dough ball into a bowl that’s been lightly oiled. Make sure to very lightly coat the entire dough ball with oil, then cover the bowl tightly with plastic wrap. Place bowl in the refrigerator for at minimum few hours, all the way up to three days.
To make the dough easier to shape, take the dough out of the fridge two hours prior to making pizza and allow it to warm to room temperature.
After two hours, preheat oven to 500 °F (260 °C). Lightly flour your countertop and shape the dough to your liking. I prefer to form this dough on the thinner side to promote faster cooking time. Top your pizza as desired and cook about 10 minutes.
No-Bake Chocolate Protein Bars
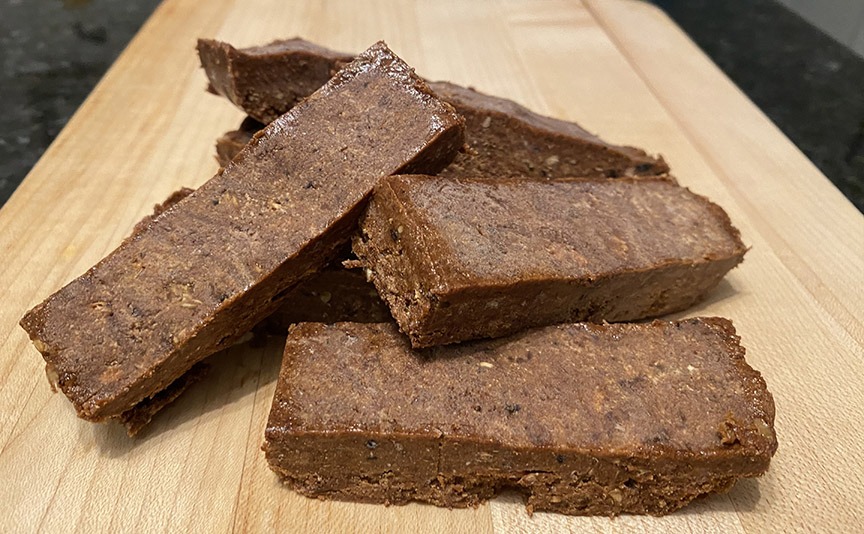
As an active person with a reasonably fast metabolism, I find it hard to make it through the day without at least one snack between meals. I like the idea of protein bars, especially as a pre- or post-gym snack, but I’ve grown so tired of all the protein bars on the market that I can’t really bring myself to eat them. They either taste like chalk, are too hard or chewy, and contain more ingredients than they probably should, especially ones that I can’t pronounce. I started experimenting with homemade protein bars a few months ago and I can say that they are actually very easy to make as there’s no cooking involved, they require only one bowl, they don’t call for any fancy or obscure ingredients, and as a bonus, all of the ingredients are easy to pronounce and explain.
The beauty of this recipe is its flexibility. For example, you could swap the chocolate protein powder for peanut butter protein powder, use peanut butter instead of almond butter, add in a ½ cup of sugar-free chocolate chips and omit the cocoa powder and you’ve got Peanut Butter Cookie Dough Protein Bars.
The recipe is also adaptable in that you can use whatever spent grain you have on hand or you can pair certain spent grain for certain protein bar combinations. For example, I like the spent grain from a darker brew in this recipe. If I was making the Peanut Butter Cookie Dough Protein Bars, I might opt to use a lighter spent grain.
Ingredients
1¼ cup almond butter
¾ cup fresh spent grain
¾ cup chocolate protein powder
1/3 cup maple syrup
2 Tbsp. cocoa powder
1 tsp. vanilla
¼ tsp. Kosher salt
Step by Step
Place all ingredients into a large bowl and stir thoroughly to combine. Tip: If your almond butter is firm and not easy to stir, after portioning it out, place it in the microwave and heat it up in short bursts until it reaches a pourable consistency. This will make it much easier to mix everything together. With that said, the mixture will still be quite thick.
Line an 8 x 8-inch (20 x 20-cm) Pyrex dish with parchment paper. Place the protein bar mixture into the lined Pyrex dish and evenly distribute it, packing it down as you work to ensure even thickness.
Freeze for 30 minutes until it solidifies, then take out and cut into 8-12 individual bars.
These bars are best stored in the freezer and can be eaten right from the freezer too.
Spent Grain Chocolate Brownies
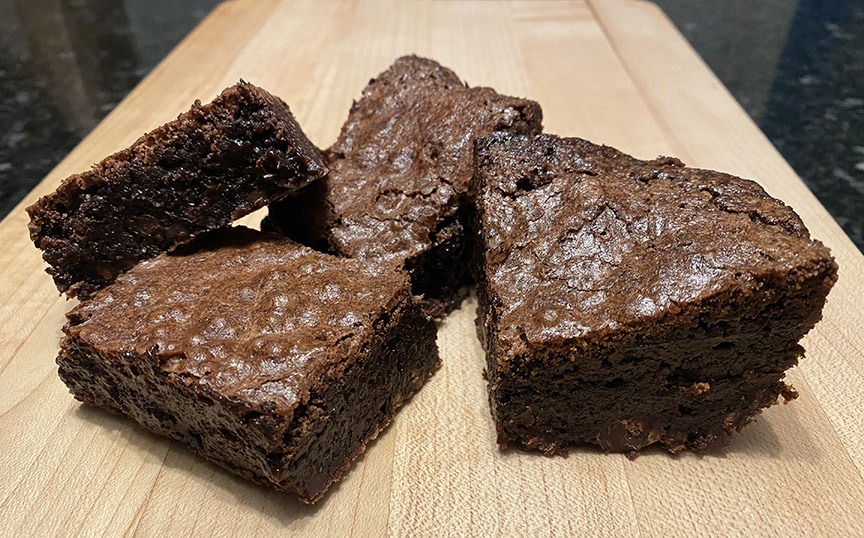
This is my go-to recipe when I want a rich, chocolate, and immensely satisfying brownie. There is nothing fancy or revolutionary about this recipe save for the optional addition of ground espresso, which serves to intensify the chocolate flavor. I tend to prefer my brownies a bit on the gooey side so the 30-minute baking time in my oven is just enough time to yield slightly chewy edges without sacrificing a slightly molten brownie interior. Because of that, it is necessary to give the brownies ample cooling time to firm-up before slicing. The spent grain addition here works well, adding some texture and nuttiness to the finished brownies. Using spent grain from a darker brew, for example a stout or porter, will also turn up the roastiness and chocolate flavor in the brownies.
Ingredients
½ cup all-purpose flour
½ cup fresh spent grain
½ tsp. baking powder
½ tsp. Kosher salt
½ cup unsweetened cocoa powder
2 tsp. ground espresso (optional)
¾ cup unsalted butter, melted
2 Tbsp. canola oil
1 cup granulated sugar, divided
2 large eggs
1 egg yolk
1 tsp. vanilla extract
3/4 cup chocolate chips
Step by Step
Preheat oven to 350 °F (175 °C). Line a 9 x 9-inch (23 x 23-cm) baking dish with parchment paper and spray lightly with non-stick cooking spray.
In a large bowl, whisk to combine the all-purpose flour, spent grain, baking soda, salt, cocoa powder, ground espresso (if using) and set aside. In a medium saucepan, combine the butter, oil, and 1/3 cup of sugar. Heat over medium heat, stirring frequently, until butter is completely melted. Remove from heat. In a large bowl, combine the eggs, vanilla and remaining 2/3 cup sugar. Whisk for 30 seconds until well combined
Slowly pour the warm butter mixture into the egg mixture, adding it very gradually, whisking constantly until completely combined.
Add the dry ingredients and chocolate chips to this mixture, slowly stirring with a spatula until just combined. Stop stirring once last trace of dry ingredients are mixed in, as over-mixing will give you cakey brownies.
Scrape the batter into the prepared pan and smooth the top. Bake for 30 minutes or until the edges are firm and the top is shiny and slightly cracked. If you prefer less-gooey and more-cooked brownies, add 5-7 minutes of baking time.
When done, place pan on a cooling rack. Allow brownies to cool completely before slicing.
After slicing, the brownies can be stored in a sealed container at room temperature. They can also be frozen to be stored for longer periods.
Honey Whole Wheat Spent Grain Bread
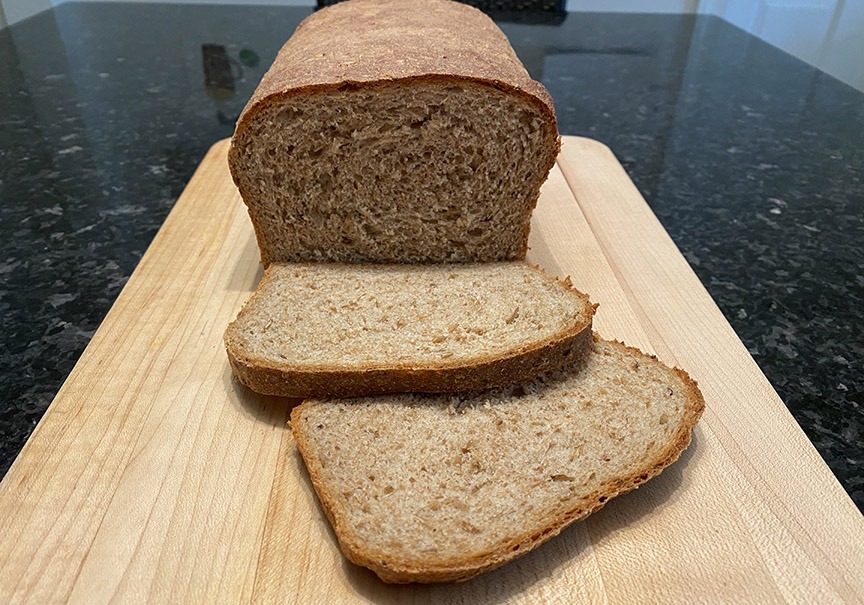
We eat a lot of sandwiches in our house, which means we purchase a lot of sandwich bread. Having such a steady supply of spent grain, I became curious about using it as an ingredient in homemade bread. Previously I had used flour milled from dried spent grain with good results so I shouldn’t have been surprised by the results of using fresh spent grain, which worked just as well in this recipe. Almost any variety of spent grain will work here — something amber or brown is perfectly suited to this recipe, but a darker brew’s spent grain works nicely, as does a lighter brew.
The one noticeable difference when comparing this bread to a supermarket-sourced loaf is this recipe will stale much faster because it lacks the added enzymes and preservatives mass-produced breads contain. With this homemade loaf, I recommend slicing it when it is completely cool, then storing the slices in a sealable plastic bag at room temperature for a few days. Any bread left over after 3 days or so can be stored in the freezer so that it doesn’t stale any further.
Ingredients
2¼ tsp. active dry yeast
1 cup warm water
1½ tsp. honey
2 cups fresh spent grain
2½ cups whole wheat flour
1¼ cup bread flour
1¼ tsp. Kosher salt
2 Tbsp. melted butter, plus 1 Tbsp. butter for greasing the baking pan
2 Tbsp. honey
Non-stick cooking spray
Note: You may need to add some additional bread flour and/or water (more details below)
Step by Step
Add the yeast, warm water, and 1½ tsp. honey to the bowl of a stand mixer. Gently stir to combine the ingredients and allow mixture to sit at room temperature for about 10 minutes or until it becomes frothy. If it doesn’t become frothy, then it is likely that the yeast used is too old and you will need to replace it with fresh yeast and start this step over again.
Once the yeast is frothy, add the spent grain, whole wheat flour, bread flour, salt, melted butter, and 2 tablespoons honey to the bowl with the yeast mixture. Using a spatula, mix all the ingredients together until a very rough dough begins to form. Once the dough becomes difficult to mix further by hand, attach the dough hook to the stand mixer and knead the dough on slow speed until the dough forms
a ball. Increase the speed of the mixer to medium and let the mixer knead the dough for about 15 minutes until it is smooth and elastic. A few things to note here:
The dough will be wet and sticky at the beginning of this process but will become smoother and drier as it kneads.
If the dough is sticking to the sides of the bowl after a few minutes of kneading at medium speed, add a little more whole wheat flour to dry it out.
If the dough can be removed from the bowl without leaving any residue behind, then it is too dry and a little bit of water should be added.
Throughout the kneading process, you may need to stop the mixer and scrape the dough off the dough hook to encourage the dough to stay in the shape of a ball.
Once the dough is smooth, elastic, and slightly tacky to the touch, take the dough ball out and fold it over itself to smooth it out further. Spray the mixing bowl lightly with non-stick cooking spray, return the dough ball to the bowl, cover the bowl with plastic wrap and leave someplace relatively warm to allow it to proof for an hour. During this process the dough should roughly double in size.
While the dough is proofing, liberally butter a 9 x 5-inch (23 x 13-cm) baking pan and set aside for later.
Once the dough has doubled in size, lightly dust your workspace with flour and turn the proofed dough onto the floured surface. Lightly dust a rolling pin with flour and roll the dough out into a rectangular shape, trying to press out as much air from the dough as you can. The shorter side of the dough should be about 8 inches (20 cm).
Tightly roll the dough up following the short side (to keep the dough 8 inches/20 cm wide). Press the edges of the dough as you roll, keeping in mind that you want to try to remove air pockets, which will leave holes in the final product if left behind.
Once rolled, pinch the seams to seal the dough and then tuck the two sides of the loaf into the seam at the bottom. Place the loaf into the loaf pan seam-side down and press the dough into the pan so that it covers the entire bottom of the pan, ensuring that it is of even height.
Cover the pan with plastic wrap and let it proof until the dough doubles in size. This should take 45–60 minutes. At the 30-minute mark, preheat the oven to 350 °F (175 °C).
As a further check if the dough has proofed enough, gently press the top of the dough with your finger to leave an indentation that is a little less than ¼-inch (0.5-cm) deep. If proofed properly, this indentation should remain, or only bounce back slightly. If it bounces back almost completely, then it’s under-proofed.
As soon as the dough has completed proofing, bake 40–45 minutes. If you have an instant-read digital thermometer, the internal temperature of the bread will read around 185-190 °F (85–88 °C) when done. Alternatively, if the bread sounds hollow when tapped on, it is done baking.
Remove the pan from the oven and set it on top of a wire rack. After 10 minutes of cooling, remove the bread from the pan and set it down on a rack to cool further. Give it at least 30 minutes of cooling outside of the pan before slicing.
Once completely cooled, the bread can be stored in the loaf pan at room temperature covered with plastic wrap. It can also be sliced and stored frozen to be used as needed – this is best practice for longer-term storage.
Banana Nut Muffins

In my opinion, muffins are criminally underrated. I find them to be just indulgent enough to make me feel like I’m eating a dessert, but without the excess baggage that comes along with a decadent sugar-laden post-dinner treat. They also make great additions to any breakfast and can even be subbed in as an occasional snack. Muffins are also very easy to make and highly adaptable — one can put just about anything into a muffin and be almost guaranteed that it will be a hit — hello zucchini muffins!
The only specialty equipment needed for this recipe is a 12-count muffin tin and 12 muffin cups. A muffin is more like a quick bread than a standard bread that requires yeast, kneading, and proofing, so the recipe can be made quickly. A muffin also doesn’t require a lot of gluten (we rarely think of muffins as being chewy); thus, it’s possible to replace more of the all-purpose flour in this recipe with spent grain. Fresh spent grain can be mixed into the muffin batter as is, without further processing.
The biggest tip when making the muffin batter is to not overmix it. It’s OK if it’s lumpy and chunky. So long as there aren’t any visible traces of unincorporated dry ingredients, the batter is ready to portion out into cups and bake. Fresh, ripe (almost to the point of over-ripe) bananas work well in this recipe. Previously frozen and thawed bananas are also great. Just about any spent grain variety will work in this recipe – I try to match the color of the spent grain to the intended color of the finished muffins. My ideal spent grain choice is any spent grain used to produce an amber-colored beer.
Completely cooled muffins will keep for a few days at room temperature if stored in a sealable container or plastic bag. Any longer than that and they can be stored in the freezer for up to three months.
Given certain allergic sensitivities, the nuts can be omitted.
Ingredients
¾ cup whole wheat flour
¾ cup fresh spent grain
1 tsp. baking powder
1 tsp. baking soda
1 tsp. ground cinnamon
½ tsp. salt
¼ tsp. ground nutmeg
3 ripe, medium-sized bananas
6 Tbsp. unsalted butter, melted
2/3 cup dark brown sugar, packed
1 large egg
1 tsp. vanilla extract
2 Tbsp. milk
1 cup chopped walnuts (or any nut of choice – pecans also work great here)
Step by Step
Preheat oven to 350 °F (175 °C). Line a muffin tin with 12 muffin liners.
Whisk together the flour, spent grain, baking powder, baking soda, cinnamon, salt, and nutmeg in a large bowl. These are the dry ingredients.
Mash the bananas in a separate large bowl (or in the bowl of a stand mixer fitted with a paddle attachment, if using).
Add the melted butter, brown sugar, egg, vanilla extract, and milk to the mashed bananas and mix well to combine. These are your wet ingredients.
Add the dry ingredients to the wet and mix until everything is just combined and there’s no more visible dry ingredients. Add the nuts and mix them in until they are just combined. Do not overmix here as this will adversely affect the texture of the muffins.
Spoon the muffin batter into the 12 muffin tins and place immediately into the preheated oven.
Bake for 21-24 minutes, until a toothpick inserted into the center of the muffin comes out clean.
Let the muffins cool for a few minutes before transferring them to a wire rack. Allow muffins to cool completely before packaging them away. They’ll stay fresh at room temperature for a few days so long as they are in a sealable container. For storage longer than a few days, place the muffins into a sealable container or freezer-proof-sealable-bag, and freeze.


