Pump Up Your Extract Brewing Skills
There’s one thing for sure about malt extract – it’s great stuff! History doesn’t record the name of the 19th century brewmaster who first had the idea of concentrating and storing unfermented beer wort so the beer could be brewed at a later time, but he had a good idea. By changing malted barley into malt extract, a brewery could avoid problems with insects and mold and still store grain long past the harvest season. Also, concentrated malt extract was easier to ship to breweries located far from barley-growing areas.
Malt extract can be described as dehydrated unfermented beer. To make extract a manufacturer starts out just as a brewery making beer would, with an all-grain mash. The combination of grains used in the mash as well and the mashing temperature determine the final color and flavor of the malt extract.
From the mash the wort is placed in the evaporator. The evaporator maintains a high temperature while a vacuum takes the water out of the wort. For dry malt extract all the water is removed. For malt-extract syrup most of the water is removed. The product is then cooled and packaged, and if the malt extract is to be hopped, isomerized hop extract is added before packaging.
Some large American breweries, especially Pabst, got through Prohibition by switching to the manufacture of malt extract. There was a thriving market for homebrew supplies when beer was illegal, and Pabst’s Blue Ribbon Malt Extract, sold in food markets as a “diet supplement,” helped many thirsty Americans make it through to the repeal of Prohibition in 1933. Malt extract really is used in hundreds of food products besides beer. Many homebrewers’ families have discovered that a tablespoon of unhopped dry malt extract, blended into a glass of ice cream and milk, makes a great “malt” out of a milkshake!

Malt Economics
In the early days economy was one of the main reasons for brewing beer at home. Before the 1980s most homebrew supply advertisements took the “10 cents a bottle!” approach. Since economy was the motivation, many malt extracts contained sugar as well as malt. Also, most early homebrew recipes called for adding more sugar when brewing the beer. Sugar costs a lot less than malt extract, and it was an easy way for a malt extract manufacturer to economize on his product.
Even today, some homebrewing products are manufactured for foreign markets where economy is the main reason for brewing. Some of the extracts are of excellent quality, but some care should be exercised when buying a malt extract. Products from well-known manufacturers are usually good, and some of the extracts are starting to list the contents or put the statement “100 percent Malt Extract” on the label. If a malt extract label doesn’t show the contents, and especially if it has a “no boil and add sugar” recipe on it, you may be buying a lot of sugar instead of malt extract.
Kits and Cans
Most malt extracts on the market are of very good quality. In fact there has been a big improvement in malt extract quality in the last 10 years or so. All-grain beers used to stand out noticeably above extract beers in homebrew competitions. Now, it is often impossible to tell if a great homebrew was made from grain or extract. If good brewing procedures are used with a high-quality malt extract and a good balance is achieved in the recipe, the finished beer will be as good as an all-grain beer.
In most cases it is best to ignore malt label instructions and recipes. The product inside the can may be excellent, but the finished beer will be much better if a good, modern recipe is used that includes a one-hour boil and all-malt brewing.
Designing a beer with malt extract is just as easy as designing a beer with grain. The thing to remember is that any beer style can be made from light, unhopped malt extract, and everything added to that is just coloring and flavoring.
In choosing an extract to brew with, the brewer has total control over how much of his own design he wants to put into the beer. On one end of the scale, a brewer can base the recipe on light unhopped malt extract and add all the specialty grains and hops to achieve the desired results. There are thousands of published recipes and guidelines to help a brewer do this. On the other hand a brewer can buy a can of “Green Kiwi New Zealand Stout” and leave the choices of specialty grains and bittering hops up to the malt extract manufacturer.
The mixtures put out by malt extract manufacturers are usually quite good. They have certainly been test-brewed, and the manufacturer felt that the resulting beer was good enough to market. Often, these mixtures are in cans and they are labeled “kits.” A “kit” of this kind is just a can of hopped malt extract to which the manufacturer has made some additions of specialty grains and bittering hop extract. These can be good makings for your brew, but the final product depends on the brewer. Don’t be afraid to be inventive. Three “Pale Lager” kits, for example, can make the basis for a great IPA (India pale ale). A couple of “Belgian” kits can turn into a fine English Bitter. Tinkering with these things is a lot of fun – but stay away from those malt can recipes!
Then there’s the question of what to do with the packet of yeast that comes on top of a malt can. Don’t use it in your beer! That yeast is of unknown quality and age, and it may have been stored in a hot warehouse for months. Instead, buy some fresh yeast for the beer and throw the malt-can yeast into the boiling brewpot! Boiling will kill the malt-can yeast, of course, but yeast hulls are one of the best nutrients for activating your good yeast.
Let It Roll
After choosing your recipe and ingredients, brewing is all procedure. The finest brewing ingredients will be spoiled by poor brewing procedure, and mediocre brewing ingredients can produce some pretty good beer if the procedure is good. As in all brewing, the most important thing is good sanitation. Unfermented beer wort, once it is cooled, is a rich broth that will be greatly enjoyed by many wild yeasts, bacteria, and molds if they can get to it. By practicing good sanitation techniques, you can keep the unwanted critters out of the wort and allow your brewing yeast to ferment the wort into good beer.
Good brewing needs to include a vigorous rolling boil of at least one hour. There are many published recipes that call for a shorter boil or a partial boil. Manufacturers like to show customers that their products are extremely easy to use, and they may suggest reducing or eliminating the boiling period. There are complex chemical changes in both the extract and the water that take place during the boil, and the quality of the beer will suffer if the boil is skipped or reduced. Also, if you use unhopped extract, the boil is necessary to get the isomerization of the your added hops.
Many homebrewers are unable to boil the whole five-gallon batch because of the size of their brewpot or their stove. They routinely boil about two gallons of wort (the whole can of extract and all other ingredients with less water), then add it to three gallons of cold water in the primary fermenter. This addition of cold water also aids in cooling the wort to yeast-pitching temperature.
There’s nothing wrong with boiling a small volume of wort, then topping up with cold water. Although many people successfully use tap water, to be on the safe side you can pre-boil the water you are going to add in the fermenter. This should be done a day before brewing, and a rolling boil should be maintained for at least 10 minutes. This ensures that no bacteria are alive in the water, and it allows chemical changes, such as dropping out temporary hardness, to occur in the water being boiled. The boiled water should then be moved into sealed, sanitized containers and placed in the refrigerator for use on brewing day.
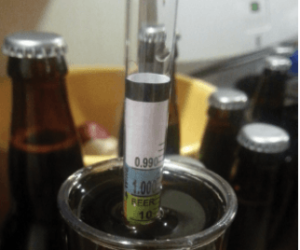
There is a little side effect that causes a lot of confusion here. When a brewer boils less than five gallons of wort, then brings the volume up to five gallons by adding water in the fermenter, it is almost impossible to get an accurate hydrometer reading. Boiling the ingredients for five gallons of beer in two gallons of water produces a very concentrated wort, of course. When that concentrated wort is poured into three gallons of water, the heavy stuff goes to the bottom.
Even with vigorous stirring, it is practically impossible to mix the wort well enough that an accurate sample can be taken for a hydrometer reading. This has no effect on the beer because thorough mixing does take place after fermentation starts.
Boiling Tips
Malt extract may scorch on the bottom of the brewpot, and care needs to be taken to avoid that. Scorching caramelizes the malt, and it will change the flavor and color of the beer. When adding malt extract to the boiling water, turn off the heat under the brewpot. Make sure the malt extract is stirred in thoroughly before turning on the heat again. During the boil stir periodically to avoid scorching on the bottom of the pot.
Try stirring with a metal spoon so you can tell if malt extract is sticking to the bottom of the pot. It’s hard to tell with a plastic or wooden spoon, but with a metal spoon you can feel the metal-to-metal contact on the bottom of the pot.
In the first 10 minutes or so of the boil, a malt extract beer will often try to boil over. For some reason dry malt extract seems even foamier than malt extract syrup. In the early part of the boil, watch carefully and control the heat. When foam starts to rise, cut the heat and stir the wort to break down the foam. Dashing a little cold water on the foam helps keep it down. The pot will usually try to boil over two or three times, then the foam breaks down and there is no further problem. This effect is called a “hot break,” and it is caused by protein breaking down in the boil.
After the hot break, protein particles are still present in the wort, but they are of very small size and can’t be seen. Later, when the finished beer is chilled, these protein particles will clump together and become visible. This is what causes “chill haze” (a type of cloudiness) in beer. Chill haze does not affect beer flavor but is a visual detractor. Commercial breweries usually cure this problem by chilling the beer just before bottling, then running it through a micron filter to remove the protein. Of course this removes the yeast too, but commercial breweries don’t rely on this residual yeast for carbonation.
Since homebrewers usually use natural carbonation, a different solution is needed. A good method is to add one-half teaspoon of flaked Irish moss to the brewpot 15 minutes before the end of the boil. Irish moss is a natural seaweed that has a negative electrical charge. When Irish moss flakes encounter the positively charged protein particles in the boil, the particles bond together and sink to the bottom of the brewpot.
The Big Chill
One of the most important things in good brewing procedure is rapid and effective wort chilling. After the boil, beer wort needs to be cooled to about 70° F before the yeast is pitched. If this can be accomplished rapidly, a couple of good things happen. First, the wort is at risk of bacterial infection after it is cooled below 140° F. The more quickly it is cooled to 70° F, the yeast pitched, and the liquid sealed into a sanitized fermenter with an airlock, the better. Second, rapid and effective wort chilling will produce a “cold break.” That is, the protein particles will coagulate into large, heavy flakes and drop to the bottom of the brewpot. This effect is aided by the Irish moss that was thrown into the boil, and a good cold break prevents chill haze in the finished beer.
There are many ways to cool beer wort to pitching temperature. Any way that works very quickly and doesn’t add anything to the wort is fine. Don’t add ice or refrigerated water unless it was previously boiled and stored in sealed, sanitized containers.
Many brewers like to use an immersion wort chiller in the brewpot. An immersion chiller will drop five gallons of boiling wort down to pitching temperature in about 15 minutes.
Adding one more step to your brewing process can really improve the clarity of your beers. You can chill the wort in the brewpot, but when the temperature gets down to about 90° F, stop stirring the wort. If the wort is left undisturbed during the last few minutes of chilling, all the protein and hop particles will drop to the bottom of the brewpot. When the temperature reaches 70° F, siphon – don’t pour – the wort into the primary fermenter. The siphoning assembly should be sanitized, of course. The intake end at the brewpot is held about one-half inch below the surface of the wort. The outflow end is clamped all the way at the top of the primary fermenter. This makes the beer splash and gain oxygen as it falls into the fermenter.
By siphoning from the surface of the liquid in the brewpot, you are able to move the intake end downward as the liquid falls. When all the clear wort is siphoned out, stop siphoning, leaving the junk in the bottom of the brewpot behind. One handy trick is to pitch the yeast directly into the stream going into the fermenter.
Brewing beer, whether from malt extract or all-grain, is a lot of fun. Grain brewing is a bit cheaper, but it takes more time. Extract brewing is faster but a bit more expensive. The best grades of malt extract have improved to the point that there is no significant quality difference between the two brewing methods. It all comes down to the preference of the brewer. Like a lot of homebrewers, you might enjoy making good beer both ways!
White River Porter
(5 Gallons)
This is a great London porter, a little sweeter and heavier than is usual for this style. The color can be determined by the dry malt extract the brewer chooses. Using a light extract will produce a brew about the color of root beer. Dark malt extract will make it black.
Ingredients:
- 0.5 lb. dark crystal malt (crushed)
- 0.5 lb. chocolate malt (crushed)
- 6 lbs. dry malt extract (unhopped) (light, amber, or dark)
- 0.5 lb. malto-dextrin
- 1 oz. Cluster hop pellets (8% alpha acid) for 60 min.
- 0.5 oz. Target hop pellets (10% alpha acid) for 30 min.
- 1/2 tsp. Irish moss
- 0.75 oz. Ultra hop pellets (3 % alpha acid), for 2 min.
- 2 packs Doric dry yeast or 1 packet Wyeast 1028 London ale yeast
- 3/4 cup corn sugar for priming
OG = 1.058
FG = 1.020
Step by Step:
Put the crushed grains in a cheesecloth bag and put that into 5 gals. of cold water in the brewpot. Turn on the heat, and move the grain bag around while the water is heating. When the water reaches 170° F, remove the grain bag. Bring the water to a
boil, turn off the heat, and stir in the extract and malto-dextrin. Return it to a boil and stir in the Cluster pellets. Boil hard for 30 minutes and stir in the Target pellets. Boil 15 more minutes and add the Irish moss. Boil 13 more minutes and add the Ultra pellets. Boil 2 more minutes.
Cool rapidly to under 75° F, preferably with a wort chiller. Siphon or pour into a primary fermenter, and pitch the yeast into the stream. Leave protein trub and hop particles behind in the brewpot. Ferment with an airlock in the primary fermenter, and move to a secondary fermenter when the foam subsides. Bottle when the beer is flat, still, and clearing. Dissolve the priming sugar in the beer, then siphon to sterilized bottles and cap. The beer will be good in three weeks and at its best in three months.