Heat Shield: Retain that wasted energy
As an engineer by trade, I find that I have a natural tendency to improve upon things to make them more efficient, cheaper, and faster. If you’ve seen Dilbert’s “the Knack” clip, you get the idea. Brewing, with its numerous processes and large number of variables, will likely provide me with years and years of tinkering.
I’m currently in a phase of my brewing hobby where I want to upgrade to a single, standalone unit for my all-grain brewing. In my online research of single-tier brewing systems, I started reading about burner height in reference to the bottom of the kettle. Recent studies have suggested that controlling the burner exhaust to vent out the back of the setup results in preventing your valves and sight glass from overheating and promotes better combustion.
Brewershardware.com even sells single-tier stands and heat shields based around this principle determined from their own experimentations.
Before spending too much money on building an entire single-tier setup, I decided to make my own single-burner stand that allowed directed venting of the exhaust gases from the burner. Needless to say, it worked! My sight glass and valve stayed cooler and all the exhaust gases vented out the back. However, after feeling the large amount of heat I was venting, it bothered me. I paid for that heat, and it’s just blowing away, not providing me any value. As any good engineer, I thought to myself, “I can fix this!”, which resulted in the heat shield described here.
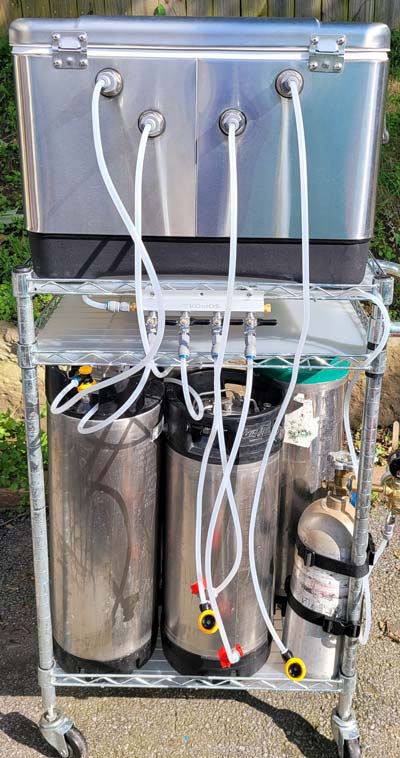
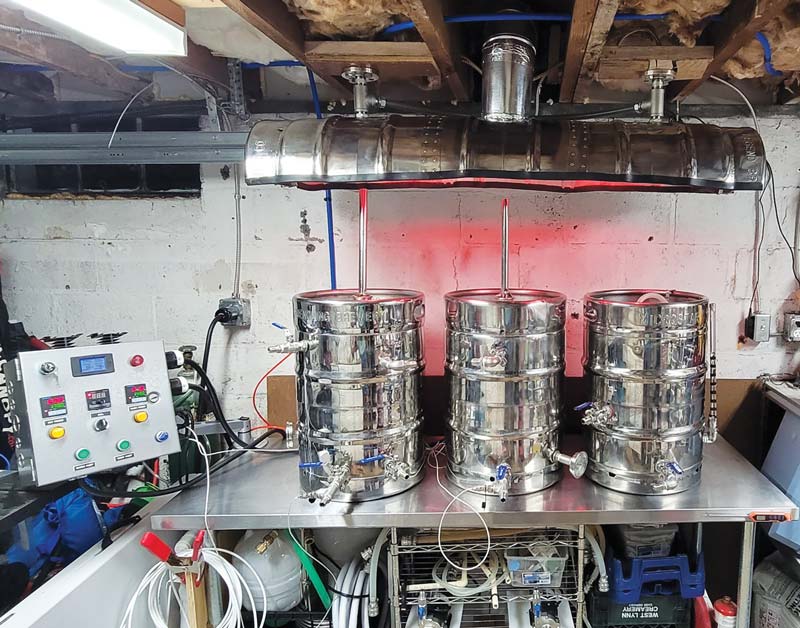
Typical homebrewing setups involve putting all the heat in the bottom of the kettle only. The rest of the kettle dissipates heat. As an example, I brew in keggles that are 15.5 in. diameter x ~23.5 in. tall (40 cm x 60 cm). For easy figuring, let’s just assume those dimensions are in contact with the wort. Normal homebrewing, with heat only applied to the bottom, results in ~189 in.2 (0.12 m2) of the keggle absorbing heat. The total surface area of the keggle (not including the top) is ~1,333 in.2 (0.86 m2) meaning, as homebrewers, we’re heating 189/1333 or ~14% of the kettle. The rest of the kettle is dissipating heat, which is working against us when trying to put heat into the kettle for boiling. Pro brewers typically use jacketed kettles so they’re heating on all sides, or at least more than just the bottom. This improves overall efficiency. Adding a heat shield to a homebrew setup that captures the hot exhaust gases and channels them up along the side of the kettle results in those exhaust gases continuing to heat the kettle. Or at a minimum, reduce my heat loss from the sides of the kettle.

I typically brew batches of 10+ gallons (76+ L) utilizing 90-minute or more boils. Between heating my sparge water and boiling, I usually use close to an entire 20-lb. propane tank. The addition of the heat shield appears to have reduced that to approximately around 1⁄3 of a tank!
I designed the heat shield shown to maintain a gap of about ¾ in. (1.9 cm) all around the kettle sides, go 3 in. (7.6 cm) below the kettle bottom to ensure collection of exhaust gases, and only cover an arc around the kettle that doesn’t include my valve and sight glass (to keep those components cool). So let’s get into it.
Tools and Materials
- 18-gauge sheet metal (Thinner is fine)
- Homemade sheet metal brake
- Tin snips or angle grinder with cutting wheel
- ¾-in. sheet metal screws
- Drill
Step-by-Step
1. Geometry Time
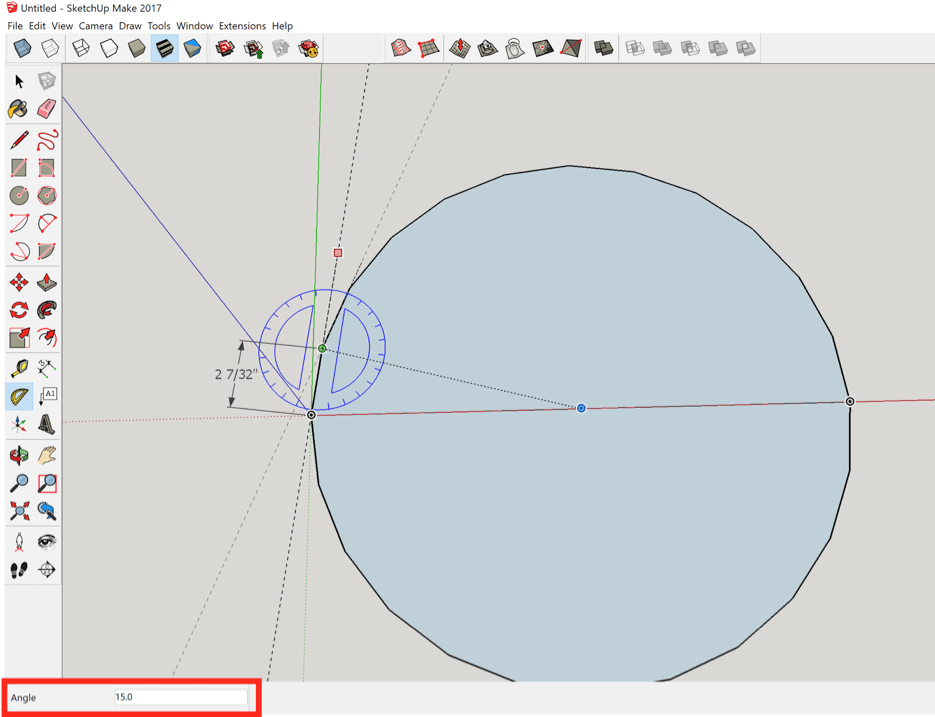
Probably nobody’s favorite step but definitely the most important. There are lots of different kettles out there so you’ll need to calculate how much sheet metal you need, how often to bend, and how far to bend depending on your kettle. I arbitrarily picked a 24-sided polygon for mine. To maintain ¾ in. (1.9 cm) all around that makes my diameter of the heat shield 17 in. (43.2 cm). I used the free version of Sketchup but you can also Google “Polygon calculator” and find a quick calculator to give you the dimensions you need. Due to the placement of my sight glass and valve. I decided on a ~285° arc. Assuming a 24-sided polygon, each leg is about 23⁄16 in. (5.55 cm) bent at a 15° angle. Now, I know how often to bend and where to bend.
2. Determine Material Sizing
I decided to have my heat shield go to the top of my keggle and I added 3 in. (7.6 cm), which will go below the kettle for capturing the hot exhaust. For my keggle, that’s a total of 26.5 in. (67.3 cm) in height. To determine the length of my sheet metal, the perimeter of the 17 in. (43.2 cm) heat shield is π x D multiplied by the fraction of the total arc. In my case, π x 17 in. x 285° / 360° = ~42.25 in. (π x 43.2 cm x 285°/360° = 107.4 cm). But you also need to add material that will get bent into your kettle at the ends. I decided on ¾ in. (1.9 cm) clearance all around in step 1, but if I added 1.5 in. (3.8 cm) to account for my two endcaps, I wouldn’t get there because you can’t bend sheet metal perfectly with a homemade metal brake (refer to step 3) and I wanted to be sure the edges came in close contact with the kettle to keep the heat in and away from my sight glass, which would be directly on the other side. I added 2.5 in. (6.4 cm) to account for this. This results in my sheet metal size of 44.75 in. x 26.5 in. (113.7 cm x 67.3 cm).
I used 18-gauge 304 stainless purchased at a metal yard. You can go thinner as well. Most big box stores don’t carry large enough sized sheets for most homebrew kettles. If a big box store is your only option, you can pop-rivet or screw together multiple sheets. You don’t have to use stainless but please do not use galvanized as the heat could burn off the galvanized coating, which results in toxic fumes.


3. Bending your metal
Cut your sheet metal to size using tin snips or an angle grinder with cut-off wheel. From your measurements determined in step 1, lay them out on your sheet metal and start bending. Many likely do not have a metal brake at home or have access to one. If not, Google “2×4 sheet metal brake” and you’ll find a whole bunch of videos and pictures showing how to make one from some lumber and a pair of door hinges. I bent the 90° ends first. Then I eyeballed the 15° and after I completed all the bends, went back and increased any bend in the brake or gently pushed on it to decrease the bend so the final heat shield appeared round.

4. Add sheet metal screws for spacers
Place your kettle onto your brew stand or burner and place the heat shield on it. You want to maintain the gap all around so for large discrepancies, bend it accordingly either by hand or with the brake. Once it’s close, add the sheet metal screws as you see fit. I placed mine about every 60 degrees-ish, 6 in. (15.2 cm) from the top and 6 in. (15.2 cm) from the bottom. The screws do not go into the kettle! They’re simply spacers to push against the kettle to maintain the gap.
5. Notch the heat shield
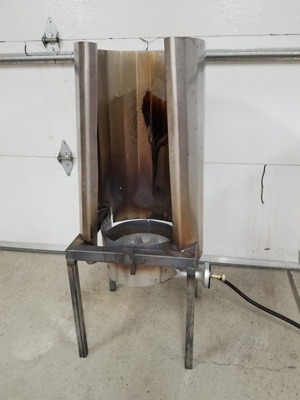
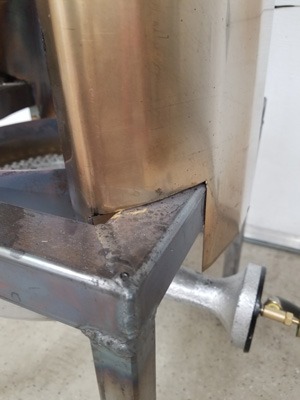
Option 1: For my setup, to get the heat shield below the bottom of the kettle, I had to notch the heat shield in areas where it contacted my stand. Setting the heat shield in place, I marked the contact points with a sharpie and notched, in those locations, up 3 in. (7.6 cm). As you can see, after notching, my heat shield is now about flush with the top of my kettle and goes below the bottom of my kettle to capture the hot exhaust gases.
Option 2: If your setup doesn’t allow for this, instead, you could suspend the heat shield from the top of the kettle using longer screws than used in step 4. For instance, If my stand wasn’t big enough to support the heat shield, I likely would have ran 2-in. (5.1 cm) screws around the perimeter of the heat shield 1 in. (2.5 cm) from the top. Then the heat shield would be suspended from those screws sitting on top of my kettle.

6. Usage
The first time to put this heat shield into service, you need to carefully watch your boil to avoid boil overs. I reached boil in a fraction of the time. Once I reached boil, I had to turn the burner way down to prevent more boil overs. Once the heat shield heated up and started not only channeling heat but also radiating heat back to the kettle, I had to turn the burner down farther. I found a good way to minimize boil overs with this setup is through the use of a 6-in. (15 cm) duct fan sitting on my hop spider blowing into the kettle. Once you’ve adapted to your new setup, sit back and enjoy the fact you’re saving money . . . which you should spend on more brewing! Cheers!