Build a Randall-Style Hop Filter

As a homebrewer and kegerator operator, I am constantly asking myself, “How can I make my draft brews hoppier?” I want that hop aroma to leap from the glass as soon as I open the faucet just like when you open a can or bottle of a favorite IPA.
I use Corny kegs as my secondary (and sometimes tertiary) fermenting vessels when brewing. With the right timing and a spunding valve, kegs allow my brew to self-carbonate with the malt sugars left over from the main fermentation. I recognize oxygen as the enemy of hop aroma compounds. Once the beer nears the end of fermentation, I don’t want any oxygen to get near my beer. So I can add dry hops near the beginning of fermentation or again when I transfer into the keg. The problem with my process of conditioning and dispensing within a closed keg system is that there is not a good opportunity to introduce additional post-fermentation dry hops. So after some careful consideration, I decided that filtering hops within the draft system was going to be my answer.
I had read about the original Randall the Enamel Animal, a Dogfish Head Brewery invention, and many other different types of hop filter builds online and from friends, but I wanted to build a hop filter that was going to be kegerator-friendly, easy to detach and clean, and cost-effective. I call it a hop filter because that was the original intent of the device. But, just to be clear, hops aren’t the only thing that I can add to this filter system. If doing a porter, you can add some coffee beans and/or mashed cherries to the filter. How about strawberries and a vanilla bean with that creamy IPA? The nice thing is that if the flavor mix doesn’t work out, you haven’t ruined the entire keg; just take the filter off-line. Also, if you are ever pouring your beer at a beer festival, the filter can be a great talking point and allow you to basically add another beer to your pouring repertoire.
But, just to be clear, hops aren’t the only thing that I can add to this filter system

After assembling the hop filter, getting it installed, and pouring my first homebrew, I have to say I could really taste a difference in the hop profile of the beer. The additional blast of hop oils just prior to hitting my glass made an impact. One small addition to the kegerator has made an already smooth operator into a smooth hoperator!
Parts and Tools
• GE Household Pre-Filtration System. Model # GXWH20S
• Brewer’s Edge® KettleScreen™ with 1⁄2-inch thread and 12 inches long
• 1⁄2-inch Male pipe thread to 3⁄8-inch male barb connector
• 4 small 3⁄8-inch O-rings
• 3 clamps
• 1⁄2-inch female pipe thread to 1⁄2-inch female pipe thread coupling
• 2 Firestone liquid posts with 3⁄8-inch female pipe thread
• 2 3⁄8-inch Male pipe thread to 1⁄2-inch male pipe thread reducers
• 2 3⁄4-inch Male pipe thread to 1⁄2-inch female pipe thread bushings
• 2 Quick disconnect fittings for ball lock kegs with 1⁄4-inch MFL (threaded)
• 2 1⁄4-inch swivel nut to 1⁄4-inch barbed end sets
• 4 ft. of 3⁄16-inch inner dimension PVC tubing
• Teflon tape
• Filter wrench
• Adjustable wrench
• Flat head screwdriver
• Metal snips
• Measuring tape
• Bolt cutters
Step by Step

1. Gather your supplies
I have a mountain of spare homebrew parts scattered around my home, as most homebrewers I know do, and was able to track down most of the fittings including the clamp, coupler, reducers, and bushings. Before I got started on the assembly, I needed to take inventory of my tools and supplies to make sure I could finish what I started and, lo and behold, I was missing a vital piece that sent me back to the homebrew shop. I had overlooked getting a second quick-disconnect fitting to connect the “out” on the hop filter to the “in” on my tap tower. It’s always a good rule of thumb to lay down the game plan before you get started with any project. When I returned home my good buddy Brew (my golden retriever) had taken it upon himself to play tug-o-war with the beer line I had purchased to connect the hop filter and tap tower together. So yep, you guessed it, back in the car and back to the homebrew shop. This time I bought a bushel of beer line.
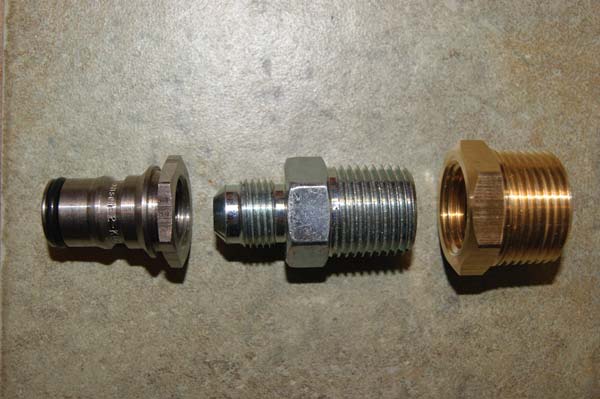
2. Assemble the fittings
Before you get started assembling the fittings for the quick-disconnects, make sure to clean and sanitize all the parts. You will need to lay out the three parts (3⁄4-in. male pipe thread to 1⁄2-in. female pipe thread bushings, 3⁄8-in. male pipe thread to 1⁄2-in. male pipe thread reducers, Firestone liquid posts with 3⁄8-in. female pipe thread) for each side and wrap the male threads of each fitting with the Teflon tape. (I used a mixture of brass and stainless steel fittings, but I suggest using all stainless steel fittings when possible.) After you get all of the fittings tightly screwed together you can insert the 3⁄4-in. male pipe thread of the bushing into the 3⁄4-in. female pipe thread on the filter housing. Repeat this on the other side of the filter housing to finish assembling the quick-disconnect liquid posts for use with the quick-disconnect fittings for ball-lock kegs.
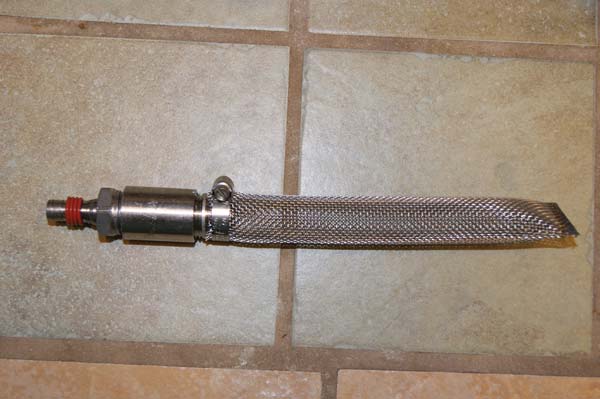
3. Kettle screen modification
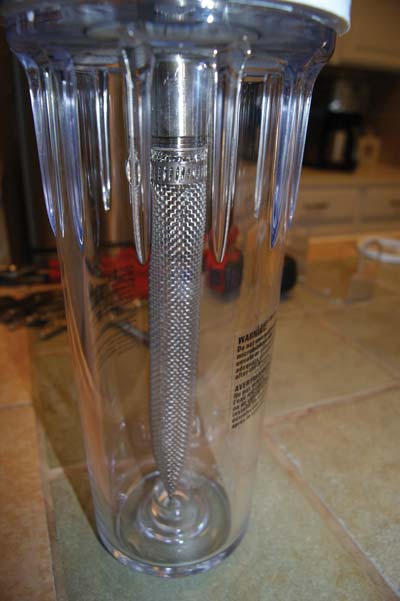
Measure 7 in. (18 cm) up from the crimped end of the weldless kettle screen and cut with your metal snips. Make sure to reshape the snipped tube back to its original shape with a pair of pliers. On the half with the threaded fitting use your bolt cutters to cut off the permanent clamp and remove the fitting. Remove the 1⁄2-in. threaded fitting and insert it into the end of your newly cut 7-in. (18-cm) screen. Slip on a stainless steel adjustable clamp and tighten. Next, screw on your 1⁄2-in. x 1⁄2-in. female pipe thread coupling and then screw the 1⁄2-in. x 3⁄8-in. male barb connector into that. Slip on the (4) small 3⁄8-in. O-rings until they are about midway down the barb. When you have completed these steps you should have something that looks like the modified screen in the picture.

4. Installing the screen
Slowly twist the screen assembly into the opening on the inside of the filter assembly cap. The O-rings you used on your barb fitting should twist in and be quite snug. The purpose of this design is for making cleaning of the hop filter as easy as possible. When ready to clean the filter you will just slowly twist out the filter assembly from the filter cap. During dispensing, the psi in the filter housing will force the screen up and create a natural pressure seal. These filters are designed to withstand up to 125 psi, so you do not have to worry about its pressure capability because most beers are dispensed between 5 and 15 psi. Tightly secure the clear filter closure to the filter cap with the included filter wrench.
5. Complete the assembly
Once the filter is assembled we will now be ready to attach it to the rest of the kegerator dispensing system, right? Wrong. Make sure you clean, clean, clean this filter. The last thing needed at this point is for your beer to be contaminated by an unclean “filter.” Use regular brewing sanitizer and baptize your new hop filter. After you have cleaned you are ready to add the filter to the system. The beer should flow from the keg, through the hop filter, and then to the tap tower. Assemble your beer line jumper out of the two quick-disconnect fittings, 1⁄4-in. swivel nut x 1⁄4-in. barbs, clamps, and the PVC beer line. Connect the beer line jumper from the keg’s beer line “out” to the hop filter’s line “in” liquid post. Then connect the tap tower quick-disconnect to the hop filter’s line “out” liquid post. You now have completed the connection and have another important step at this point: What kind of hops to use?
6. Test drive
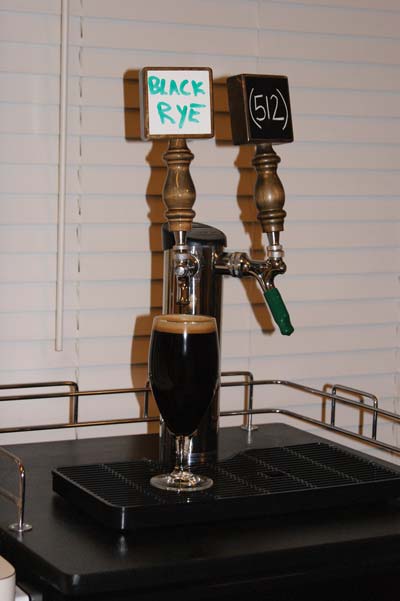
I used Centennial whole leaf hops for the first run through the filter. My homebrew on tap at the time was a Black Rye brewed with Columbus and Centennial and then dry hopped with Amarillo® and Centennial. I turned on the CO2, set it to around 8 psi and watched the hop filter fill with beer. As the beer traveled down and then back up through the screen I watched for leaks around all of my fittings. Success! No leaks and the beer made it all the way out and up to the tap tower dispenser. I closed the kegerator door and let the temperature come back down to 38 °F (3 °C) before dispensing to minimize foaming. The first beer was foamy, but quickly settled and I could see some particulate had made its way through the filter. After a few beers the particulate matter cleared and I was left with a noticeably hoppier brew.