Mash Uniformity: Single-vessel temperature stability

Single-vessel, “brew-in-a-bag” brewing had humble beginnings as a very simple and budget-friendly method on the fringes of the hobby. As it became more popular, system builders began innovating by adding electric heat, digital temperature control, and recirculation pumps, which aimed to match the precision of much larger and expensive 3-vessel systems.
After brewing on various systems in this category and data logging temperatures at different areas of the mash, I discovered that a simple and relatively inexpensive modification can be made to maximize temperature stability and uniformity. This is not to suggest good beer can’t be made with primitive gear, rather that if you already have a system like this, or are building one, higher levels of stability are possible and may be warranted if the following benefits are appealing to you:
- Temperature uniformity throughout the entire mash volume allows for batch repeatability and accurate communication of recipes between brewers because you know what the mash temperature was instead of a recording of a single spot in the mash (where the probe is installed).
- Heat is more quickly distributed when ramping for step mashes, again allowing for faster and more precise arrival at target temperature across the entire mash.
- Heat is moved away from the heat source quickly to reduce the chance of scorching wort.
The drawing above illustrates heat movement in a single-vessel system. Heat is added at the bottom, whether by direct flame or electric element and exits primarily through the sides and top of the vessel.
Adding an insulation layer can reduce the heat loss, but it is seldom done because it detracts from the aesthetics of the kettle and needs to be removed when cleaning up.

A more common way to hold temperatures throughout the vessel is to pump the recently heated mash liquor from the bottom to the top of the grain bed. However, a delicate balance needs to be struck. If you pump too slowly, the top of the mash will always be significantly colder than the bottom. Pumping too quickly will overwhelm the flow rate that the mash and bag (or basket) can handle and an air pocket will form in the bottom right where the heat is being applied. The result is scorching or dry firing the element. It is often difficult to dial in the perfect flow rate because we are trying to restrict a 7-gallon-per-minute (26.5-L-per-minute) pump down to a mere 5–10% flow.
The last unique situation to consider applies to systems that contain the mash within a solid-sided basket where some amount of liquid surrounds it. This surrounding liquid is always the coldest area and never gets replenished with typical recirculation to the top of the basket. Temperature differentials in a single-vessel mash have been measured upwards of 8 °F (4 °C).
In summary, this particular evolution of a recirculating single-vessel brewing system has the most stable and uniform temperatures, as well as fastest step ramping that can be achieved at the homebrewing scale.
Tools and Materials
- Single-vessel or brew-in-a bag brew system
- Recirculating pump
- Whirlpool port with valve
- Recirculation arm
- Tee fitting (appropriately sized to pump and system)
- Valve (appropriately sized to pump and system)
- Quick connects (appropriately sized to pump and system)
Steps

1. Enough Theory. Let’s fix it!
The recommended modification is to split the output of the recirculation pump and direct the flow to both a whirlpool port in the kettle and to the recirculation port over the grain bed at the same time. There are many ways to accomplish this depending on what equipment you are starting with. We will explore some of your options.
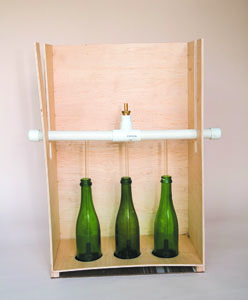
The basic concept is pictured to the right. Most importantly, the flow that goes to the recirculation port above the grain needs to be capable of granular adjustments, such as 2 qts. or liters per minute, or slightly higher during step mash ramp ups. Unfortunately this rules out the use of a butterfly valve but ball valves, diaphragm valves, and linear flow needle valves are appropriate.
The whirlpool return is simply a valved port with an interior fitting that forces the inflowing liquid to make a hard turn into the kettle sidewall. That in turn stirs the contents of the kettle below the bag or below (and around the sides of) a basket. The flow to the whirlpool return can be wide open or slightly throttled down but the flow rate here is relatively unimportant as long as the dead space is stirred.

2. Adding a Whirlpool Port
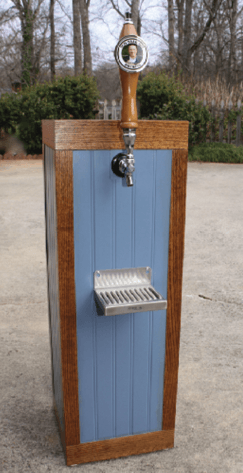
If your kettle doesn’t already have a whirlpool port, you’ll be adding one on the lower side wall of the kettle. There are several purpose-made weldless options on the market that mildly skilled DIYers can handle just by drilling a hole. Two such examples of what a whirlpool port may look like can be found to the right and below. Those with existing welded ports may be compelled to have a local welding professional add the NPT or tri-clamp port and then purchase an appropriate thread-in or clamp-in whirlpool fitting. Again, there are many commercial options available. Finally, since this port will always be under the liquid level, a butterfly, ball, or similar valve is required to be added to the exterior of this new port.

In addition to the temperature stability and other benefits listed, adding a whirlpool will also increase post-boil wort clarity and chilling efficiency. For a more in-depth look at instructions to install a whirlpool port, visit: https://byo.com/project/whirlpool-port-install/
3. The Recirculation Arm
If you’re already using a pump for recirculation, you most likely already have a solution to deliver the liquid back on top of the grain. But I’ll cover a few options in case you’re building up a simpler system or starting from scratch.
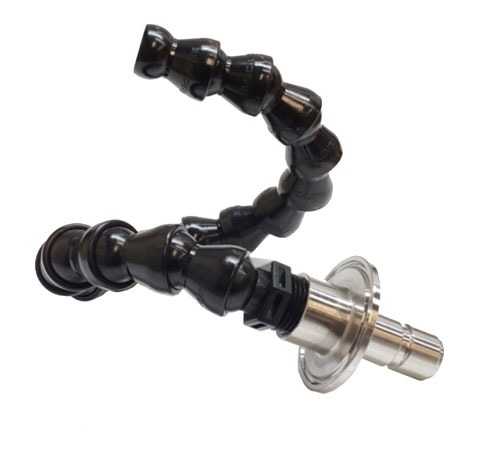
There are two primary goals to care for. First, the liquid’s entry into the top of the grainbed should be gentle so that it doesn’t drill a hole into the grain over time. You should also avoid unnecessary splashing or spraying. The topic of detrimental hot-side oxidation is still highly debated in the homebrewing community, but there is no reason to intentionally expose the hot wort to oxygen. For that reason, I prefer hardware solutions that have some level of height adjustability to account for different grain bill amounts. Solutions include Loc-Line (above), varying hose lengths hanging from the lid, wing-nut positionable stainless tubes, hose floats (below); among others.

4. Splitting the Flows
There are also several physical configurations possible for the last task in the project, which is splitting the pump flows and dialing in flow rates.

The first, and most intuitive method is to put a tee fitting directly onto the output port of your pump (above). The output that leads to the whirlpool does not need a valve because that path can be closed or throttled via the valve on the whirlpool port. The second output of the tee fitting will need a valve so you can throttle or close the flow. This solution requires one additional hose to be added to your kit.

The second option is to move the splitting tee to the front of the whirlpool port’s valve (above). This provides two advantages: It reduces the total hose length required since only one hose runs back up from the pump to the kettle and it locates the recirculation throttling valve at the kettle level, which is easier to reach if your pump is on a lower shelf.
The pictures show how both options can be achieved with ½-in. NPT valves and fittings as well as quick disconnects on the hoses. Either can be done with different hose connections including tri-clamp (TC) fittings, though the kettle-mount option may end up being too bulky with all TC parts.