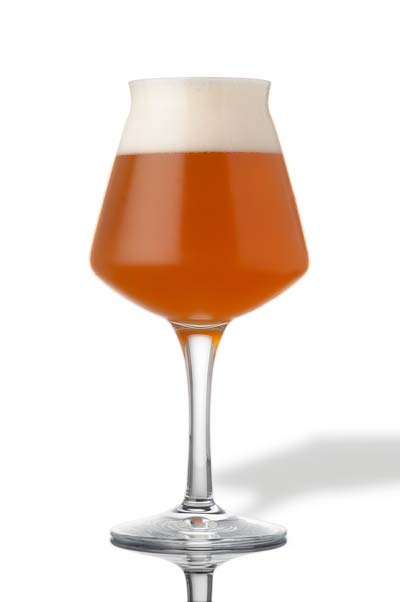
Beyond Barley: Brewing 100% Chestnut Beer
Since I began homebrewing, I’ve always tried to test the boundaries of beer — seeing what can, and cannot, be done. When I brewed my 3,000-year-old beer (that I wrote about in the January-February 2026 issue), one question kept coming up: What makes beer . . . well . . . beer?
Is it the hops? The barley? The yeast? What separates beer from wine, cider, mead, and every other fermented drink? The more I thought about it, the more I came back to the process. At its core, it is defined by two steps: Converting starches into sugars, and then fermenting those sugars into alcohol.
Most of the time, those starches come from grains and cereals. Barley malt is the classic example because it brings both starch and the enzymes needed to convert that starch into fermentable sugar. But cereal grains are not the only foods that contain starch. A few nuts do too, especially once dehydrated. The problem is that nuts generally do not come with the same enzymatic machinery as malted grain. They may contribute flavor, body, or complexity, but without outside help, they usually remain adjuncts rather than the foundation of the beer.
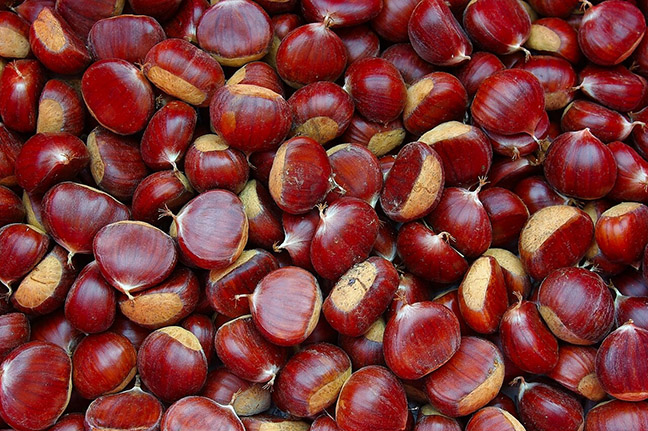
Chestnuts are one of those nuts. When dehydrated, chestnuts contain more starch than most other nuts, which makes them a fascinating candidate for brewing. But without the fundamental enzymes that break down starches, there could never be a 100% chestnut beer.

At least that used to be true. Modern brewing science changed that, and a new idea for my next brew was born.
After some research, I found the Gluten Free Home Brewing website, which offers a range of enzymes for non-traditional mashes. I ordered lactic acid, Termamyl, and SEBAmyl L Endo-Alpha Amylase. Termamyl SC DS Thermo-Stable Amylase is a heat-resistant alpha amylase designed to help break down starches at higher temperatures. SEBAmyl L Endo-Alpha Amylase is also used in gluten-free mashes to aid starch conversion into fermentable sugars. Between the two, I had a plausible path to full starch conversion.
Next, I had to order chestnuts.
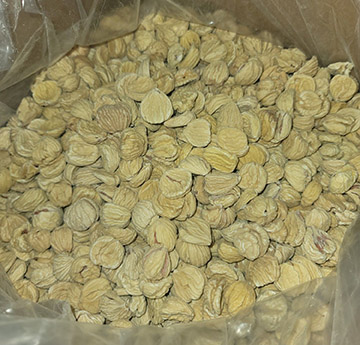
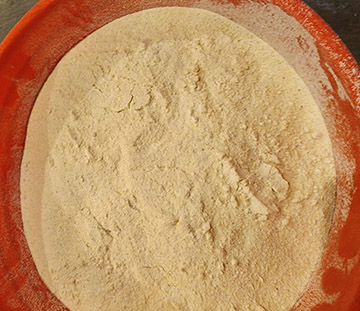
I did not want to dehydrate them myself, since crushing them into a usable powder was already going to be a chore, so I ordered 25 pounds (11.3 kg) of dehydrated chestnuts from a bulk-food supplier — enough for a 10-gallon (38-L) batch of beer. I considered buying chestnut flour, but was unsure of the process the chestnuts would have gone through, or that it was indeed 100% chestnut flour, so I opted for the much more time-consuming method of grinding the chestnuts myself. Because they are nuts, there was a real risk of the grinder heating them up and turning them into paste, so I kept the chestnuts frozen and iced the grinder. Three full grinds (and grinders) later, and I had chestnut flour that would be capable of saccharification. To build some malt-like character, I roasted 1 lb. (0.45 kg) of chestnut flour for about half an hour. I smoked another half pound (230 g) for about the same amount of time, hoping to add a subtle “open fire” note; I wanted warmth and depth to come through in the final glass without turning the beer into a smoke bomb.
With the chestnuts prepared, I turned to hops and yeast. Originally, I wanted to wrangle my own yeast to give the beer a unique signature. But I eventually reminded myself that the point was to make chestnut beer, not a wild fermentation experiment. A yeast that introduced too many unpredictable flavors might bury the very thing I was trying to showcase. With that in mind, I chose Wyeast 1762 (Belgian Abbey Style Ale II) for its relatively clean profile and its ability to contribute character without taking over. For hops, I paired East Kent Golding with Strisselspalt, aiming for something that evoked “chestnuts roasting over an open fire” without becoming a novelty beer.

On brew day, I set the strike water to 175 °F (79 °C) and added 2 lbs. (0.9 kg) of rice hulls along with the 25 lbs. (11.3 kg) of chestnut flour. The rice hulls were essential. Chestnut flour does not behave like crushed barley, and I wanted every possible advantage when it came time to lauter. Because chestnuts do not lower mash pH the way barley or other grains often do, I adjusted the mash before adding enzymes. I diluted 88% lactic acid with water at a 1:4 ratio, added two tablespoons of the solution, and waited ten minutes. That brought the pH down to 5.75, which was where I wanted it before adding the Termamyl.
At this stage, the mash looked less like a mash and more like very thick oatmeal. The total volume was about 15 gallons (57 L), and I had not even added enzymes yet. I was only supposed to add around 2 fl oz. (60 mL) of Termamyl, but this is not really an ingredient you “overdo” in the usual sense. The enzyme breaks long starch chains into shorter dextrins. You either add enough to do the job, or you do not. Since the Termamyl came in a 4-fl oz. (120-mL) bottle and I had no use for the remaining half-bottle, I added all 4 fl oz. (120 mL). As soon as I stirred, the mash de-clumped and thinned out into something much closer to a traditional mash. After about 15 minutes, the chestnuts had absorbed roughly 1.5 gallons (6 L) of water during the enzyme breakdown process. Five minutes later, the mash smelled like nutty bread. That was the first moment I really believed this might end in drinkable success. After a 30-minute rest, I let the mash temperature drop to 145 °F (63 °C). I then used the remaining lactic acid solution to bring the pH down into the 5.2–5.4 range. Once the mash reached that target, I added 2 fl oz. (60 mL) of SEBAmyl and held the temperature for a 75-minute saccharification rest.
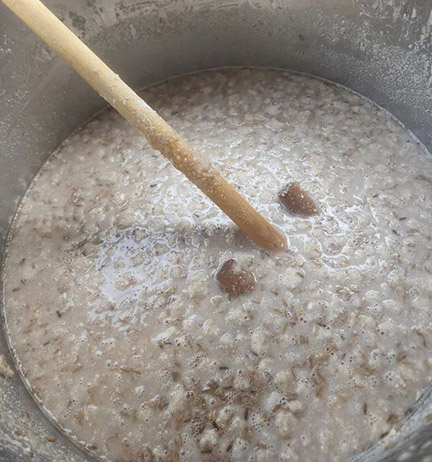
I sparged until I had 12.5 gallons (47 L) of pre-boil wort and decided on a 90-minute boil. After 30 minutes, the wort smelled amazing, unlike any I had brewed before. At the 60-minute mark I added 2.5 oz. (71 g) of East Kent Golding hops; with 15 minutes left, I added 2 oz. (57 g) of Strisselspalt hops and suddenly it had the aroma of a proper wort. At flameout, I added the final 2 oz. (57 g) of Strisselspalt. I transferred the wort to the fermenter while chilling it to 64 °F (18 °C). Because chestnut wort does not contain the same nutrients as barley wort, I added Fermaid O and diammonium phosphate (DAP) before pitching yeast; both nutrients that would provide a better environment for fermentation. Being my first time working with chestnuts, I had no idea how well they would ferment, so it was important to provide the optimal environment, especially immediately after the pitch since I wasn’t making a starter.
The original gravity came in at 1.067. I pitched six smack packs of Belgian Abbey Ale II and oxygenated the wort. Fermentation had visibly begun 12 hours later. After 24 hours, I added a little more Fermaid O to help the process along, then sealed the fermenter and let the yeast do its work. My final gravity target was somewhere between 1.010 and 1.020 (again, I wasn’t sure how well they would ferment). It landed at 1.012. Success!
The beer fermented for four weeks before I moved it into a 10-gallon (38-L) rye whiskey barrel for six more weeks. The goal was to give this gluten-free chestnut beer a more familiar beer-adjacent structure: A little oak, a little whiskey, and enough depth to support the nutty base. After barrel-aging the beer, I bottled it with one Coopers carbonation drop per 12-oz. (335-mL) bottle.
Two weeks later, the first bottle was ready.
I chilled it for a couple of days before opening it. A 100% chestnut beer was not something that I could find any examples of so I had no idea what to expect. Twenty percent chestnut? Sure. Maybe even 50%. But a beer built entirely on chestnut starch required enzymes, and using isolated enzymes this way has only recently become practical for a homebrewer.
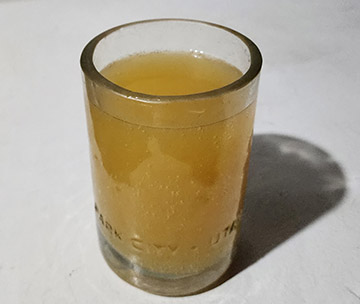
The first thing I noticed was the carbonation. There was plenty of it, but there was almost no head. That made sense. Chestnuts do not bring the same proteins that barley does, and those proteins play a major role in head formation and retention. The second thing I noticed was the haze. It was not just hazy — it was almost concerningly hazy. At first, that threw me off, but it was not thick, it did not smell bad, and nothing about it suggested a problem. So, I took a swig.
The first flavor came from the rye whiskey barrel. It was a little hot at first, but after a few more weeks of bottle conditioning, that initial bite softened. Underneath it was a nutty, fruity body followed by a bitter finish.
After finishing the bottle, I deemed this batch a success. I set out to see if I could brew 100% chestnut beer, and I did. The starch converted. The yeast fermented. It tasted like beer. If I did not have to grind the frozen dehydrated chestnuts again, I would absolutely brew this beer again.
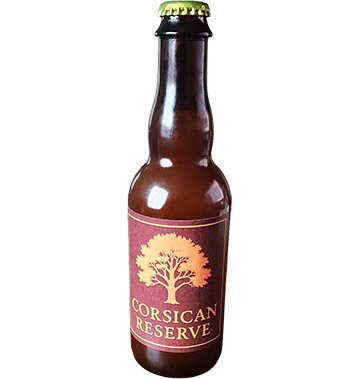
Once I decided it deserved a label, I named this 100% chestnut beer Corsican Reserve, a nod to the island and the people so intimately tied to the chestnut for hundreds of years.
Chestnut Beer
(10 gallons/38 L, all-nut)
OG = 1.067 FG = 1.012
IBU = 30 SRM = 7 ABV = 7.2%
Ingredients
25 lbs. (11.3 kg) dehydrated chestnuts (crushed)
2 lbs. (0.9 kg) rice hulls
4 fl oz. (120 mL) 88% lactic acid
4 fl oz. (120 mL) Termamyl
2 fl oz. (60 mL) SEBAmyl
12.5 AAU East Kent Golding hops (60 min.) (2.5 oz./71 g at 5% alpha acids)
8 AAU Strisselspalt hops (15 min.) (2 oz./57 g at 4% alpha acids)
2 oz. (57 g) Strisselspalt hops (0 min.)
2 oz. (57 g) Fermaid O
0.25 oz. (7 g) diammonium phosphate (DAP)
6 packs Wyeast 1762 (Belgian Abbey Style Ale II) (or build up an equivalent size yeast starter)
Coopers Carbonation Drops
Step by step
Crush the dehydrated chestnuts into a fine powder and then add chestnut flour and rice hulls directly to the mash tun (I chose to smoke and roast a small percent of the flour for added dimension, which is optional). Alternatively, you can buy chestnut flour if you trust the source. Add 10 gallons (38 L) of strike water at 175 °F (79 °C) to get mash to ~165 °F (74 °C). Dilute 88% lactic acid to three times as much water and add 2 Tbsp. every 10 minutes until the mash reaches 5.5–5.75 pH when measured at room temperature.
Add Termamyl at the start of the mash and hold for 30 minutes. Reduce temperature to 145 °F
(63 °C) and continue to add 2 Tbsp. of the lactic acid solution every 10 minutes until the mash reaches 5.2–5.4 pH. Then add SEBAmyl and hold for 75 minutes for the saccharification rest. Both of these enzymes can be purchased in homebrew-size quantities from glutenfreehomebrewing.com.
Lauter and sparge at 168 °F (76 °C) until there’s 12.5 gallons (47 L) of wort in the kettle.
Boil wort for 90 minutes, adding hops as indicated. At the end of the boil, chill to 64 °F (18 °C) and transfer to the fermenter. Add 1 oz. (28 g) Fermaid O, 0.25 oz. (7 g) DAP, and the yeast. I used six individual packs of liquid yeast instead of building up a starter because I wasn’t sure how a starter made with chestnut flour would react and I did not want any fermentable beyond chestnut in the beer . . . though if you are OK using malt extract it would be a big money saver. After 24 hours, add another ounce (28 g) of Fermaid O to the fermenter. Fermentation will take 3–4 weeks to complete.
Once done, transfer to a rye whiskey barrel for 6 weeks, if possible, or add oak cubes previously soaked in rye whiskey. Transfer to bottles, adding one Coopers Carbonation Drop to each bottle or keg and force carbonate as usual.
Further Reading . . .
• For a long time, the only enzyme most brewers would ever think about adding during the brewing process
was some amylase enzymes . . . boy have times changed. Learn about the rapidly expanding world of exogenous enzymes.