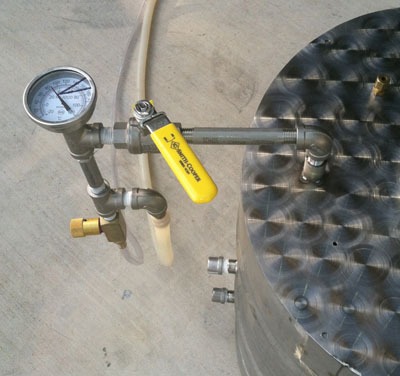
Custom Brew-In-A-Bag Stand
After a few extract brews, the realization and initial amazement that I was actually able to make beer with a pot on a stove top and a bucket subsided. What came next for me was longingly gazing at others’ elaborate all-grain brewing systems. Not surprisingly, the child in me wanted the biggest, coolest, shiniest, most flashing lights and gizmo-laden system I could find. Cost and space were of no concern. It just had to be awesome! The adult in me, however, went full on buzz kill mode wondering where in the world will a monstrosity like that fit in the garage? How exorbitant is the price tag for all that? Even begrudgingly starting off with an Igloo cooler-type 3-vessel system would still require THREE large vessels! Not to mention two large burners, a false bottom, valves, pumps, and hoses or some kind of large vertical stand just to get started. All of this sounded very costly and destined to occupy a large chunk of nonexistent real estate in an already crowded garage. Wishing for a way to break into all-grain brewing on a tight budget and limited physical space before knowing if the hobby would even be something I’d want to continue long term, I found the Brew-In-A-Bag (BIAB) method.
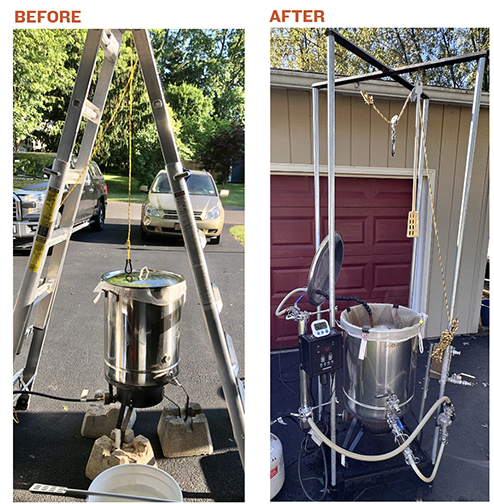
BIAB seemed like a way to get myself into all-grain brewing that would be approved by the adult in me. Requiring only one large vessel, a mesh bag, and my propane turkey fryer burner to get started, it checked the boxes for space-saving and wallet-friendly. It seemed like a great way to introduce myself to all-grain brewing until I could afford and figure out how to fit a “real” all-grain brewing system of my own. At least, that was my misguided thought process at the time.
After a number of BIAB batches I could see that this hobby is certainly something I wanted to continue, but one of BIAB’s downsides became quite evident. Wrestling around with the cumbersome hot bag full of wet grain is awkward at best, and more than a tad uncomfortable on a few occasions. A simple pulley and rope hooked to the garage door frame or an A-frame ladder remedied that problem temporarily. This “system” was certainly nothing to look at. It was a far cry from the electric panels and pumps and shiny stainless advertised in magazines, but it worked. Though the child in me still yearned for that fancy, all-grain system. After the eventual realization that BIAB is indeed “real” all-grain brewing, tricking out a single-vessel BIAB system became the new goal, and my current system began to take shape.
The first addition had to be a brew stand. The stand had to be able to come apart and store away when not in use to take up as little space as possible. Using some basic materials, I created a brew stand that was functional for me to brew on from day one, yet able to be easily modified as new components were added.

In my opinion, BIAB excels as a system for a homebrewer for multiple reasons. The first being that it can be a comparatively cheap and simple way to get yourself into all-grain homebrewing. I started off with a basic 16-gallon (60-L) GasOne kettle I ordered from Amazon with my propane turkey fryer burner perched on a few concrete blocks and a bag from The Brew Bag. That’s truly all you need to be a successful all-grain homebrewer with a BIAB system, and it’s your choice to leave it at that or slowly add and build it as budget and time allows. That GasOne kettle and old turkey fryer burner are still the foundation of my brew system today.
A homemade copper coil immersion chiller was the first upgrade, followed by a homemade hop spider. Over time, I added a pump and hoses with a trub dam and whirlpool arm, and whirlpooling was now mechanized rather than me slowly stirring by hand. With a pump in the mix, the immersion chiller was eventually upgraded to a plate chiller, and ran in that configuration for quite some time before adding the RIMS (Recirculating Infusion Mash System) tube to the mix. With the addition of the RIMS, I’d argue that my BIAB system offers more control than some of those shiny three-vessel stainless gizmo-laden systems I once longingly yearned for. Strike temperature just has to be in the ballpark. The RIMS tube will make the correction if I hit low on my mash-in temperature in a matter of minutes. Multi-step mashes are also a breeze, and mash efficiency is improved.
Is my BIAB brew system “finished”? Honestly, tinkering and building is half the fun for me with this hobby, so the answer is likely “no.” What I can say for sure is that BIAB was the way to go for me. I was able to budget and slowly build this setup over time as I gained more knowledge, while still being able to brew on it throughout its evolution from day one. This, along with the fact that all the components still fit in my overcrowded garage space appeased the adult in me. The child in me is happy to be able to step back and admire the shiny, elaborate, gizmo-laden creation. For me, my BIAB stand and brew system is a win-win. And if you think it may be for you also, I’m here to share more about the stand itself. I’ll avoid most of the exact measurements due to the nature of this build being sized for my own gear, but try to give a clear picture of how you can build something similar to fit your needs as well.

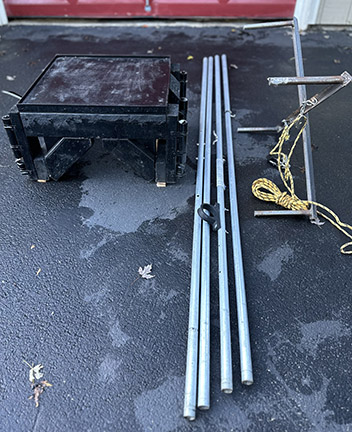
The stand itself is composed of three main parts consisting of a sturdy wooden base, four equal length sections of ¾-inch Electrical Metallic Tubing (EMT), and a crossmember on top for the pulleys and rope to hoist the bag.
The crossmember setup is constructed using steel angle. I welded that in an “X” and at each end I welded a section of ½-inch steel round tube that would fit inside the electrical conduit. This same idea could easily be accomplished with a nut and bolt drilled through the center to create the “X” and large bolts on the ends to seat into the tops of the conduit legs if you don’t have a welder. I happened to have a new welder I wanted to play with, so I went that direction.


The base is simply 2x4s and a small piece of ¾-inch plywood that I also had in the garage. I chose to purchase some 1-inch flat steel to create a lip around the edge as a little added protection from one of the propane burner’s legs slipping off the platform during a brew. On the corners of the base are short sections of 1-inch PVC pipe secured with pipe hanger straps. The ¾-inch electrical conduit fits nicely inside the 1-inch PVC. Under each section of PVC is an EMT conduit coupling that I drilled a hole through and lag bolted to the frame. This provides a well-fitted pocket for the base of each conduit leg and keeps them off the ground at an even height. The additional PVC sleeve seen in the center of the picture above was added later as a mount for the plate chiller.
The dimensions of the base were specific for my space also. The base and the burner are able to fit under my fermentation chamber when not in use to save precious space.
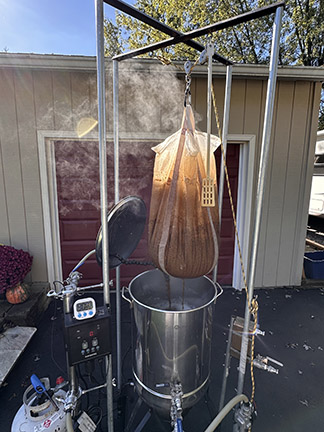
The strong, yet lightweight electrical conduit is easy to drill, which made mounting a boat cleat to keep the bag suspended for draining a breeze. Later modifications to the conduit legs were made to mount the pump, a hook for the lid, the RIMS tube and controller, and whatever may come next.
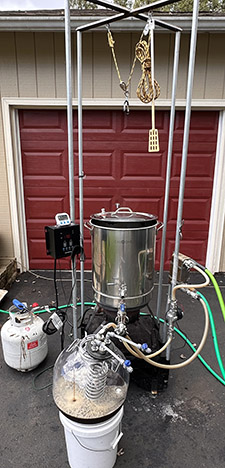
During the boil, the RIMS tube can easily be removed to wash and the hoses are reconfigured for whirlpooling and chilling. The addition of the plate chiller has made knockout more efficient for me. If you’re interested in BIAB brewing, whether it stays as a simple functional stand or slowly gets tricked out over time, I’d suggest that some version of a brew stand with a pulley system be at the top of your project list.
Want to Try Brewing in a Bag?
If you’re looking for an easy way to get into all-grain brewing, the brew-in-a-bag method might be your best bet. Check out the articles below for tips and techniques on brewing beer in a bag.
Thinking Brew-In-A-Bag: Helpful tips for this style of brewing