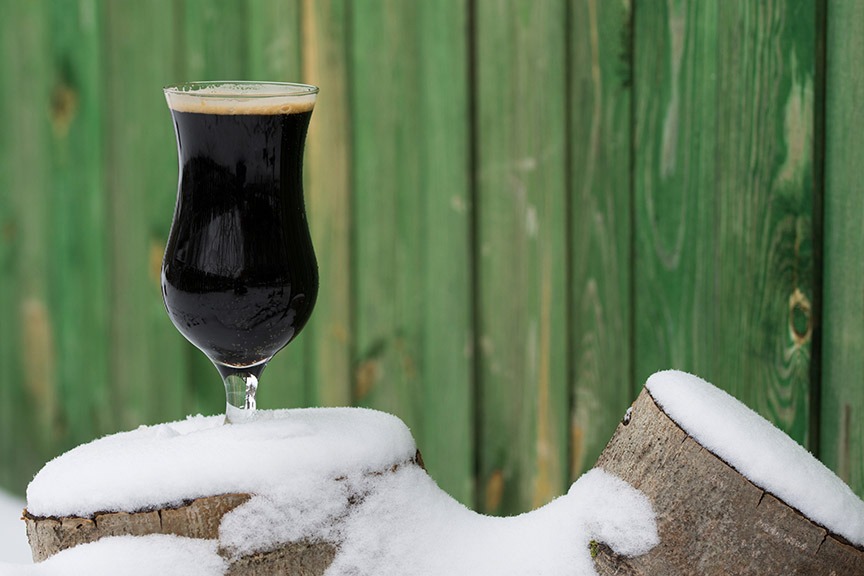
Go Big!
As the year heads towards the end, our thoughts turn to the fancy of a big beer. “But isn’t it too late? You need to brew big beers months prior.” Much like a tree where the best time to plant it was a decade ago, the second-best time is now. Of course, with modern brewing practices you don’t always need to wait a year to drink your giant beer.
Definitions first: What’s “big?” For ease of this discussion, we’ll put our floor at 1.080 OG. Ceiling? Let’s say maple syrup levels of 1.320 OG. Actually, if you made a beer that strong, we’ll applaud your reckless enthusiasm for very dumb projects. (And we’ll wonder how you plan on fermenting that monster.)
Now, we’ve both brewed big, stupid things like Drew’s now infamous Samichlaus clone called “Falconsclaws” and Denny is routinely creating bold Belgian beers. To say we have some experience is underselling it, but even with all that experience we’re still confounded with the changes that happen!
When you go big you will find new challenges. Your previously well-documented and well-behaved mash tun will become reluctant to give up the sugar it shared freely before you fed it a gluttonous diet. All that grain takes up unexpected volume when mixed with water — messing up your intuitive sense of water amounts. How much do you collect? How long do you need to boil? And even, or maybe especially, your old reliable favorite yeast strains will require extra attention and coaxing to fulfill their life’s purpose.

In other words, things get wibbly when you go big.
The Recipe
Your first challenge when brewing big is structuring a recipe that will work. Your first inclination will invariably be “let’s go BIG!” A lot of this, a little of that, etc. Being silly lends a goofy air to our choices with the exuberant energy of a kid hopped up on cotton candy at the local carnival.
We caution you to remember that “this, that, and, oh, that too” adds up to a lot in a beer that by definition will have a lot going on. Use what you need, but sparingly so, because there will be a literal tun filled with base malt.
Taking a cue from history, Bass No. 1, usually credited as the first beer named “barley wine,” was reputedly made from 100% pale malt. Having made several barleywines in this fashion, we can say you get a very lovely beer when you choose a characterful base malt. In other words, don’t expect the same results from 100% domestic Pilsner malt as 100% Maris Otter.
If you do add character malts, tread lightly. If 100% pale malt gives enough character, you really don’t need much more! Our general rule of thumb about crystal malts is to keep them less than 10%, but for a bigger beer, we’d recommend starting even lower.

One thing that is definitely a nice touch is adding sugar. It has other advantages (more on this later), but from a recipe perspective, sugar’s clean fermentability leading an air of “dryness” is a boon to those attempting to make a less sweet final beer.
The Mash
Mind the Volume
We usually don’t have to think about our mash tun capacity as most projects don’t approach the extreme limits. When you’re going big, you need to mind the volume. Remember the rule of thumb that each pound (0.45 kg) of grain will take up roughly 0.13 gallons of volume (or 0.9 kg will take up 1 L) . When we brew in our 40-liter system (~10.5 gallons), we can fit nearly 30 lbs. (13.6 kg) of grain in that vessel.
How much grain you can fit in will also vary with how much water you add. While you can gain some room by reducing the initial amount of water, remember that will make your mash harder to run off and impact efficiency if you push too far.
Adjust Your Expectations
Brewing science and brewing calculations are brilliantly on point when you’re doing something “normal” (e.g., beers in the 4–7% ABV range). So, we have a tendency to think, “I plug the numbers into my recipe calculator and those will be what I get.” Then we get upset when the physical universe refuses to confirm to the theoretical possibility.
Go into this project with the knowledge that you probably won’t get what the calculators say and in fact will probably grossly undershoot. Drew’s experienced his usually reliable 75–80% efficiency plummet to 55–60% when going large. In part, this can be mitigated by adding more grain or sugar, but even when compensating gravities don’t play fair and square. So, prepare to accept lower original gravities or go for a longer boil and lower volume if the number is dead set important for you.
Sugar is Your Friend
It wasn’t that long ago that any adjunct was looked down upon by craft and homebrewers as “lesser.” As stated earlier, sugar is your friend when going big, and that includes malt extract. Even in commercial breweries it’s not uncommon to use it for 10–20% of the sugar content to boost gravities. (For most homebrew-sized batches this would equate to 1–3 pounds in a 5-gallon batch or 0.5–1.5 kg/19 L.)
It’s not cheating, and it can make for a better final product. Besides, if you don’t use sugar in making a strong Belgian beer, you’re making your life more difficult for what?
The Ferment
Baby Your Yeast
We’ve repeatedly banged the drum that “Healthy and Vital Yeast Forgives a Number of Sins!” In other words, give your beer enough healthy yeast and you can screw up in a lot of ways and still get a decent drop at the end. That mantra becomes carved into a stone tablet of deity-derived wisdom when it comes to your large beer projects. Starting with an inadequate supply of yeast because you’re trying to save time or money is running straight into the arms of a bigger waste as your beer suffers for your penurious ways.
If you’re short on time, at least buy several packs of yeast to jumpstart your beer. For our money, the best thing you can do is plan ahead and create a “starter beer” — aka a beer brewed with the eye of generating a yeast cake. It’s a wonderful idea, because you get two beers out of one silly “big beer” idea. Just brew a low- to moderate-strength beer, say 4–6% ABV, transfer, and use a portion of the resulting yeast cake to ferment your big beer. You don’t want to use all of the yeast cake! When making his big Samichlaus-inspired strong lager, Drew brews a 5-gallon (19-L) batch of schwarzbier and splits the resulting yeast cake across 30 gallons (13.6 L) of the big stuff. (And remember, lagers are recommended to have higher pitching rates!)
This is also a really good time to cozy up to your favorite brewery and very politely ask the brewers if they’re getting ready to dump yeast. Bring them a sanitized growler or jar and get more healthy yeast than you can shake a stick at.
One other advantage to large amounts of healthy yeast — it simplifies the oxygen game. We used to recommend adding copious amounts of oxygen at pitching time and 12–24 hours after pitching — the idea being to encourage enough sterol production to create flexible new cell walls to handle the intense fermentation event. While we still think adding oxygen when you pitch is a good measure, we no longer recommend the later additions due to fears of staling and contamination.
Keep Your Cool
Big beers have a reputation for some aggressive fermentation characteristics — and we don’t just mean rollicking kräusens threatening to shoot out of your airlock! But because of the harsh fermentation stresses, yeast cells will often secrete compounds we consider “off-flavors” — think your phenols, esters, and fusel alcohols. Pitching a ton of vital yeast is step one in warding off those problematic sensations.
The second is keeping your ferment cool, at least for the first part of the process. When the yeast is in the lag/reproductive phase is when a number of those stressor chemicals are produced. To combat that phenomenon, we recommend keeping your fermentation consistently chilly early on. Think 63 °F (17 °C) for an ale ferment. If you hold there for at least the first three days of fermentation, you’ll keep the yeast relaxed and slow down the chemical processes that cause extra heat and stress. After those first few days, you’ll want to allow the fermentation to rise in temperature to encourage a complete fermentation.
Stay Patient
How much time your beer will take is one of those fun debates. In the older days, the recommendation was “seal up the fermenter and wait a few months.” It feels like most of those rules were needed due to poor yeast health.
With all that vitality you threw at your beer, you should be fine to follow a slightly extended version of your typical fermentation schedule — think a month or two for your primary fermentation. After that, get the beast out of your fermenter and into kegs or bottles (assuming of course that your gravity has stopped changing). We do this to avoid tying up the precious resource that is a fermenter, but also to get the beer off any remaining yeast. While we’re not normally worried about the meaty flavors of autolysis, months spent on a bulk of yeast strikes us as a bit “extra.”
Your beer will be ready to drink, for certain values of that notion, as you go to package. Homebrewers tend to hold onto romantic notions of long aging times and while we agree there’s value to it, you’ll only learn how things change when you also try the beer young. So, package, try one, wait a couple weeks and try again. Rinse, repeat, and make it a regular ritual like your dental checkups!
Fixing Problems
No matter what you do, you will probably run into a problem or two as you make a larger beer. Here are our solutions:
Missed My Gravity (Low)
First, ask yourself if your missed gravity is actually a problem. If you missed low and want to raise it, reach for the sugar we talked about earlier. You can also boil longer if you’re over volume or don’t mind producing less beer. If you’re at the end of boil, just make a sugar syrup and mix it into the still hot wort. If you’re in the fermenter, you might want to ask why is this now a priority?
Missed My Gravity (High)
Most folks would be happy to have this problem! It’s also fairly easy to fix with a small judicious dilution of water. You can calculate this as a straight dilution of 0 sugar points. For example, 5 gallons at 1.100 + 1 gallon of water would be (5 x 100) + (1 x 0) / (5+1) = 0.8333 or 1.083 OG. If you want to dilute later in the process, make sure your water is freshly boiled to avoid contamination.
My Beer Stopped Fermenting
This is probably the big scary one!
Is Your Beer Actually Done Fermenting? It’s not unusual for a beer with a high OG to end up with a high FG. Many mega-monster imperial stouts end up with final gravities near 1.050. Those are outliers, but don’t be surprised if your big malt bomb ends up with an FG in the 1.020–1040 range. (Remember a little extra sugar isn’t terrible — it can hide the extra burn of alcohol!)
Use a Fast Ferment Test. When you start your fermentation, hold a portion to the side in a flask or growler. Put it on a stir plate or give it a regular swirl and don’t control the temperature on it! After a few days it should be done fermenting. You’ve optimized for fermentation completion, not flavor. The resulting gravity will tell you your rock bottom baseline. A good flavor-oriented ferment will end up a little above the base. If you’re more than 5 points off, then your yeast still has work to do!
Give It A Swirlie. If you still need to ferment a few more points, the right place to start is with a gentle swirl of the beer to rouse the yeast back up. No, this doesn’t always work, but it’s the least invasive way to get it fixed.
Still Not Done? Give it some fresh yeast. Whether from a re-hydrated pack of dried yeast or more yeast slurry from another batch (or brewery). Pitch a fresh dose of yeast and give it that swirl. If you have extra concerns, a little pinch of yeast nutrient may not ensure a further ferment, but it might calm your addled mind. Repeat until either the beer surrenders or you do.
It’s Still Not Done! Well, darn! First things first – give it a taste. Does it taste complete? You may be able to run with it! Consider other options – would dry hopping help cover any sweetness (and maybe re-kick fermentation)? Would a spirit like Bourbon add the additional potency and watering down needed to make the beer pop? Fruit? Spices? Etc.? Ultimately, with this stubborn brew, you’ll need to find some way to make you happy and anything’s fair game.
The Nuclear Option. Brew again. This is really the last resort, but it’s a possibility. Brew a beer to blend in with the recalcitrant biggie. Make something smaller, more hoppy, etc. to punch up the characters of your first beer. This isn’t without precedent — many great British strong ales are blends. But while we remind you that this is a possibility, we’ve both only done it in cases of mortal peril!
There’s your five-minute course in the art of making a big beer. Remember, lots of everything — malt and sugar for fuel, hops for break, yeast to turn your dessert soup into dessert beer, and a mix of patience and perseverance to drag it across the finish line. You’ll also quickly discover that playing with the big bold notes of these beers opens up other possibilities, whether it’s strange techniques like reiterated mashing to pull more malt sugars into the beer or the endless combinations of barrel aging and flavors that brewers are adding to the bold bottles.
Keep your wits about you and stay calm to steer your big beautiful barleywine from mash tun to snifter glass!
The King’s Diamonds
(6.5 gallons/25 L, all-grain)
OG = 1.095 FG = 1.020
IBU = 38 SRM = 11 ABV = 9.8%
This is a riff on Drew’s classic “Queen’s Diamonds” that’s slightly updated to modern ingredients and a change in history. Note that the efficiency when working with this much grain is lower than usual.
Ingredients
17 lbs. (7.7 kg) Crisp Chevallier® Heritage malt
6 lbs. (2.7 kg) Crisp Maris Otter malt
13 oz. (370 g) Invert #3 syrup (mix of invert syrup and blackstrap molasses)
18 AAU Magnum hops (60 min.) (1.5 oz./42 g at 12% alpha acids)
1 oz. (28 g) Target hops (whirlpool)
LalBrew Verdant IPA yeast (second generation harvested from a batch of mild)
Step by step
Mash grains at 149 °F (65 °C) for 60 minutes. Mash out at 172 °F (78 °C) for 10 minutes. Vorlauf until the wort is clear and then run off into the kettle. Sparge grains with 3 gallons (11.5 L) of 168 °F (76 °C) water to collect 8 gallons (30 L) in the kettle. Boil wort for 60 minutes, adding the Magnum hops at the start of the boil. When the boil is complete, turn off heat, add the Target hops, stir to create a whirlpool and let rest 20 minutes.
Transfer to your fermenter and pitch yeast. Allow to ferment for up to two months. Package this beer in a keg and force carbonate.
Extract version: Replace malts with 12.5 lbs. (5.7 kg) pale ale dried malt extract. Bring 8 gallons (30 L) of water to a boil. Remove from heat and stir in the malt extract until dissolved. Return to a boil for 60 minutes. Follow the remainder of the all-grain recipe.