Build a Draft Jockey Box
You have your kegerator set up and running smoothly; your friends love to drop by and drink your homebrew on tap. But now you (and they) want to bring your finely crafted brew out and about to parties, picnics, and other social gatherings.
You could build a portable kegerator, but there is a cheaper and simpler alternative that also opens up the possibility of serving multiple kegs on the go: a jockey box.
For those who don’t already know what it is, a jockey box is a “just-in-time” beer chilling and dispensing rig made from an insulated cooler, a coil of metal tubing, and standard draft dispensing hardware. The jockey box is packed with ice (and a little water) to get the coil cold. Beer is pushed from the keg into the jockey box, which cools the beer as it travels through the chilled metal and is then dispensed through a standard draft faucet. This allows for temperature-correct draft beer to be served in any place where electric refrigeration is not convenient or possible, such as a camping trip.

Commercial jockey boxes are often made using a plate chiller to cool the incoming beer. These are very efficient chillers, and somewhat similar to the wort plate chillers used in commercial and homebrewing. As you might expect, these chillers are not cheap, and so our jockey box project will use more common metal tubing – stainless steel (although it can be built with copper as well), which is available at most hardware stores.

Stainless steel is the metal of choice for this project as finished beer comes in contact with the metal. Many homebrewers build jockey boxes with copper tubing as copper is amazingly efficient at heat transfer (it has tremendously high thermal conductivity). It is great for any project related to chilling, such as immersion chillers, however copper can be the source of some negative consequences when it comes in contact with finished beer, which has a different pH than wort. Copper has the potential to cause staling post-fermentation because it catalyzes staling reactions, including the production of hydrogen peroxide and can oxidize the alcohols to aldehydes. There is also potential for copper to lead to copper poisoning (nausea, vomiting) from too much exposure.
If you don’t want to worry about it, go with stainless steel — it’s more expensive and harder to bend, but non-reactive.
Build Your Own Jockey Box
Tools
• Drill with 7⁄8-inch hole saw
• Rotary tool (Dremel) or hack saw with metal cutting blade
• Adjustable wrench
• Flathead screwdriver
Parts
•Insulated cooler (the size will depend on how many taps you plan to add. For a single tap, the cooler can be very compact.)
• 2x Beer shanks — one for beer in to the box; one for beer out.
• 3x Shank nuts
• Wing nuts and tail pieces, as needed
• Dispensing faucet
• 20 feet of pre-bent stainless steel tubing: 1⁄4-inch OD
• 1 foot (approximately) of vinyl tubing: 3⁄8-inch OD
• Hose clamps
• Teflon pipe tape
Step by Step
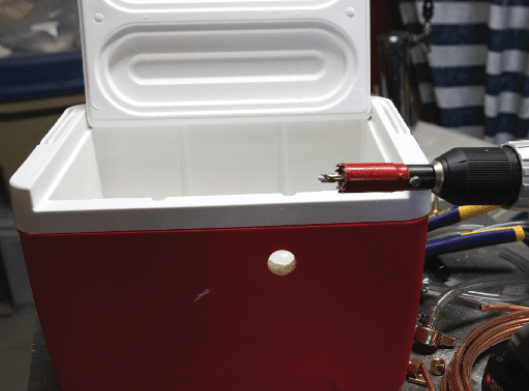
1. PLAN FOR DRILLING
I used a fairly small cooler (2.25 gallons/8.5 L), but there is enough space for two taps and coils, so I drilled the faucet hole (front of cooler) a little off center. This way, I can add a second faucet in the future and have both taps the same distance from the center and maintain a neat, symmetric look.
The position of the beer inlet hole (back side of the cooler) isn’t all that critical, as you can easily bend the copper and vinyl tubing to accommodate the shank. However, for multiple inlets, spacing them far apart can be helpful in getting each coil to fit neatly.

2. DRILL AND TEST SHANK
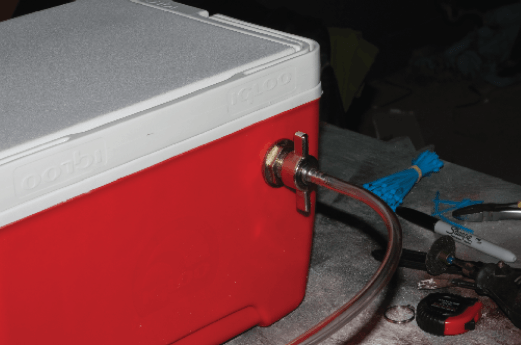
Both the faucet hole and inlet hole should be 7⁄8-inch. Measure off your center points (measure twice!) and drill out the holes. I used a faucet shank that has a hose barb attached. I just happened to have it handy for this project, but any type of beer shank will work, provided that it is long enough to extend enough threading through the wall to accommodate a shank nut, wing nut and tailpiece.
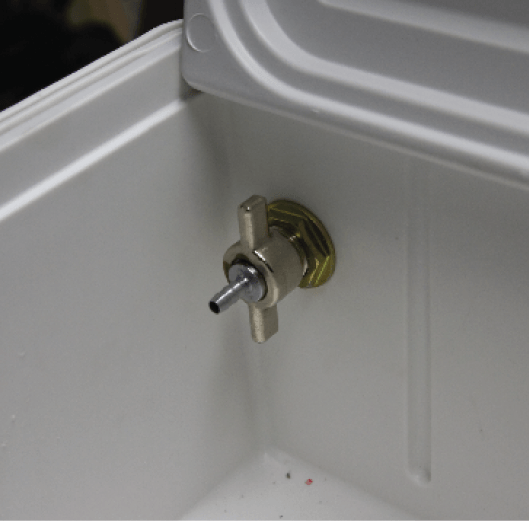
3. MODIFY THE SHANK
I decided to spec my jockey box with standard beer shanks for both the inlet side and faucet side. I have seen many similar projects that make use of brass compression fittings for the inlet hardware, but I wanted to keep everything compatible with standard kegging equipment. However, this requires that one of the shanks be modified to make it into what amounts to a long pipe nipple. It’s also possible to use brass compression fittings instead, but I find the shank to be far easier to work with in the long run and more solid. It takes three or four separate brass fittings to make the connection through the thick wall of the cooler, and the total cost is about the same as a beer shank and wingnuts anyway. Plus, with the shank you can cut it down to fit precisely the thickness of your cooler.

4. CUT TO FIT, INSTALL
Start by cutting off the non-threaded portion of the shank (the end where the faucet screws in to the collar). Now fit the cut shank through the inlet hole, screw a shank nut (the flat hex nut that comes with the shank) on the inside of the cooler, and then screw on a wing nut with the tailpiece attached. Push the shank towards the inner wall until the shank nut is flush with the cooler wall. Now screw another shank nut onto the shank on the outside of the cooler until it is flush with the outside wall. A wing nut uses about 3⁄8-inch of the threads, so mark the shank approximately 1⁄2-inch out from the edge of the nut.
Remove the nuts from both ends of the shank and cut it off where you made the mark. A rotary tool or hacksaw will work fine. Be sure to wear safety goggles when cutting metal, especially if using a power tool. Reassemble the inlet hardware to make sure everything fits.
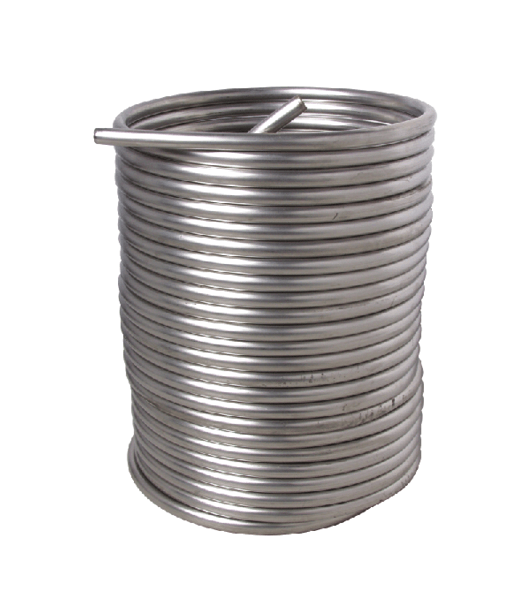
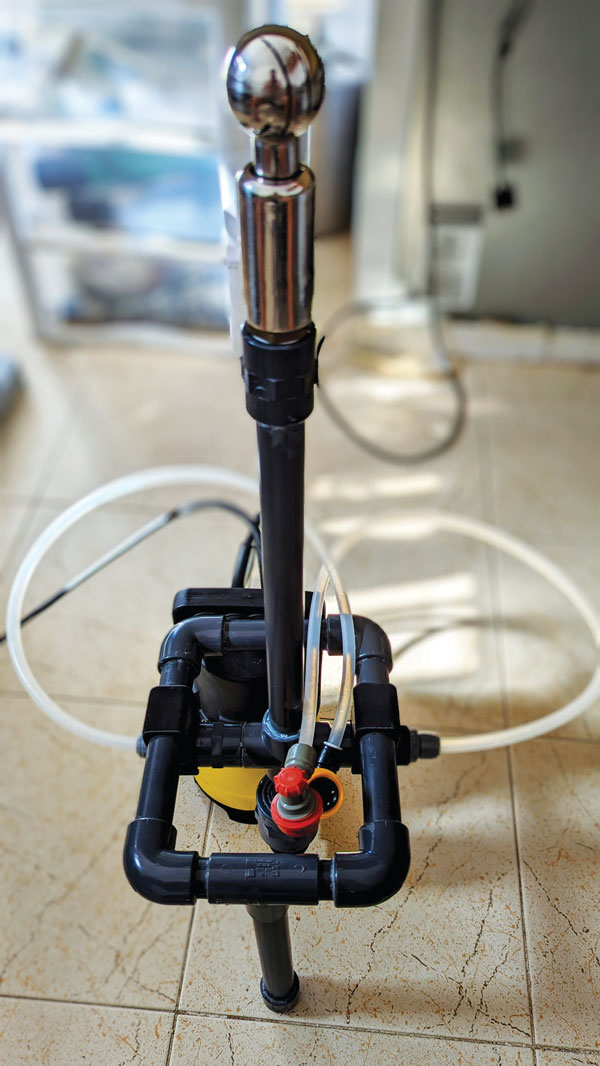
5. CHOOSE YOUR COIL
You can build your jockey box with either copper tubing or stainless steel. Copper works, and you can bend it yourself, but I recommend going with a pre-bent stainless steel coil. Not only will you not have to worry about the metal reacting with the beer, but you also won’t have to go to the trouble of bending the tubing — which requires purchasing or borrowing a stainless steel bending tool. Many homebrew suppliers sell stainless steel coils in various lengths, such as this one pictured here from MoreBeer! (which runs about $80). Be sure you know the dimensions of the cooler before you purchase a coil, however, so that it will fit inside the cooler when you assemble the finished project. You may need to have a coil cut down to size.
6. FINAL CONNECTION
With the faucet and inlet shanks cut, fit, and secured, all that remains is to connect the coil to the shanks. Cut two short lengths of vinyl tubing and slide them onto the hose barbs on the shank tailpieces. Onto the inlet side vinyl tubing, slide two hose clamps and then insert one end of the copper coil into the vinyl tubing; tighten one clamp on the hose barb and the other where the vinyl overlaps the copper tubing. Repeat the same procedure for the faucet side hardware. Now secure the faucet to the front shank and connect the vinyl tubing from a keg to the outside inlet tailpiece. Next, test the box for leaks. Once leak testing is complete, load the box with ice and a little water. Hook up a keg of homebrew and experiment with gas pressure and hookup tubing length to get it dialed in for a smooth pour.