DIY Keg Washer
A homebrewer’s best friend
For every passionate homebrewer, the joy of crafting the perfect beer is often accompanied by the less glamorous task of cleaning and sanitizing our equipment. In particular, kegs can be a challenge to clean thoroughly, especially if they’ve housed a particularly hoppy or yeasty brew. Enter the DIY keg washer, a game changer for homebrewers looking to streamline their cleaning process without breaking the bank.
Keg washing is crucial for ensuring the purity and taste of your beer. Residual yeast, hops, or even small particles can influence the flavor of subsequent batches, leading to inconsistent results. While commercial keg washers are available, they can be prohibitively expensive for the average homebrewer. Moreover, in regions outside of North America, these specialized tools are hard to come by. This is where the ingenuity of the DIY spirit shines.
Creating your own keg washer using a domestic pump, PVC tubes, John Guest connectors, and a zip ball is not only cost-effective but also surprisingly simple. The pump serves as the heart of the system, providing the necessary pressure to circulate cleaning and sanitizing solutions through the keg. PVC tubes, known for their durability and resistance to chemicals, are ideal for directing the flow of these solutions. The CIP (Clean-in-Place) spray ball, a versatile cleaning tool, acts as a scrubber, ensuring every nook and cranny of the keg is reached.
The assembly process is straightforward. Connect the PVC tubes to the domestic pump, ensuring a tight fit to prevent leaks. The other end of the tube should be fitted with the zip ball, which will be inserted into the keg.

The CIP (Clean-in-Place) spray ball, a versatile cleaning tool, acts as a scrubber ensuring every nook and cranny of the keg is reached.
One of the primary challenges in designing this DIY keg washer was ensuring consistent cleaning inside the input and output posts and tubes. The solution? Using two ball locks connected to the main mounting via John Guest connectors allows the pressurized liquid to efficiently clean the parts of both posts.
Once your keg is sparkling clean, the benefits are immediately apparent. Not only will your beer taste fresher and maintain consistent flavor, but you’ll also extend the lifespan of your kegs, preventing corrosion, contamination, and buildup that can compromise their integrity.
A DIY keg washer is an invaluable tool for any homebrewer that uses Corny kegs. It offers an affordable, effective solution to one of brewing’s most tedious tasks. With cleaner kegs, you’re ensuring that each batch of beer is as delicious as the last. So, why not invest a little time and creativity into building a keg washer? Cheers to innovation and the perfect pint!
Tools and Materials
- 3.3 ft. (1 m) 1-in. (25-mm) PVC pipe
- 1-in. (25-mm) PVC coupling with four outlets
- (3) PVC coupling 1-in. (25-mm) to 1-in. (25-mm) female thread
- PVC coupling 1-in. (25-mm) to 1¼-in. (32-mm) female thread (or whatever size thread the pump has on its outlet)
- (2) PVC coupling 1-in. (25-mm) male thread to ½-in. (13-mm) female thread
- (2) John Guest connector 3⁄8-in. (9.5-mm) to ½-in. (13-mm) male thread
- ~4 ft. (1.2 m) 3⁄8-in. (9.5 mm) speedfit tube
- Liquid ball-lock (or pin-lock) connector
- Gas ball-lock (or pin-lock) connector
- Submersible pump
- CIP (Clean-in-Place) spray ball with 1-in. (25-mm) male thread
- 1-in. (25-mm) PVC coupling T
- 1-in. (25-mm) PVC end cap
- (4) 1-in. (25-mm) PVC elbow coupling
- PVC adhesive
- (2) 3-D printed pieces (optional)
Step by Step
1. Cutting Out the PVC
Begin by cutting the 1-in. (25-mm) PVC tube to the following measurements: (1) 82⁄3-in. (220-mm), (2) 61⁄3-in. (160-mm), (1) 4¾-in. (120-mm), (1) 3-in. (75-mm), (2) 1½-in. (40-mm), and (2) 1-in. (25-mm) sections. Sand the ends to ensure a smoother surface, which will enhance the adhesive grip when gluing.

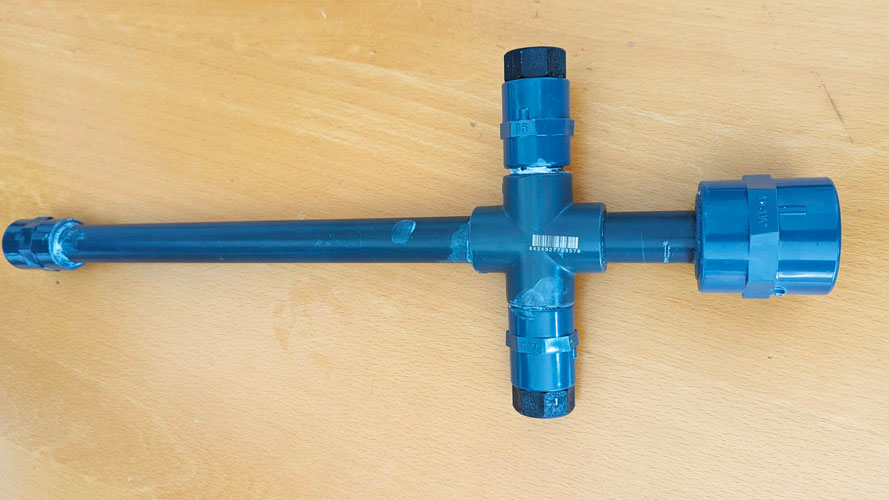
2. Build the Spray Wand
Assemble the PVC tubes and couplings as illustrated in the diagram. You will be using the following cut PVC pieces: (1) 82⁄3-in. (220-mm), (1) 3-in. (75-mm), and the (2) 1-in. (25-mm) sections to create the spray wand. These will be fit into the PVC coupling with four outlets. Ensure you use a specialized PVC adhesive to bond the pieces together as these pipes will be pressurized. Use the couplings to transition to threads. Apply plumber’s tape to the threaded sections to prevent any water pressure-induced leaks. Affix the spray ball to the top of the assembly.

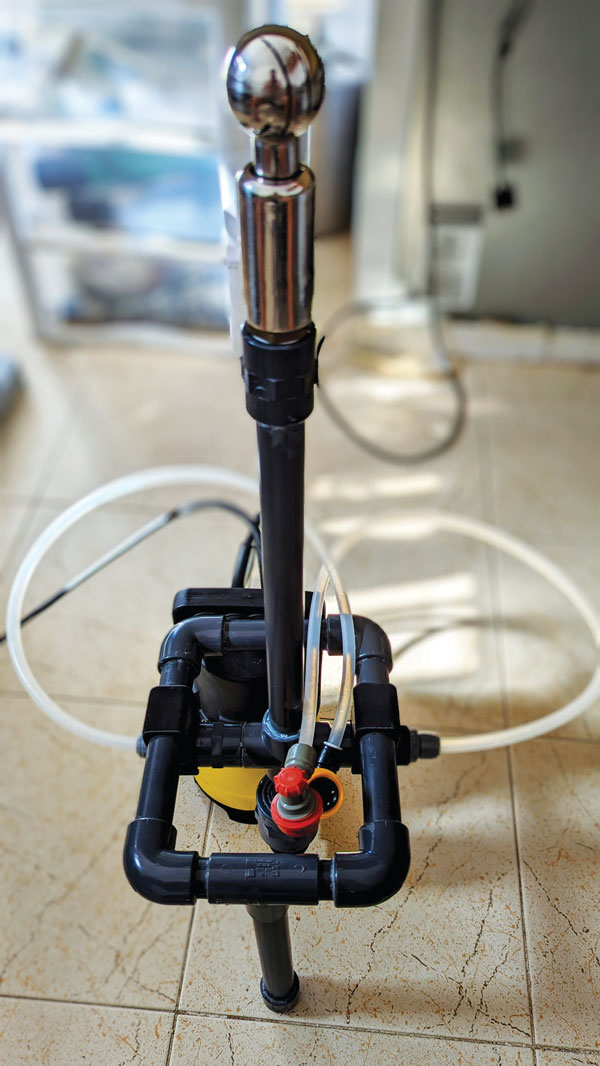
3. Attach Pump To the Wand
Attach the spray wand assembly to the submersible pump. It’s crucial to ensure this connection is tight; otherwise, the assembly might not receive adequate pressure. Again, use plumber’s tape to ensure no leakage from this connection.

4. Give It Wings
Install the John Guest connectors, the tubes, and the ball-lock connectors. These will be attached to the keg’s two posts to ensure the keg inlet and outlet are fully cleaned and sanitized. Ensure the tubing is long enough to facilitate easy connections to the posts.

5. Build the Support Stand
Using the same PVC adhesive, set up the separate keg support stand as depicted. You will be utilizing the remaining PVC cuts for this step. The leg section needs to be cut to size since it, along with the endcap and T sections, needs to match the height of the pump, which will serve as the stand’s other leg. For an optional enhancement, consider 3-D printing the two plastic components that will rest on the spray wand wings and further stabilize this support. The link for the .stl print file is found here.

6. Test Run
Submerge the entire assembly in a bucket filled with hot water and a detergent like PBW or similar. Connect the ball locks to the keg, position the keg downward, and activate the pump. Let the magic begin! I always run for 15 minutes for cleaning, then a quick 3-minute cycle for sanitizing.