Keg Polisher: Give your kegs a shine
So the first question that may be asked is “Why?” For me it came after I successfully built an effective keg washer and had nice clean kegs on the inside but that were scuffed, scratched, dented, and oxidized on the outside. And not that it’s necessarily an issue but we all know, a scratched and oxidized stainless surface is harder, if not impossible, to sanitize. Not that the outsides need to be sanitized . . . but it surely can’t hurt and they certainly look nicer.
So I began thinking of how I could efficiently recondition the outside of my Corny kegs. It started with my 2-roller rock polisher. It was too small, too slow, and provided no way to keep the keg in place. And then I thought about using a wood lathe but all I could think about was knocking my teeth out if the keg spun off the lathe. But the lathe seemed to be my best bet . . . so I started off with thinking about rotational speed (RPMs). I wanted slower, maybe about 500 RPM, so I hit the obvious places like Facebook Marketplace and Craigslist — where lo and behold, I found a 1994 vintage Craftsman wood lathe, ½ horsepower, 12-in. (30-cm) max diameter, variable speed that could accommodate up to a 36-in. (0.91-m) length of wood. Unfortunately it’s slowest rotation was 875 RPM but it looked as though it could work and the price was right at only $75. I’m not a wood lathe expert but I knew I had to make some modifications.

Next came the tricky part, how to keep the keg firmly attached since wood lathes are made for wood, not stainless kegs. The solution I came up with was to get a ¾-in. (19-mm) thick, 9-in. (23-cm) pine circle from a hobby store. But I needed something to attach to the wood circle that would accomplish two things, center the keg to hold down wobble and keep the keg secure on the lathe. I needed a bowl-like piece with slightly slanted sides and about 8 in. (20 cm) in diameter across the bottom. I finally found it at a Tractor Supply store — a stainless steel dog food bowl.
Next came the tricky part, how to keep the keg firmly solidly attached since wood lathes are made for wood, not stainless kegs.

I bought two dog food bowls (I renamed Keg Centering Cups), one for each end of the keg, both mounted on a wood circle. What I quickly discovered was that there is absolutely no standard or consistency to the rubber end on Corny or Firestone kegs, there is a pretty wide variance. Also, my 3-gallon (11-L) kegs have NO rubber top, only a single handle and I had no way to securely attach them to the lathe. I was getting a substantial wobble, some worse than others and I kept thinking about my teeth, I needed a better way. In looking through my stuff, I found a Corny lid that had a pressure relief dead center of the lid. I removed the pressure relief and now have a perfect center point on that end of the keg. Success!
I’ll probably never have to re-polish my own kegs in my lifetime, we are just not as abusive to them as their commercial life was. That’s why I’ve offered up the machine’s use to members in my homebrew club, and this project to you.
Tools and Materials
- Wood lathe (I found a 1⁄2-HP, 12-in./30-cm lathe)
- Lathe faceplate (I purchased a 4-in./10-cm size)
- 9-in. (23-cm) pine circle
- (Michaels)
- Spot Puppy Litter Feeding Pan, SKU: 240845899 (Tractor Supply Company)
- MT1 Live Center Tailpiece
- Several grades of polishing abrasives and liquid Bar Keepers Friend
- Small length of 1⁄2-in. (2.5 cm) silicone tubing
- 5⁄8-in. (16-mm) leg cup floor protectors
Step-by-Step

1. The Lathe
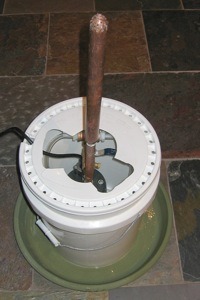
I have the lathe clamped onto my table saw as a temporary work surface. When not in use, it can stand on-end out of the way somewhere. As can be seen, the slowest rotation is 875 RPM. I’d prefer more like 500 RPM for one simple reason, I feel like at slower speeds, the abrasives would be less likely to “skip over” some dents.

2. Retro Fit The Faceplate (Keg Centering Cups)
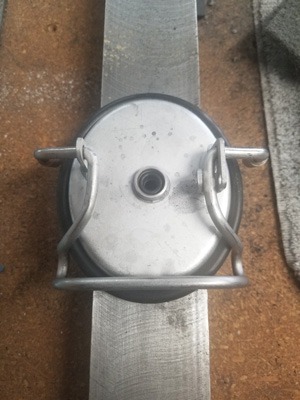
My lathe has a ¾-in. spindle and 16 threads per inch (TPI) so what I bought is a Craftsman 4-in. faceplate (OEM 718926), ¾ in. x 16 TPI (metal plate seen in picture 2a). For what it’s worth, I wish I had purchased the 6-in. faceplate instead. I found wood circles at Michaels hobby store. I mounted the dog bowl upside down to the ¾-in. (19-mm) thick circles (seen in picture 2b). The slanted sides help to center the kegs but, some kegs are slightly too small and will not self-center. In these cases, I’ve cut little 2-in. (5-cm) lengths of ½-in. inner diameter silicone tubing, slit it lengthwise and place on keg bottoms to bridge the space.


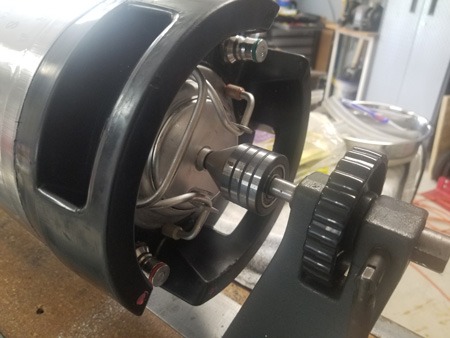
3. Tailpiece and Lid
My lathe came with a fixed tailpiece center point, which means it does not turn. I purchased a Live Center tailpiece, which has ball bearings and spins with the keg (seen in picture 3a). MT1 indicates the size and angle taper of the shaft.
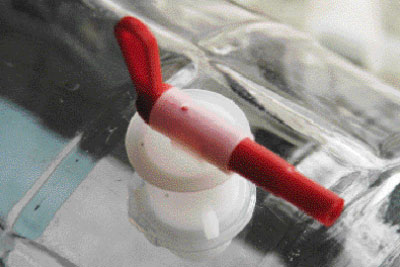
Finding the proper lid may be the biggest challenge to this build, a lid with the pressure relief dead centered on the lid (seen in picture 3b). I just happened to get one on a keg I bought and it had a very small relief valve compared to normal lids and I accidentally lost the washer down the drain so it was useless, until I found it was the magic I needed to make this all work. It’s a common placement on racetrack style lids. After a bit of looking, these are available online, many are the plastic lids, which I wouldn’t recommend for safety reasons. I think they are old Firestone keg lids. Your best bet may be to ask your brew buddies if they have one to trade for a normal lid. As you can kind of see, I’ve placed a small o-ring in the hole so it’s not metal-on-metal contact. Once placed on the keg, it ensures as smooth of a rotation as I can expect.
4. Prepare For The Cleaning
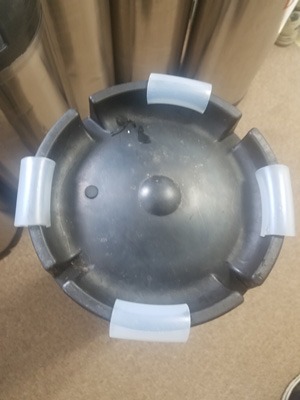
As I mentioned before, to ensure the kegs are as centered as humanly possible, given that all kegs are slightly different, I use bits of silicone tubing on the bottom of every keg (seen in picture 4b). They really do make the keg more secure with less wobble. Space them evenly on the bottom of the keg. I also slip little 5⁄8-in. (16-mm) leg-cup floor protectors over the keg’s gas and liquid posts (seen in picture 4a) just to keep them clean during the cleaning and polishing. Slide the tail pieces with the live center into lid orifice and tighten down the tail piece lathe-dog to secure it into position.

Now adjust the live center against the lid (seen in picture 6a) until you feel resistance and secure it in place with the lathe-dog. This is very important, DO NOT fail to tighten down both the tail piece and live center lathe-dog if you value your teeth. Also, be sure all stickers and adhesives have been removed from the keg with a scraper and isopropyl alcohol.
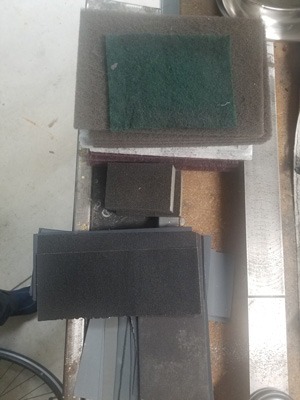
5. The Abrasives
This is where all the magic happens, the abrasives. I over purchased because I had no idea what I needed. What I’ve found out was that more coarse grits, in the range of 80 to 220, were most effective and 400 to 4,000 grit are ineffective. Also useful were coarse sanding sponges and 3M Scotch-Brite pads. I’ve found I used the white, maroon, brown, and tan 3M Scotch-Brite pads the most. You can find them on eBay if you cannot find them locally.
I start off with 80 grit and spend 4–5 minutes before going to the sanding sponge for another 4–5 minutes, then moving to the TAN Scotch-Brite pad. Then it’s on to some 120, 220, and 320 grit abrasives. At this point I will look for low spots or dents that may have been missed and use some 320 grit by hand to clean them up. As for the final polish, I use liquid Bar Keepers Friend, it contains oxalic acid which will re-passivate the stainless, helping to prevent oxidation.
6. Feel the Shine
The keg should rotate mostly without a wobble, if it wobbles excessively, double check all your mounting points, some kegs may wobble more than others but not excessively. If you continue to get wobble, try adding additional silicone spacers to the bottom of the keg.
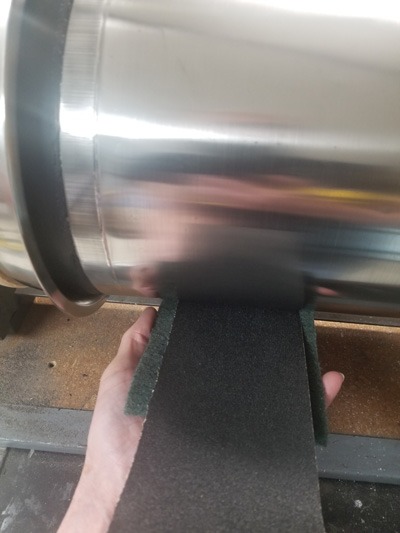
Turn on the lathe and finish it to your satisfaction, you can do one keg in 15 minutes but if you wanted to spend 30 it will look even better. The keg will rotate towards you, which is why I was concerned about my teeth. You can hold the abrasive and finish along the upper side of the keg or along the bottom, working your way back and forth, whichever works best for you. When using a sheet of abrasive, it will generate some heat so I place the abrasive on a Scotch-Brite pad (seen in picture 6b) and use it kind of like a hot pad of sorts.
Once polished you will want to wash off the rubber tops and/or bottoms as well as the posts to remove the black oxidation residue. Make sure to clean the kegs inside if you’ve gotten anything inside. If you want to go an extra step, you can apply some automotive UV protection to the rubber ends of the keg to give them a little shine.