Techniques for Beer Clarity
You’ll hear again and again the old adage “we first drink with our eyes.” Legend links the rise of Pilsner to the increasing availability of affordable clear glassware because it allowed drinkers to appreciate the beer’s clarity.
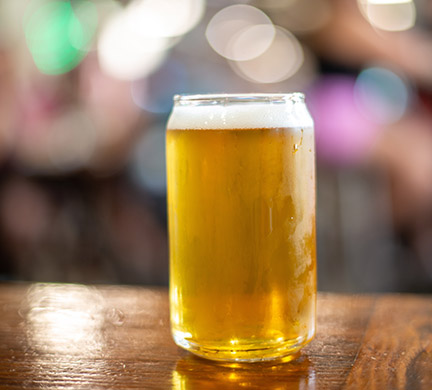
The rise of hazy IPAs was a potent battleground of generational differences in visual preferences. Older drinkers were completely turned off — “Gravy! Thick! Soupy!” Younger drinkers were excited — “Juicy! Smooth! All the hops!”
Hidden in the fog of hop soup is that unrelenting truth: For most beer styles, clarity is a mark of excellence. Would a pale lager be as highly praised without that bright diamond gleam? Would your palate fizz with excitement if there was a haze-roughened mouthfeel? Fortunately, clarity isn’t magic — it’s mostly a matter of time, cold, stillness, and finings to make a beverage “clear, bright, and pure” (for those judging by their puritanical beer bibles).
Nota Bene: Hazy IPA (or any heavily dry-hopped beer), wheat beers (hefeweizen, witbier, etc.), and farmhouse ales are all signs that brilliant sparkling clarity is not necessary for a great beer experience. Haze is perfectly fine when it fits the style and taste goals.

The Stuff that Haze is Made Of
Beer haze is largely driven by three causes: Yeast, protein, and polyphenols.
Yeast is every brewer’s best friend, but we also know the horror of a shaken carboy turning transparent liquid into a murky mess. Enough yeast in suspension yields cloudy ugliness and a sharp, meaty “yeast bite.” If you start with a healthy yeast pitch and a proper fermentation environment, they will almost always behave as polite little gremlins should. Strain selection also plays a role (read more about this in this “Mr. Wizard” column).
Protein is not just the latest fad in “healthy diets,” but a large component of brewing. We need enough protein and amino acids for fermentation and head formation. But we want to avoid the extra haze and mouthfeel that comes from too much protein. Modern maltsters have largely rendered this worry moot; as long as you’re smart with your recipe structure, you’ll be fine.
Polyphenols are the most mysterious of the three haze-inducers we’re talking about. You can deduct from the name that they are complex snarls of multiple phenol compounds. These could be tannins from grain husks and plant materials or complex compounds leached from hops.
With our big haze hurdles identified, let’s talk about making our clarity lives easier from the jump. By starting with a proper foundation that leans towards clarity, we’ll make later polishing steps more effective. Also, remember that every time you “touch” the beer — transfer it, dose it with a compound, etc. — you run the risk of damaging the beer via oxidation or contamination. As a homebrewer, you get to decide if the juice is worth the squeeze. Does your beer need to be perfectly polished to be enjoyed by your audience? Is it OK to have a slight haze instead of risking an oxidized mess because you employed aggressive clarifying measures?

Un-Haze the Easy Way
Remember the near universal cure for haze problems — time, cold, and stillness (finings come later). Most haze causes will clear up with a judicious application of that trio. Think of the clarity that comes after a meditative stillness and apply it to beer.
When saying “cold,” what we mean is cold. We routinely bring finished beer down to 40 °F (5°C) or lower. When beer gets that cold, proteins coagulate, yeast goes dormant, carbon dioxide stops evolving, and the churning excitement of fermentation fades. With the lack of a buoying current, the heavier clumps of material succumb to gravity and drift to the bottom of the fermenter.
And the fun part — the cold crash doesn’t take long. Even as little as 24 hours will show remarkable improvement in clarity. Try this with a starter in a glass jar and you can watch it in real time! When Drew really wants the beer to be clear (and he remembers to time it correctly), he’ll schedule a two-week cold crash at 40 °F (5 °C). Hard for a beer with appropriate recipe choices to be murky after that! The colder the temperature, the quicker the beer will clear up. If you can get down to freezing temperatures, try that for a day and watch your beer clarity shine!
Getting to a crash state is as simple as setting a thermostat if you have a glycol system. If you have a fridge or chest freezer, you’re pretty set as well. But if you don’t have either of those, you can do what we used to do and use large water baths with plenty of ice to get the beer cold for a brief crash.
But that’s only the first part of the equation. The next part is stillness. Once you’ve let the beer settle, any motion will stir things up and ruin weeks of quietude. That goes for even the most well-settled yeast cake. Now, this isn’t “don’t open the oven while baking a soufflé” levels of caution, but if you have to move the beer to rack it, be as gentle as possible and then let the beer settle for a few hours before racking.
If you’re feeling particularly old school, you could be the brewer to bring back racking to a secondary fermenter (aka moving the beer to a new clean fermenter for further settling away from the bulk of the yeasty morass). We still don’t recommend secondaries for most projects due to the risk of transfer-related damage.
Setting It Up
Of course, the best cure is prevention. You don’t have to remove haze if you never generate it. So, where is haze bred? The mash tun or the boil? The answer is both, and to make the easy way work, you’ll need to start at recipe design.
Most modern malts have been engineered for ease of use and that includes clarity. Having said that, you still need to make smart choices about avoiding haze. While some old-school malts will have high enough protein levels to worry over, the big culprit is anything you’d throw in a hazy IPA to generate clouds — think wheat, oats, chit malt, etc. (Grains that break down to simple sugars and are low protein like rice and corn are usually problem-free.)
With hops, our primary concern is about amounts and application. The more plant material you throw in the kettle (or the dry-hop), the more haze you’ll have to fight. On the dry-hop side, we know that dry hopping during active fermentation creates perfect conditions for haze formation. If clarity is your goal, skip the biotransformation step. Active fermentation dry hopping doesn’t guarantee a hazy pint, but it’s far more likely than traditional dry hopping. I always expect a light haze in a dry-hopped beer, but you can still achieve brilliant clarity with appropriate dosing and treatment.
Lastly, the yeast. Given how much Wyeast 1318 (London Ale III), Imperial Juice, and more became the rage during hazy IPA’s rise, yeast strain matters! For clarity’s sake, you’ll want to look for strains that are both good flocculators and don’t have a rep for throwing haze when exposed to dry hops. (See Omega Yeast’s work on the HZY-1 gene). Look again at Wyeast 1056 (American Ale) or a similar strain from another supplier as a classic clear-dropping strain, or SafLager W-34/70, the world’s most used lager strain that produces incredibly bright beer.
Finally, the biggest non-recipe cause of haze in homebrew is contamination by wild yeast and microbes. Unless you’re making a wild ale, you don’t want those in your beer! So, be a good brewer and keep the gate crashers from the party.
Setting It Up Part 2 – Brew Day Boogaloo
Clarity on the brew day comes down to good brewing basics — reduce haze materials and exercise a sure hand on temperatures. For the mash, this means good water stripped of sanitizing compounds and overloads of minerality but still having the minimum calcium levels needed for conversion and yeast (~50 ppm). You hit proper mash pH (5.2–5.5, typically) and spend enough time in the tun to convert starches into sugars (with modern malts, 20–30 minutes suffices). When it comes time to separate the grain and liquid, keep the grain mostly out of the boil kettle. You don’t have to be obsessive about it but it’s good practice to prevent any potential starch contamination.
Once you’re in the boil kettle, our goal becomes encouraging two separate protein coagulating events — the hot and cold breaks. For the first, we make sure we have a strong boil. The old rule of thumb was a boil vigorous enough to lose ~10% of your kettle volume (e.g., 2 quarts/L per 5 gallons/19 L of wort). Assuming your mash pH was correct and the boil is vigorous, you’ll notice long sheets of egg-like protein form during the boil — that’s the hot break.
As we move down the boil clock, we add our first fining agent – Irish moss, either granule or in the form of Whirlfloc tablets. Many brewers view these finings as helpers with hot break, but they actually have their most profound effect on cold break. The negatively charged seaweed pulls proteins and polyphenols into heavy clumps that will settle out. A gallotannin kettle addition (see OxBlox or BrewTan-B) can also help, but that’s not the primary purpose of those compounds.
To get our cold break, this is when we have to slam on the brakes and do the exact opposite of what we just did and chill the wort rapidly to pitching temperature. Again, the idea is to clump proteins and drag other undesirables into their web as they drop out of solution. As we’ve pointed out in the past, one can make great clear beer with no-chill or slow-chill, but if clarity is the goal you want to chill quickly.
And then we get to the last stage of the brew day — transfer and yeast pitching. You don’t have to pull ultra clear wort into the fermenter (some trub can aid fermentation), but it’s still best to avoid slopping all the gunk into your bucket. For yeast, you’re intentionally murking up the wort. Ensuring that your yeast are vital and ready means they’ll be more well behaved and go to bed when the feast is over.
There is one last addition you can make to help clarity. At pitching, add a clarifying enzyme like DSM Brewer’s Clarex/White Labs Clarity Ferm. It attacks specific protein structures to prevent the formation of haze in the finished beer without filtering or fining. Bonus — the proteins it attacks include gluten — yielding “gluten-reduced” beer. (Please do more research on “gluten reduced” before handing off a beer brewed this way to someone with gluten issues.)
At this point, we’re back to the start of the “easy” way — time, cold, stillness. If this was an old Choose Your Own Adventure book, we’d tell you “Turn back to Chapter 1.”
Fine, We’ll Fix It in Post (Fermentation)
Even the best of us could use an occasional boost, and so it is with the “easy” way. Whether you’re looking to speed things up, the beer is stubbornly refusing to clear, or you really want that “I can read the newspaper through the glass” effect, there are biochemical tools to aid your quest for clarity.
The additives we’ll explore do the same general thing — introduce an electrostatic charge to attract haze-causing particles into clumps that fall out of solution. We mentioned Irish moss is negatively charged when used in the kettle, but most of our post-fermentation finings are positively charged to pull in the majority of our haze-inducers at this late stage.
Vegetarians Beware: If you are on (or are serving to those on) the plant-based dietary spectrum, be aware some of these additives are decidedly not lifestyle compatible. You probably won’t run into isinglass, but gelatin is very popular with homebrewers. This is one reason Biofine Clear and other silica-based finings are popular at the professional level.
Usage instructions for these additives are pretty consistent. Take cold beer that’s finished fermenting and settled. Prepare the solution according to package instructions. Then add to the beer and mix it in thoroughly. Drew prefers to add the solution to a sanitized, oxygen-purged keg and then transfer the beer into the keg to blend into solution. Others will pop open the fermenter, pour in the additive, close the works up, and give it a good swirl.
The Big Additives
Gelatin: It’s cheap and available at the grocery store. To use, dissolve 1 gram of unflavored gelatin per gallon (3.8 L) in just enough water to dissolve. (Drew uses ~5 grams in a cup of water for a 5-gallon/19-L batch.) Sprinkle the gelatin over the cold water and hydrate for 10–20 minutes. Heat the mixture to above 160 °F (71 °C), microwaving in 30-second intervals. Add the gelatin soup to the keg/fermenter. Wait a couple of days below 50 °F (10 °C) before carefully racking into your clear beer receptacle.
Silica Finings (e.g., Biofine Clear): Widely available to homebrewers now, these vegan-friendly silicic acid-based fining agents also have the benefit of avoiding mixing, blooming, and heating steps. Just add and go! Dosing depends on the formulation, but Biofine Clear is commonly 5–10 mL per 5-gallon (19-L) batch of finished beer. Wait a couple of days at cool temperatures and rack.
Kieselsol/Chitosan: This is a two-stage application (sometimes sold together as Super-Kleer) that is the nuclear solution for a haze that won’t quit. Kieselsol is a silica-based fining that you add first. Wait a day, and then dose chitosan (usually a shellfish/crustacean-derived clarity agent) to sweep behind it. Drew’s broken this out before to kill a haze that would not die. It’s comparatively expensive, but effective.
Two other special mentions, though our experience with them is largely with mead, cider, and wine. First, Polyclar, a PVPP polymer that swells in the presence of water and acts like a sponge. It’s easy to use, but when professional brewers use it, they tend to filter it out as it can remain suspended for a while. The other is bentonite, a natural clay that sweeps through liquid quickly. Bentonite should be added into the top of the vessel to settle through the beer. When Drew was learning meadmaking, it was a common technique to use Polyclar to grab a bunch of material and then bentonite to sweep it out of solution. Bentonite forms a hard-set cake at the bottom of the tank as well.
One last note — if your fining didn’t work, you can try running another cycle with a larger dose. Or try a different fining agent. The effectiveness of a fining can vary widely with the cause of the haze, the pH of the beer, age of the fining, and the sheer load of material in solution. A beer that you didn’t allow to settle first or a highly, double dry-hopped IPA will require more fining!
Where Does He Get Those Wonderful Toys?
If the thought of time and additives doesn’t thrill you and you really want to tackle this problem mechanically, you can go for a filter setup. Truthfully, we don’t use filters. Drew used one once just to see what the deal was. The deal? A lot of fiddly fussy risky work for brilliant beer.
You can buy homebrew-sized filters in canister or plate formats. The idea is the same — push finished beer through a set of filter media. The media catches the yeast and protein particles and allows the beer to flow clearer. The media is sized by microns (aka how big a particle it will let through). Generally, they’re grouped as “coarse” filters (5–10µ) good for removing the larger cruft (yeast, hop bits) and “fine” filters (1–3µ) that will take out much finer particles. It is imperative that you begin with a coarse filter prior to using a fine filter.
There are also metal screen inline filters like the Bouncer. They have the advantages of reusable screens in a homebrew-friendly size. They’re better suited towards catching the big stuff instead of polishing the beer bright. The capacity is smaller, meaning more clogged screens with oxidation still a major risk. But for our money, they’re better suited for our general needs as occasional filter practitioners.
What About Chill Haze?
If you’ve ever poured a pint and been disappointed at its cloudy appearance only to find when you let the beer warm up it’s turned clear, you’ve experienced chill haze! What’s happening is proteins and polyphenols in solution will tangle up in the cold like a pile of puppies on a winter’s night. In that state, they scatter light and cause a haze. As the beer warms, the strands relax and no longer act like shutters.
The good news is that the primary way to fight chill haze is precisely through all (waves hands frantically at this whole article) the things we’ve discussed.
Further Reading . . .
Filtering may not be a common technique among homebrewers, but it is one every homebrewer should consider. Learn the ins and outs of filtering your homebrew, and why it is a technique with merit.
Strictly speaking, you don’t need to fine your beer. However, there are several reasons to consider fining as a brewing practice that will generally improve the quality of your finished beer. Read more on clarity, fining, and recipe decisions.