Side-By-Side Fermentation Unit
Converting an old fridge
Disclaimer: We are working with 115V. If you are not comfortable with your abilities, consult an Electrician.

Dialing in the temperature of the fermentation based on the chosen yeast can elevate your beer. Brewers may also want to raise temperature for a diacetyl rest or cold crash a particular style of beer and a fermentation chamber along with a temperature controller works great for this.
I decided to make the move from a brew bucket to a conical and needed a larger fermentation chamber to fit it. I looked at a ton of different refrigerators and freezers and the only style that would fit my conical was a side-by-side fridge. I needed an inside height of 44.5 in. (1.13 m) based on the tallest attachment on the conical’s lid and a depth of about 20 in. (51 cm) for the attachments on the front.
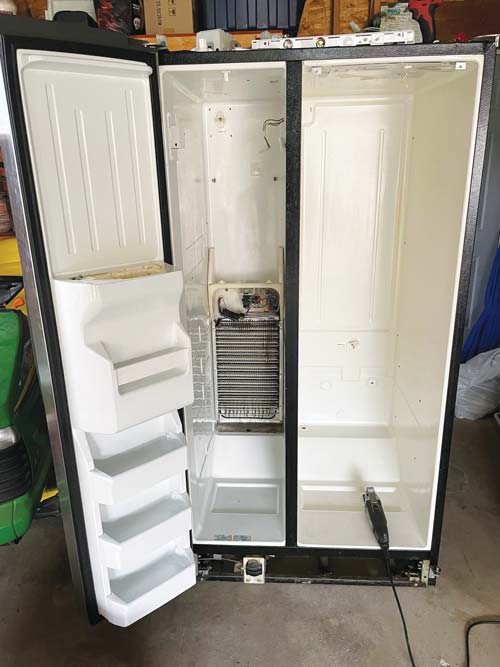
I found a side-by-side refrigerator for only $100 (USD). The inside dimensions were 54-in. high x 32-in. wide x 26 in. deep (1.38-m x 0.81-m x 0.66-m) so this would give me plenty of room. I gutted just about everything out of it including the glass shelves, wire baskets, ice maker, water and ice dispenser on the door, and the interior dividing wall (so I could make it into one large chamber). The only things left intact were the wiring harness on the ceiling and the cooling unit in the back.

The refrigerator side of the unit alone was large enough to fit the conical, so I did consider leaving the freezer alone, but I decided I didn’t need the extra freezer space. Also, keeping the interior wall would have forced me to make a venting system to push the cold freezer air over to the fridge side when there was a need for cooling. In addition, the extra room without the interior wall gives me plenty of room for a blow off vessel, the heater/fan unit, and the option to add another fermenter if I ever choose to do so.
I decided to make the move from a brew bucket to a conical and needed a larger fermentation chamber to fit it.
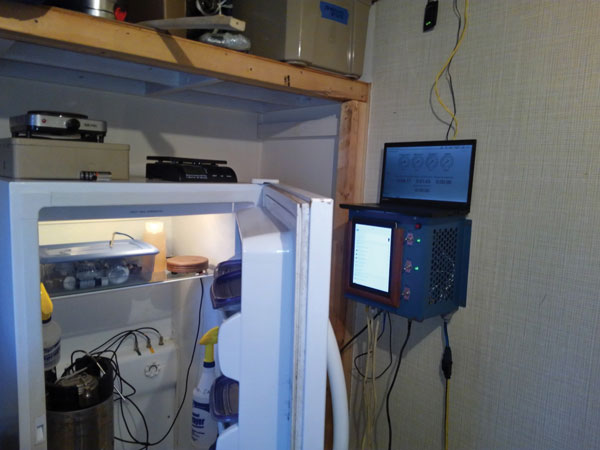
There are many temperature controllers on the market to control your fermentation chamber, but I chose to go with the BrewPi controller. The BrewPi unit basically controls your fermentation chamber by using one temperature probe measuring the inside of the chamber and the other temperature probe inside a thermowell on your fermenter to measure the wort temperature.
Based on the temperature of the wort and the temperature you need your wort to be, the controller will either turn on the compressor to cool the wort or turn on your heater to warm the wort. For example, my yeast may have an optimal range of 68–72 °F (20–22 °C). I will set a 10-day profile on my controller to start the wort at 68 °F (20 °C) and then raise the temperature of the wort over a 10-day period to 72 °F (22 °C). When fermentation is complete, I’ll soft-crash the beer to 50 °F (10 °C) for dry hopping, then finally lower the wort to 38 °F (3 °C) to help drop the hops and yeast out of suspension and prepare for a closed transfer from the conical to a keg.
Tools and Materials
- Side-by-side refrigerator (cooling)
- Porcelain light socket (heating)
- 150-W reptile bulb (heating)
- Computer fan (heating)
- BrewPi temperature controller
- 2×4 board (floor)
- Composite decking (floor)
- 2×2 board (viewing window)
- (2) 5-in. x 7-in. (13-cm x 18-cm) glass (viewing window)
- (2) Solid state relays
- Oscillating multi-tool
- Duct tape
- Silicone caulk
Steps
1. Everything must go
I removed just about everything from the interior of the side-by-side refrigerator including the glass shelves, wire baskets, ice maker, and all parts involving the water/ice dispenser on the freezer door. I then gave all the surfaces a good cleaning with bleach.
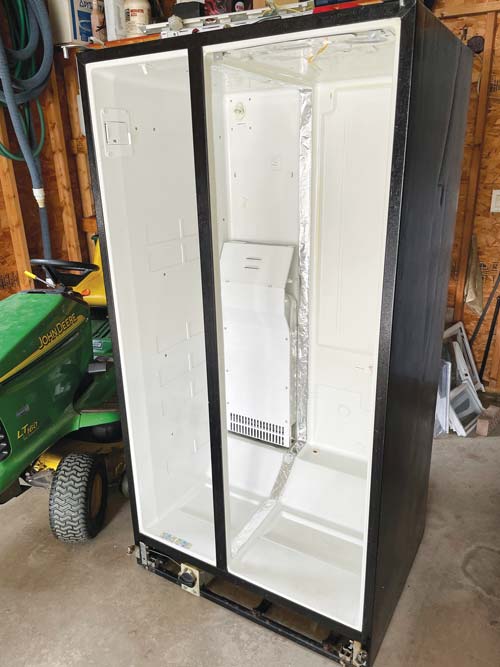
2. Remove the interior wall
I removed the interior wall separating the freezer from the fridge. I use an oscillating multi-tool to initially cut the plastic wall on both sides and then removed the plastic. Then I used the blade from a hacksaw to cut the insulation out that remained. I made sure to leave a couple inches in the front center so that the doors have something to close against. Finally, I used some duct tape to seal up the exposed insulation where the wall once was.

3. Remove the water and ice dispenser from the freezer door
I probably didn’t have to remove all of it but the whole area was dirty and unsightly so I ripped it all out. This was probably the most difficult part of the project. All the parts (plastic ice chute, water tubes, and wiring) inside the door were sealed in with foam insulation and had to be cut out. Once everything was removed, I sealed it up with a piece of sheet metal and used a can of foam spray seal in the hole to fill the void.

4. Add a floor
The refrigerator floor had a big hump in the back (which is where the compressor and other parts occupy) and the rest of the fridge floor was very uneven, so I built a new floor level with the top of the hump for everything to sit on. It’s simply built using a 2×4 frame spray painted black and some old composite decking boards across the top that I had in the basement.
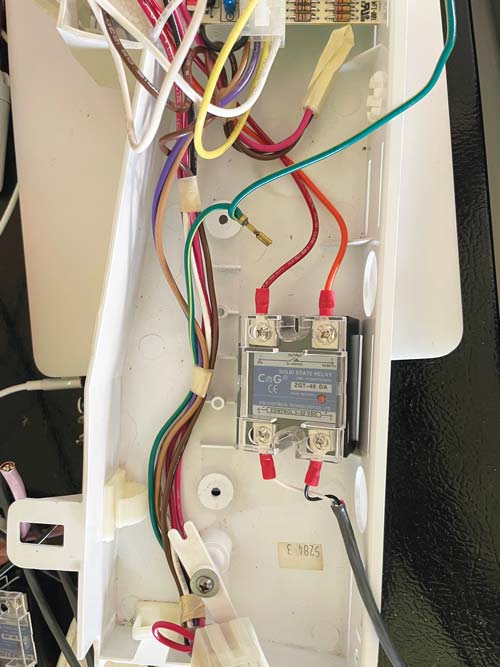
5. Electrical Wiring
To control the cooling side, I located and removed the fridge thermostat so the BrewPi controller can take over. I then cut and attached the two wires to a solid-state relay (SSR) that attaches to the BrewPi controller. In the picture on the right, you can see the red and orange wires that connected to the original thermostat. The white and black wires feed to the BrewPi controller, which will switch the power on when needed. The heating side works the same way — wires connect to the porcelain light socket, which is wired to an SSR, then back to the BrewPi controller.
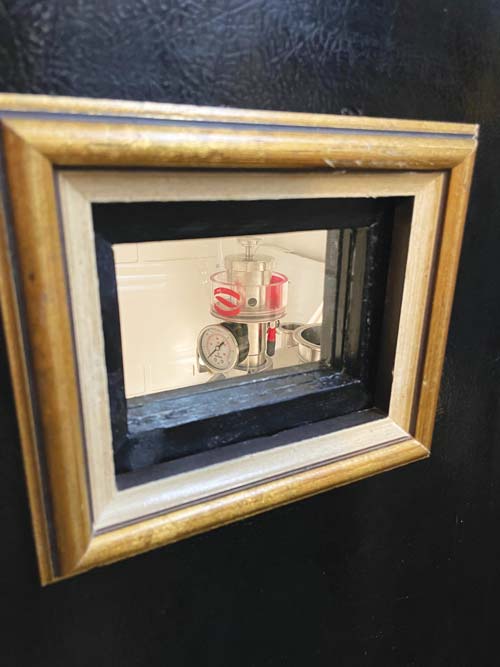
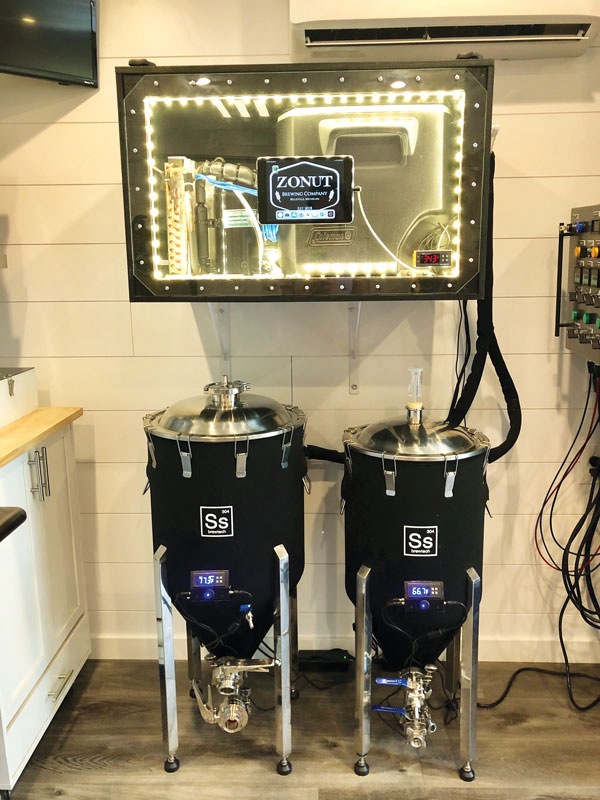
6. Viewing Window
Probably the least important yet my favorite feature is the double-pane viewing window. I didn’t want to open the doors every time I wanted to see how the fermentation is progressing or to check the psi gauge, so I added a window to the side of the unit. I found two old 5-in. x 7-in. (13-cm x 18-cm) picture frames in the basement and took the glass from both of them. Then I made a frame from scrap 2×2 board and cut two ¼-in. (6-mm) grooves in each board and painted it. I slid the glass into the grooves, then glued and screwed them together, finally adding silicone caulk around all edges to create a seal. Next, I cut the hole in the side of the fridge and used silicone to seal the window in. I also tapped into the light wiring in the fridge door and added a light switch on the outside.